Tampilkan postingan dengan label beadboard. Tampilkan semua postingan

How you doin’?

No how YOU doin’?? ;)

I’ve been planning this post forever, because there’s lots of projects that I do up in here that I’ve been meaning to update you on. When I see projects out in blogland, I love hearing how they work in real life and how they hold up. It’s like those extreme makeover shows when they show the person a year later and you’re all like, ohhh, they look GREAT. Or ohhh, that’s just too bad…

This is the house version.

And so here. we. go.

First up – the beadboard backsplash in the kitchen:

beadboard backsplash

I cannot express how much I LOVE it. It looks fresh and clean and it’s been way easier than I thought it would be to take care of. I can count on one hand the number of times I’ve even had to wipe anything off of them in almost two years -- mainly by the sink. The grooves aren’t exactly easy to wipe down, but I figure at least I can wipe them down – I don't have to deal with cleaning grout or anything like that.

If you remember, I glued those suckers right over the tile. And I have no doubt they’ll be there as long as I want them to be. ;)

There was one little spot that wouldn’t stay put, so I tried a nail gun (yeah, into tile, not the best idea), and it left a not-so-perfect part.

Nothing a fern can’t fix:

Ta DA!!! No mess up. :)

Overall I’m thrilled with the backsplash – especially considering the whole thing cost less than $50 (I think? I’m pretty sure!) to do.

Speaking of the backsplash, I get asked a lot about the cereal containers we keep out on the counter:

cereal in glass containers

OK, the Oats are now chocolate rice krispies and the Bran is chocolate frosted flakes (YUMMO), but whatever. I change the cereal but hardly ever the names. ;)

Yes, it stays super fresh in these (you can find them at Walmart and Target) – I swear longer than it does in the box. By the way, you can get the scoops for the cereal for CHEAP at restaurant supply stores – most of them are open to the public and they have some great stuff. (That’s a whole other post!)

Well, speaking of counters, there’s one more in the kitchen – the butcher block! Another one I LOVE:

butcher block counters

I got a butcher block from IKEA, and had it cut down and a decorative edge routered, then replaced the old laminate counter with this beauty.

I used to baby it a bit, but now, it’s like anywhere else. It takes a licking and keeps looking beautiful. ;)

I clean it like I do the other counters, I put hot and cold on it, water sits on it, wine spills on it – it’s fabulous. We don’t have any stains or water rings and I love it.

About once a year I’ll oil it (I explained how to do that in this post), but that’s where the upkeep ends.

In the kitchen, I’d do the backsplash and butcher block again in a heartbeat!

Let’s move on to the family room – where we have our very first, post debt free purchase, the sectional we bought last spring. I researched my heart out and decided on a sectional from Arhaus:

(You can see more about that process here and here.)

This is another one I’m pleased as punch with – I am so glad I did so much research before buying. I went into it thinking I wanted a slip covered sofa, and ended up with a microdenier fabric (similar to microfiber but bunny-soft) instead. And I said I would never do microfiber. That’s what I get when I say never. ;)

The only upkeep for this one is that I flip the cushions every three or four months. It takes a few minutes cause I have meellions of pillows on there:

And yes, usually a little dog.

I take off the seat and back cushions and flip them:

Number two reason I love this sofa so much – the super deep seats! Plenty of room for pillows and tushies.

The number one reason? That these two can do whatever they want to it and the fabric is still like the day we got it:

The Nutter (the dog) jumps on with wet feet (all. the. time.), he digs into it trying to get comfy for his nap, and smushes the back cushions in two spots – one at the back window and one at the end of the sofa so he can monitor the rest of the house. ;) He also cleans his paws and licks the sofa while he’s doing it, which totally grosses me out, and he’s doing it right now. Ew.

And I don't worry about the Bub eating on there – usually it’s just a small snack, but I certainly don’t live in fear of it getting messed up. I think it still looks like the day we bought it!:

image arhaus sectional sofa 

The sofa when we got it on the left, on the right today.

I love that the cushions hold their shape – no fluffing needed. EVER.:

microdenier sofa

Now let’s talk about the part of the room that’s not holding up so well…the lovely rug:

I got it from HomeGoods a while back – I think it’s been more than a year ago?

It is NOT doing well. It’s a complete mess actually. ;) You can’t see it well in pics, thankfully, but it’s kind of a disaster. There are small parts the dog has chewed on it, and it’s bare in those areas. But the bigger issue is just the way it wears. It’s not good.

I don’t think I would get this looped kind of rug again. It’s beautiful, and I’m looking for something I love just as much (for a similar price) and not having much luck. But it’s not good quality. For what I paid for it, I guess it’s OK.

A big one I get asked about a lot is the stair redo:

white risers stained treads stairs

Best project I’ve ever done in our house – hands down. The fact that it was SO cheap didn’t hurt. ;) (The wood under the carpet was in great shape and I used stain and paint I already had.)

I was a teensy bit concerned about them being slippery and they haven’t been. I think we’ve had one small slip on them in two years – and that’s WAY less than we had with carpet. At least in our house, the carpet caused more spills than the wood. :) (Knock on that wood.)

There’s not much upkeep on this either – about six months ago I put a quick coat of white on the risers:

hardwood stairs

They were scuffed up just a bit, and I didn’t even tape off to paint over the scuffs. It took about 20 minutes total.

The actual treads have held up fabulously! They look like the day I finished.

We used cheap, basic pine boards from Lowe’s for the landing (this was pre-hardwoods), and this area has seen more wear:

pine flooring

It doesn’t bother me (obviously because I haven’t fixed it), because I think it makes it look rustic and worn (in a good way). The big scratch was from when hubs and I were taking a box spring down (or up? I don't remember) the stairs, and we we scooched it and scratched the floor.

I knew this would happen because pine is so soft – and if you wear shoes in the house this would look a lot worse! Again, I kind of like the look. It doesn’t bother me at all.

Because the stairs don’t match our hardwoods, I’m hoping to get our flooring guy out this year to sand down the treads and install our floors on the landing. Then I’ll repaint and restain everything.

Wooee. I can’t WAIT to do all of that again. Can you tell? ;)

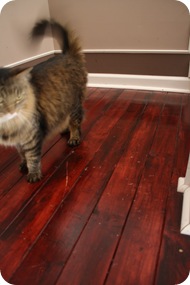
Just a little side note – it took about 15 shots before I could get a pic of JUST the floors. Someone has to be in every picture:

 IMG_0431      

But he won’t stay still long enough for me to get a good shot of him. Stink.

So there you go! A few updates on some of my big projects and purchases! I don’t steer you Squeezies wrong – I’ll always tell you how I feel about projects and products.

As you know it usually takes me seven years to get any major projects done and that’s because I think them out and plan them for a ridiculous amount of time. In the end it serves me well, so I don’t see that changing any time soon. ;)

Are there any projects I’ve done that you’d like to know more about? I’m happy to share – just let me know! Have any of these little projects appeared at your house? I’d love to hear!

Farmhouse Industrial Modern?

Last year I told you about my Suburban style. “Real” decorators – especially those on TV –- seem to think “Suburban” is a bad word. I happen to think it’s lovely and warm and so ME.

Oh, the horrors! ;)

Over the past year or so, I’m drawn to different styles and feel like mine is changing a bit. I just have no clue what to call it now. I don’t know if it’s all the lovely blogs out there or just the natural ebb and flow of my decor taste, but things, they are a changin’. 

The other day I was looking around at some of my purchases over the past few months and they just showcase my decorating confusion. I thought I’d share a few of them with you. :)

I visited one of my favorite spots in Indy a couple of months ago – a salvage and architectural shop that I don’t think I’ve blogged about yet. (I will soon cause it’s amazing!)

We were in a bit of a hurry, (it’s the kind of place you need at least an hour to look through) but I did find this old crock:

antique crock

I’ve always been drawn to all things old and full of character. I absolutely LOVE it and the light blue “6” on the front. The price was crazy good too – only $20!

It sits next to the sofa and I fill it with blankets:

crock with blankets

Score one for the antiques! Or farmhouse style? Cottage? I have no idea.

For months and months I’ve been trying to figure out what to put on the wall to the left of our stairs. I can’t find a good picture of the scrolly iron thing that I had up there, but you can see a smidge of it here:

image

I’ve used those iron jobbies forever and a day to fill wall space, but I’m trying to move on and change it up a bit.

The iron piece was way too small for this wall anyway – but figuring out what to use instead was stumping me big time. I didn’t want a gallery wall, cause it would be too busy with the one on the stairs. I didn’t want to do a mirror, cause I have one over the foyer table. So what the heck else do you do?

Well…a find at a small town antique shop nearby solved that problem…at least for now:

antique windows on wall

(Yes. The Halloween mice are still out. I’m throwing in some spooky style into the mix.)

I found a few old antique windows, cleaned them up and hung them on the wall. I love the colors – they came in the white, blue and brown – perfect for our house! And I love how they fill up that large wall. I may do some adjusting but I’ve already got eleventy billion holes in that wall as it is.

Sooo…old stuff, two points.

Over the summer I found this little beauty at HomeGoods:

industrial stool

It’s the cutest little stool I ever did see! The grey color and metal legs lean more toward an industrial look, but the cute little number on the top is more farmhouse style:

number 1 stool

Half point industrial, half farmhouse. I’m so confused. ;)

Finally, I totally blame blogland for this one. My friend Chris made my multiple decor personalities issue even worse. She found a lovely table at World Market and I was smitten.

I was sitting in a waiting room when I read her post, and it just so happened I was about 50 yards from a World Market. Curses!!!

So I went. And I got it:

round modern table world market

(Yes. Those are seashells still on display. In November. I told you I’m all over the place.)

Dang her and her awesome taste!! I got it for a great price because I found a coupon online (they took it off my phone – hurrah!). You can find the table here.

I’m IN LOVE with it’s modern look – the shape, the design, the glass top. I swoon every time I walk by it. I’m still thinking about taking some Rub n Buff to it to change up the color a bit, but we’ll see about that.

Sooo…score one for modern style.

That leaves us with…uh. Major design confusion. ;)

I wouldn’t even call my home eclectic cause I when I hear eclectic I think funky – maybe I’m wrong? Who knows what’s going on in my head and house. All I know is I LIKE IT!

I love the different pieces throughout our home and that they change up the look up around here. I’m just more confused than ever on what to call my style.

Modern farmhouse industrial old stuff suburban? It’s got a certain ring to it.

Has blogland influenced your style? What would you call yours? I hope it’s easier than  mine. For your sake. ;)

A beadboard island…again!

Well helloooo! Thanks for all the thoughts on the flooring – it’s helped a LOT. I’ll keep you updated on our progress. (Which I hope happens soon!)

Last week we saw some progress of another kind – we got our kitchen island reinstalled and I was so happy to have it back!

The guys doing the work had to pull off all of the beadboard and the corbels in order to get the island up and moved (into my office, which is why progress has stalled in there). But they came back with all the supplies, ready to rebuild the whole thing!

I felt bad, cause usually when they go back to a house to reinstall and island, they reinstall an island and move on. At our house, they had to redo all the “extras” I had done. ;)

I was pretty good – I didn’t hover. (Ahem. Too much.) And they did a great job! The guys bought a different kind of beadboard:

black beadboard

And I actually quite like it! I’ve never seen this one before, but the “board” and “bead” parts are both wider. I like that it’s now a little different than the beadboard backsplash.

They also fixed a couple things that had bugged me about my installation. I didn’t leave enough of an overhang with the butcher block on the cabinet side when I installed it, so I had them move it out a bit:

It always bugged me before -- it’s the little things! (That drive me crazy and then make me happy.)

And when I installed the beadboard around the island I cut out around the outlet, instead of installing the outlet cover over the boards, like I did with the backsplash. So they fixed that for me too:

The whole island needs a light sanding and another coat of paint, but I’m waiting till the flooring is done before I do that.

There was a little mishap with a ring of black paint on the butcher block countertop, but it was a small price to pay after all the hard work they did. And it was time for me to apply another coat of Tung oil on the counter anyway.

Many of you have asked how the butcher block has held up and I must say – I LOVE IT. At first I was obsessed with keeping it perfect, but I’ve long since realized perfect is impossible and wear and tear shows character. (If you keep saying that to yourself it finally sinks in. Realize it or go crazy I say.)

I hope I feel that way about the floors years from now. ;)

There’s a few small scratches here and there, but they aren’t bad at all – overall it still looks beautiful! We leave cups and and liquid on it all the time, and it holds up GREAT.

To take care of the black paint, I had to sand it down a bit:

I went after a few other minor scratches while I was at it. Then I just wiped it down and covered it with another coat of Tung oil:

tung oil on butcher block

You can see how it brings the wood to life – the oil is applied on the left of the wood below:

tung oil on butcher block

It needs to dry for about 12 hours, and then after a sanding with steel wool, you can do another coat. I only did one for now, but the first time I did it (a year ago), I think I did three coats.

It still looks fantastic!:

And now things are getting back to normal in the kitchen. We even got the new fridge yesterday – no more walking to the garage for a piece of cheese! YAHOO! :)

Now the plywood on the floors seems so much more manageable:

    beadboard island

The island houses our trash compactor, so it’s so nice to have that back too. And the island is the hub of our kitchen – I couldn’t believe how much I missed it!

We celebrated it’s return by making cupcakes:

butcher block beadboard island

They were Halloween cupcakes, I admit it. ;)

One baby step at a time…we’re getting the kitchen back! Just in time to tear out all the floors! Ah well…I am not complaining!!

Overall I’m thrilled with my butcher block counters -- they aren’t nearly as much upkeep as I thought they would be. It’s all about treating them after they are installed and knowing they won’t stay perfect!

I’m so letting go of perfect. :)