Tampilkan postingan dengan label inspiration. Tampilkan semua postingan

The mud room plan

Hello errrrybody! How are you? It’s been a HOT one this week – I’m not complaining (yet) because it’s the first 90+ temps we’ve had all summer. And tomorrow it’s supposed to cool down again. It’s really been an amazing summer!

So I’m busy working on our bedroom right now, but my mind easily wanders when it comes to projects and decorating around here. If you haven’t noticed I’ll start one thing and get an idea and then move on to something else because I have a great idea I just have to do. It’s very much “Oh look, a butterfly!” Or in this case…a mudroom.

That’s what I’ve been thinking about a ton lately. Ours has been sitting half way done for years. It started when I replaced the floor, and then last year we moved the the laundry down to the basement (best decision ever). It used to be a combined mud/laundry room and it drove. me. nuts. The picture tells it all:

It looks much better now (well, it’s still bright yellow, which is making me itch) – but the clutter (shoes!!) is creeping back in. I have an idea to address some of that till we finish the room but otherwise it’s just going to be slightly messy until we get some storage up in here.

I know I’ve said it a million times, but it takes me a while before I know exactly what I want to do with a room. I’ve sat on this one long enough that the plan and ideas are finally coming together in my head. Like other spaces though, the updates need to be made in a certain order, which slows me down a bit.

The big decision I’m struggling with now is whether or not to keep the flooring as is or do hardwoods. I don’t want tile in here because it flows into our family room and I want a nice transition that you don’t really notice. The vinyl tile that’s in there looks great because it’s a similar color to our floors. A few years ago I would NEVER have considered hardwoods, but now that I’ve lived with them for awhile I love them and how they hold up – even to the occasional water.

These vinyl tiles are holding up great, it’s the grouted spots between them that’s not looking the best. So I need to make that decision quick, because I want to move on this space. Here’s my plan, told through inspiration pics, of course. :)

First up, the lighting – you can’t tell in that picture above, but our lighting in here is a long fluorescent light. GREAT light, but I’d love something prettier. We got the fluorescent for a reason – we wanted good light because we knew the laundry would be in there. We wanted to see the stains well I guess? :)

But now that’s not needed, and I’d like to do some regular lighting, maybe two of something? It’s a decent sized room so I think we’ll need more than one. This mud room is one of my all time favorites:

white mud room with beadboard

For MANY reasons, but I do love LOVE that light fixture. I think the round shape is fun.

I love the idea of adding color in the lights too, like this room:

rustic mud room

Speaking of the ceiling – I know I want to do something fun. I’ve always loved the look of a planked ceiling – I just can’t decide if I want to go with color, like this one:

blue planked ceiling

(source)

Or natural wood, like this one I’ve loved forevah:

wood planked ceiling

(source)

I am leaning towards the natural wood, but it will depend on the lighting situation. We don’t get any natural light in that room, so I don’t want the ceiling to feel too heavy. Isn’t that beautiful though?

Next up – storage. This is what has taken me the longest to figure out. We have about five feet of space where the washer and dryer used to be – plenty of space but not a ton, so I want to use it well.

I know I want to go all the way to the ceiling with the built ins:

mud room built ins to ceiling

But I’m not sure if it will be closed like that one or open shelves like this:

bright mud room and laundry

Isn’t that room ADORABLE??

We have a shelf in there now that just ends up full of clutter (stuff I mean to take out to the garage/my car and hardly do) so I don’t know if I want it open. I know I need closed storage in there somewhere. And if we go all the way to the ceiling (nine feet), that area won’t be accessed regularly anyway since it will be so high. So it will probably be closed. Thanks for helping me decide. ;)

The biggie for me is the shoe storage. ARGH. The shoes!! (Shakes fists in air!) At first I thought I’d be OK with open storage for them underneath:

mud room with bench

I figured I could use baskets and such. But the more I’ve thought over it, the more I know I want them put AWAY. Will they stay put away? That’s yet to be determined. We have a million shoes and wear the same ones over and over, so I think most of them will stay out of sight.

We have them in baskets now and it’s not working great. One, we have too many shoes. Working on that. Two, you have to dig through to find the ones you need and it makes a mess. Not great.

I love the idea of the bench opening up and hiding them all, like at my girl Traci’s old house: 

mud room with storage bench

(source)

I think that would be the easiest solution.

But I’ve been crushing on this secret door idea since I saw it years ago:

hidden storage for shoes in mud room

Like hard core…CRUSH. I know I can’t do this on my own though, so we’ll see. I heard from a friend after I posted this pic the first time years back that this is actually nearby in central Indiana – I need to do some investigating! :)

So there’s the biggies – the beadboard has already been up in most of the room but I need to wait on built in dimensions of the built ins before I finish that up. Paint will be easy – in my head I’ve been planning something a little different though. I may go with a color on the beadboard and white (or light) on the walls. I think it would look awesome!

Do you have a mud room? I consider myself lucky that we even have a space like this! It’s going to be SO fun to work on, I can’t wait! I’ll try to anyway. :) What would your dream mud room look like?

Have a great weekend!!

**I can’t find original sources for some of these pics – if you know of them let me know!

The power of a neutral wall

Happy Friday to you all! I’m so sorry for the late post, the Internet is not cooperating today so I’m lucky to even get this one out! This is my third location trying to get wifi – that’s dedication right there. ;)

So many of you have noticed lately that my style, it is a-changin. While I still love the look of a dark, dramatic room (and still have plans for one or two in the house), overall my preference has moved to lighter spaces.

I do struggle with having enough color in a room with lighter walls – I NEED my color. But I’ve had one too many instances where I couldn’t find drapery fabric/bedding/accents that work in a space because the look of the room was so dictated by the color of the (darkish) walls.

I’m realizing that there is great power in a neutral wall. I told you how I couldn’t decide on light or dark for our bedroom, but I made a decision soon after:

Yep. Light won. :) It’s a really light gray color (I can’t remember the name so I’ll have to look and update.)

I went light mostly because I didn’t want the room to become too dark (it already is with the current color). We only have one east facing window in there and I knew it would become a cave if I went any darker on the walls. And it felt like it would be a dark and depressing cave, not a cozy and comfortable cave. :)

But working on the powder room redo really opened my eyes to the decorating possibilities with lighter paint on the walls. I’ve already had plans to lighten up the family room and kitchen, and these inspiration photos kind of sealed the deal for me.

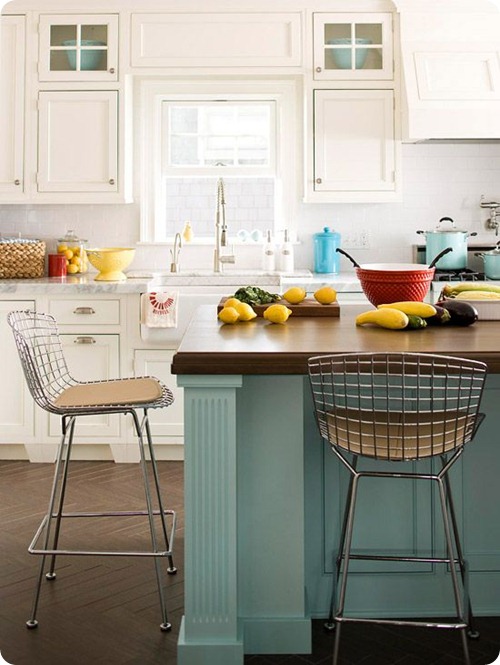
Here’s the thing – I’ve fallen in love with white kitchens over the years too. I drool over them. I love how clean and bright they are, but so color is SO easy to add in:

blue island white cabinets

(source)

I painted my kitchen island a similar blue, and I love that you could totally change up the look of the space with just a new color on the island. (And painting an island is WAY easier a whole room.)

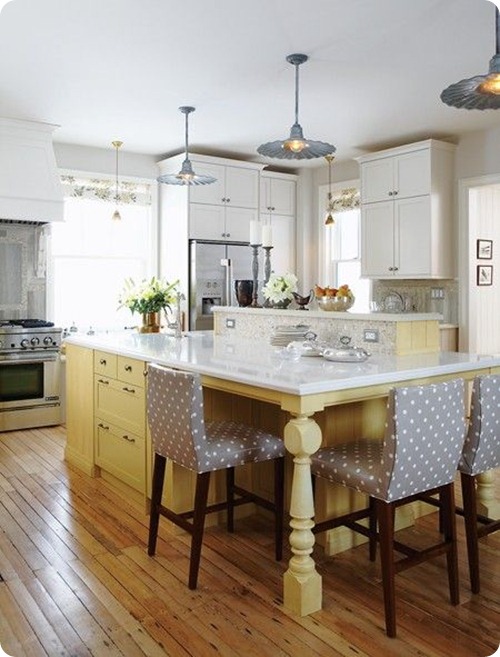
I loved this bright kitchen with the soft yellow island by Sarah Richardson:

sarah richardson yellow island white cabinets

(source)

That kitchen still feels so warm and comfortable to me, even with all the white.

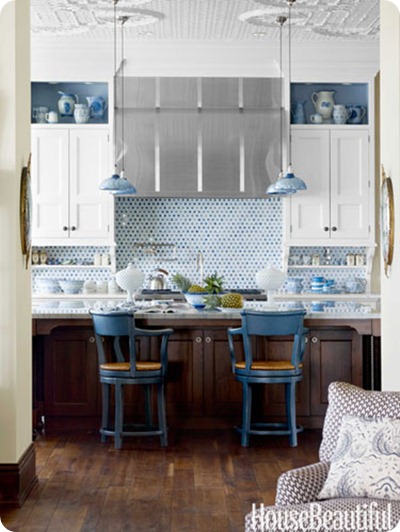
And in a kitchen you can add a ton of color with a backsplash if you wish too:

white cabinets blue accents kitchen

(source)

Of course that’s not an easy change down the road, but you could also add color with the chairs and accessories like this photo.

I found this kitchen on Houzz a few days ago and instantly fell in love:

Maybe it’s because I was still feeling the Americana love from the 4th, but I just adore the use of blue and red in there. SO welcoming.

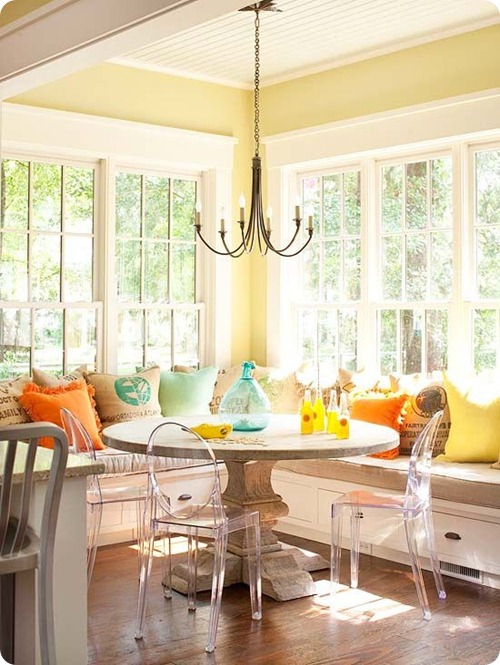
These walls aren’t really neutral, really, but they are light. It just goes to show all the different colors you can bring in:

kitchen banquet in yellow orange

(source)

I’d love a built in banquet like that by the way. Any time is fine.

You know I love a painted ceiling. With darker walls a painted ceiling will feel heavy and could make the space feel dark (I’ve done it and it does both) – but in a lighter room it’s just a beautiful, unexpected accent color:

blue ceiling white kitchen

OK, but seriously, make sure you love that ceiling color. It’s a pain in the patoot to redo. (Again, ask me how I know.)

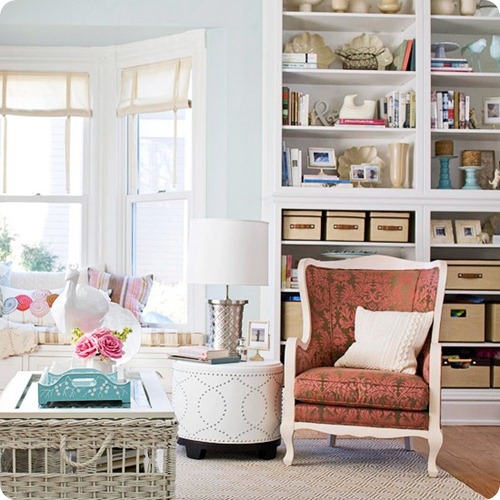
With a lighter wall color the less expensive, easier decorative stuff (like pillows and accessories) can be changed out more often if you wish:

using color in a neutral room

(source)

Although I would totally paint the back of those built ins. ;)

Like I said, I have loved our darker bedroom for quite some time, but it’s been SO hard to decorate. The greenish/gray wall color made it difficult to even find accessories that I liked. And bedding? That took FOREVER.

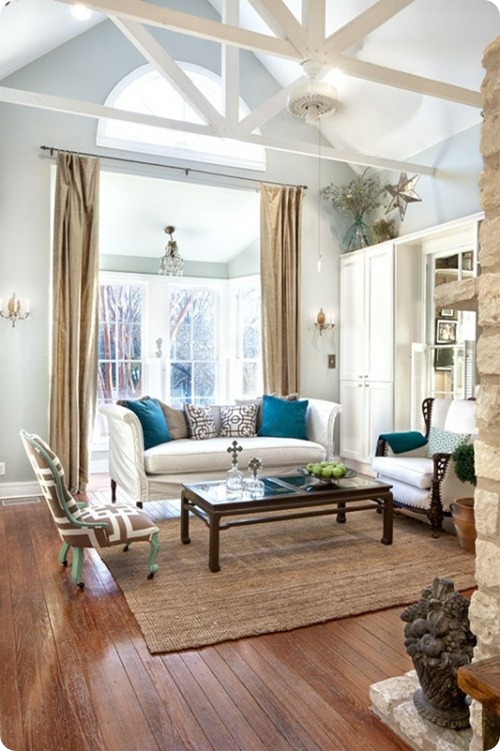
This light gray/blue color is so pretty – there’s not a ton of color in this room but the dark blue pillows totally pop:

light blue walls big windows

I could see a big print on the drapes too – that would be amazing in that space. (Like that room needs my advice.)

In a more neutral room you can do a darker accent wall too – or a really fun wallpaper you wouldn’t normally use on in a whole space:

floral wallpaper laundry room

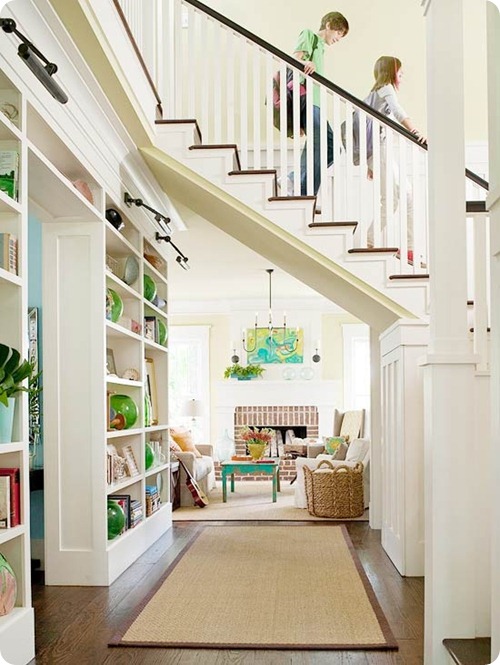
And this photo (which is one of my all time favorite spaces by the way), is a great example of how a lighter space doesn’t always mean stark and bland – the accessories, art and furniture add plenty of texture and color:

using color in a neutral room

(source)

All that gorgeous, thick molding sure doesn’t hurt either. 

I still don’t think I could do white walls though, do you? Do you have them and love them? I had plenty of white walls in apartments over the years so I don’t think I’ll ever go that far in the light direction.

You’ve probably noticed I’ve gone lighter as time goes on, and I think that will just continue. What do you think? Of course color on the walls doesn’t always mean it will be dark and hard to decorate – I’m just speaking from my experience. Years ago I used a lot of very deep, saturated colors in our house and it was such a struggle to make changes in those rooms. It can be done – it just takes a lot more talent and patience than I have most days. ;)

Are you leaning light these days? Or do you still love your color on the walls and not on your shelves?

Dark or light side?

Hello all! Hope you had a great weekend! We took a little road trip to the Chicago area for a couple drum corp shows (for hubby), Legoland (for the kiddo) and IKEA (for me). It was a fun, quick trip!

So now that the powder room is done I’m moving on to a room I’ve been itching to change up for a while – our master bedroom. I made some changes earlier this year using things I already had, and the room got a few other changes a couple years ago.

We have a new addition coming to the room that kind of spurred a new redo on but I’ve been wanting to change some things up for a while – No. 1 on my list is getting rid of the striped wall behind our bed. It’s given me the itches for a few years now.

But my biggest dilemma before I can really get moving is the wall color – I’m torn between the allure of a deep, dark wall color and the light and bright look. I STILL can’t decide. Every time I think I have I see a new picture and it takes me back to the dark side. Or light. Or dark.

You get the idea.

I’m drawn to the moody, comfy feeling of a dark room:

dark walls bedroom

(source)

Did you notice the trim is painted the same color as the walls? What do you think of that?

Although if I went dark I would keep the headboard light like Dear Lillie’s room:

dark brown walls white bedding

The light bedding brightens up the room and gives great contrast – I’m a lover of contrast you know.

I actually have a sample of a deep navy color like Carmel’s room:

dark walls dark wood bed

Mine has a little more of an aqua tint to it, if that makes any sense – like a peacock blue. Can I just say how much I LOVE that mirror above her bed too??

In general I think it’s easier to pull in colors with a lighter room, but I love how color was used in this room, even with the dark walls:

dark walls with aqua and blue

(source)

I do love the pop of pink with the dark chocolate walls in this bedroom:

brown walls white bedding

(source)

Just not sure the hubby would go for that. ;)

Here’s a great example of how a darker color completely changes the look of a room:

light room redo to dark walls

(source)

There’s plenty of other changes too, but isn’t funny how much bigger it looks in a dark color? You always think it will be the opposite but that’s not always the case.

But here’s the thing – I’m finding I’m loving the power of a neutral wall color. It’s soothing, yes, but it also allows you more options when it comes to decorating with color:

decorating with color lighter walls

My friend Layla’s old master bedroom is one of my favorites:

cottage style bedroom I love that the walls and bedding are light but the room is still so warm and colorful.

I think it’s evident by my photos (and recent projects) that I’m loving the wall planks:

white walls, black and green accents

(source)

I just adore that room – I think every room can take some black pieces and this looks amazing with the white walls and green accents. Love!

And no, I’m not planking our bedroom walls – I need a break from the painting for awhile. ;)

Of course it doesn’t have to be white on the walls – I don’t think I could do an all white room anyway. This greige-ish space is just beautiful:

light room with blue and greenI love that you could pull in pretty much any accent color and it would work. It’s that a gorgeous room?

I love this blue color too – and it proves that a lighter color can still offer plenty of contrast against white trim:

two story bedroom

(source)

I also love that there are plenty of darker accents in there (rug, chairs, ottomans) that offer some depth without making the room really heavy.

Overall I just love the idea of a calming, serene space:

molding same color as walls

(source)

But the thing is, our current wall color is darker (Tornado Watch at Lowe’s) and it feels super cozy too:

dark walls bedroom

A dark room feels like a hug to me, a lighter one feels like a big breath of fresh air.

Decisions, decisions.

A few months ago I was getting ready to slap a deep color on the walls, now I’m leaning big time toward a light color. I think I’m ready for a change!

What is your favorite for a bedroom – dark or light? Do/did you struggle with your wall color like me or did you know exactly what you wanted? Do tell!

P.S. I also painted the Bub’s room a dark blue but kept it light with lots of white trim – you can see it here.

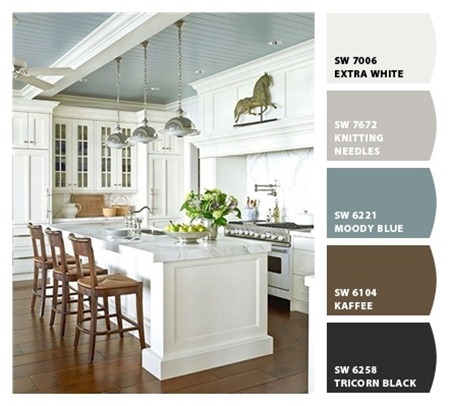
Nature-inspired paint palette

Hey hey all! The sun is shining, my garbage disposal is fixed – it is a very good day! It’s still not warm – but better. I have hope. :)

So I totally got the idea for this post from a reader – Laurie commented on this recent pic of mine on Instagram:

farm fresh eggs

It’s a shot of some eggs from a local farm – it’s probably silly but I think they are SO pretty. When Laurie mentioned how they would make a great paint strip an idea was born – why not make one?

So I pulled out my Sherwin Williams paint deck and looked online to find colors that were in this palette. They’re not exact, but I tried to find tones that played nicely together.

And there you go: a farm fresh egg inspired color scheme:

Paint palette inspired by farm fresh eggs thriftydecorchick.com

I love the names too – wouldn’t that be a fun job? ;)

Some of the blueish ones leaned more aqua, the lighter ones were a really pale blue. The brown eggs had a bit of a pink tone to them, so I tried to go with taupes that are more warm and less pink. (You know how I dislike pink walls.)

Fun right? I particularly love the Rhinestone and Moroccan brown together. The Snow drop and Colony buff are so pretty too. OH and Brooklet and Outer banks – LOVE.

These light, pretty colors have me completely rethinking the colors for the powder room. I was going to go with a deeper color but there’s certainly something to be said for a calming combo. I am in a constant struggle between painting rooms deep and dramatic or light and bright – I’m drawn to both!

So there you go – a color palette for your home inspired by nature. It was fun and I will do this again in the future for sure. Now I just need to go find more inspiration. ;)

Have you ever pulled a room color from an unexpected source?

**SW has a tool that does this for you that I told you about here that’s fun too. And this is not a sponsored post of any kind, I just love paint. :)

Pinterest fail (curls)

OK peeps, this may be my one and only hair post here at TDC. Well, there is one other tip I found that actually works great on my hair, so maybe there will be two…someday.

Don’t worry, it won’t become a thing. You’ll see from my photos that I’m meant to photograph house stuff, not myself.

Anyway, I actually found this hair trick at Pinstrosity – it’s a fun little site that you must check out! (I like that they don’t tear the original post apart – they often share how it could have been done better to fix the outcome.) The original post was from PaperMama and her hair turns out gorgeous!!

I’ve been wanting to try this out for a while now – usually when I do my Zumba class at night I take a shower after and let my hair just naturally dry. Thing is, it’s a disaster in the morning. And I’m so not taking a shower all over again in the morning -- so it’s a pain.

I thought it would be LOVELY if I could find an easy way to make my hair look presentable the next day, so I decided to finally try this out last night. The great part – you only need a headband, that’s it!

You can visit the PaperMama site for a great video on how to do it – she shows you every step. I let my hair air dry for about 30 minutes and then started -- it actually was much easier than I thought it would be and took no time at all – maybe two minutes for my whole head:

no heat curl headband

(This is me this morning. These are all awful cell pics cause I was too lazy to get my camera.)

You sleep with it like that overnight. I thought for sure the headband would come off at some point but I woke up with it exactly how I left it.

You can see here how my hair is pulled through and around the headband:

no heat curl headband

I woke with my hair completely dry and had high hopes.

They were soon dashed. DASHED people. Were there curls? Yeah! Did I look like Shirley Temple? Heck yeah!!:

no heat curl fail

Um…not what I expected. I’ve been growing out my hair for awhile now, but it’s obviously not nearly long enough for this trick. It worked…it just didn’t work like I wanted.

I expected those loose, flowing curls, but I didn’t get them. ;) I tried to calm my head down by putting my fingers through my hair, a little water, and then even a brush. It helped…a little. But not enough:

no heat curl fail

There were also random pieces of hair in the back that were just frizzy and looked like I hadn’t done a thing to them, and I know they were wrapped around like the others. Who knows what happened there.

I’ve learned one thing with this little project though – I was considering growing out my bangs and now that’s so not gonna happen. I, uh…need them.

Here’s the thing – if you have long hair this may work great for you. And I am definitely going to try it again as my hair gets longer and I may try wrapping my hair less tightly. It felt pretty loose in there but it was obviously wrapped too tight.

It worked, that’s for sure! Too well?

I ended up just throwing my hair up into a loose pony for the day, and I love how full it is:

no heat curl with headband

This would be a GREAT base for an updo for a fancy occasion – it gives tons of body and fullness to your hair.

So. That’s my experience with this hair trick. Have you tried any you’ve found on Pinterest? Have they worked? (Feel free to share links in the comments if you’ve posted about them. I love reading those!) I did find a way to curl my hair on Pinterest that I LOVE – it just takes forever. Maybe someday I’ll post about that…after a few more DIY projects of course. ;)

Outdoor Dreamin’

Hello and welcome to the (almost) weekend! Got anything fun planned? Not much here other than time with my loves, maybe a little decluttering and DIY, and perhaps a nap. Perfect weekend at home. :)

It’s only 32 degrees here today but I’m dreaming of warmer weather already…we were teased with a lovely 65 degrees last weekend and it was fabulous!

We took advantage of the warm weather to address the…ahem, disaster that has been waiting for us on the deck.

Our lovely gazebo that I showed you a couple summers ago:

gazebo pergola on deck

Started falling a few weeks ago (I just found this pic on my phone):

photo

So sad. :(

It only got worse – the wind was CRAZY that few days and it was just getting more intense. Hubby was out of town and I was so afraid the whole thing was going to blow off and hit a neighbors house or something. So I decided to pull some of the cover off so it wouldn’t catch the wind as much. It helped, at least it didn’t fly away!:

Some of you suggested that maybe it could be salvaged but there was just no way. The steel braces that hold it on to the deck were bent and some ripped in two – insane! At least we know our deck is sound because it didn’t budge! :)

That cover acts like a parachute, I tell you what. It had been up for 18 months without an issue till now, the winds we had were just too much this time.

So anyway, last weekend we spent a couple hours taking it apart. The gazebo itself wasn’t too bad to disassemble – it was all the glass from the pretty lights we had up that we had to watch for. What a mess!!

Now we’re left with a wide open space again:

I need to get a cover for the stuff on here now, it’s been protected by the gazebo till now. (We don’t have a spot to store outdoor furniture over the winter.)

So now…we’re thinkin’. Thinking about what we could possibly put there in the future. I should say dreaming…because most of the ideas we like are spendy.

One thing we know for sure – no more fabric roofs!! It’s just not going to work. I love the look of pergolas – I’ve heard if they are built correctly you can block the sun for most of the day:

White pergola attached to house

But we’ve been known to sit out there in the rain in the summer, and I like having the protection for the furniture. A pergola with a roof like this one would be perfect:

(source)

Or this one too – I love the vines wrapped around it!:

Pinned Image

(source)

I found this one with the lattice across the top and loved the idea:

Lattice roof for filtered shade. (Wood Pergolas Westport | Backyard America | Pergolas)

(source)

Isn’t that brilliant? We could totally DIY at least that part! It wouldn’t keep all the water and sun out, but it would make a big difference.

I also loved this one – same lattice roof but curved:

pergola

I love the twinkly lights. :)

We also loved the idea of something fully covered, with a roof:

Pinned Image

(source)

A sweet little waterfall would be perfect too. ;)

I love the shape of this one, the shape is similar to what one on our deck would look like:

Gazebo On Deck Design, Pictures, Remodel, Decor and Ideas

(source)

And this one is AWESOME – with screens!!:

Corner Deck Gazebo

(source)

This would be my dream because I am an absolute mosquito magnet in the summer. It’s horrible. We loved our gazebo because we could close all the screens and I could actually enjoy being out there.

But of course for the price of that one above, we could just built a screened porch onto the the house!!

Who knows what we’ll do and I don’t think it will even happen this year. Honestly we’re both kind of loving the deck open like it is right now. I guess it’s that whole less is more feeling we get this time of year. We’re digging it…who knows what I’ll be saying in July when I’m getting eaten alive by the skeeters. :)

What’s in your dream backyard? A covered gazebo? An open and airy pergola?

**As always, please visit the original source to pin the inspirational pics!