Tampilkan postingan dengan label solutions. Tampilkan semua postingan

Hiding the cords! (Ick)

Hello all! How was your weekend? I was out of town all weekend in Nashville and I’ll probably share some pictures from that later this week. There were some amazing shops down there I wanted to show you!

Even with about eight hours of sleep in three days I still was able to able to get a little project done when I got home. After a nap of course. :) I’ve been meaning to tell you more about this for a while and now is the time…and I’m about to rock. your. world.

I blogged about this before years ago (oddly almost exactly five years ago to the day!), but it’s worth another mention. Or ten. Keep in mind this is not something some of you probably even care about, but it keeps me from waking up in the middle of the night sweating because of my deep, burning hatred of electrical cords.

Yes, I loathe them. In somebody else's house – would probably never notice them. In my house, hate. them. And it does drive me crazy when I see them on a design show or in a magazine. I mean, they’re going to create this amazing space and then you see them laying on the floor or hanging around? Shiver.

So here’s how I deal with them. And this is for smaller things like lamps or whatever. The whole TV cord thing is a whole other post (which I will do too).

Here they are…my loves:

cord hiders

These are cord hiders. Otherwise known as the best things invented ever in EVER. I find mine at Lowe’s on the end cap near the cable stuff. Not the electrical aisle – near the cable supplies.

This is how I use them – when I have a lamp cord that hangs down behind something (that I can see – I don’t care if it’s something I can’t see. Not that crazy.) I will use my scrap pieces of the plastic cord things and stick them on the back of the furniture:

plastic cord hiders

They have a sticky back – you just peel off the paper and stick them on. And to cut them you just score them with your scissors (turn them around between the blades) and then snap it apart.

I also put them on the wall above the outlet:

how to hide cords

I actually wish I had made that piece a little longer. I can deal though. Kinda.

So instead of having the whole long cord hanging down behind the desk, you just see a little bit:

how to hide cords behind desk

And yes, I’ve considered painting the cords. Nothing is above me. Not quite to that level of crazy just yet.

You may have noticed no cords showing when I showed you my new blue lamps last week:

how to hide lamp cords

Same thing there – I took a piece of the cord hider and stuck it down the back of the pedestal table: 

how to hide electrical cords

Have I blown your mind? Huh? Yeah? Boom.

These are actually made to snap shut too – so that open side you see above could be closed. I don’t worry about that since you rarely see these in the first place.

I did it again in the kitchen/family room so that you can’t see the cord behind the console table:

hiding electrical cords

Oh my. That is beautiful, right?

You can also paint these things:

cord hiders

I hung the sconces that used to be in the bedroom down in the basement and used these to hide the cords going down the wall:

cord hiders for sconces

I’m not totally crazy about that look, but it’s something that hides dangling cords. I’d love to eventually have something hard wired there so this is a temporary fix. (And I tried one of the hiders along the bottom but realized the cords were less noticeable on their own since they match the wood top.)

The cord hiders come in a variety of sizes and I use them for our TV component stuff too. That little section at the hardware store is a magical place, be sure to check it out. ;)

Oh, and when I put them on the wall like above I don’t take the paper off the whole strip and stick it to the wall because they can damage the wall when you remove them later. Or sometimes the residue sticks too well and stays on the wall -- that’s my only complaint about these things. I just take off a tiny bit so just a smidge is sticky – it’s usually enough to hold them in place just fine.

There you go. How I survive life. First world problems, hiding cords. These things come in about five foot lengths and I think they’re like $4 each? But I usually cut them down so they go a long way for me.

Be sure to come by tomorrow to kick off our fall parties and link up your fall mantels!:

Fall_2013_bannerSee you there! :) 

Square foot gardening

Hello all! Since school is back in I’ll be going back to my posting schedule of four posts a week – at least most of the time. :) Some weeks get crazy but for the most part you’ll see one more post a week again.

I know, calm down. Awesome.

I should have really talked about this earlier this summer but the months just got away from me. I did want to mention it so you can prepare for next year if you are interested in gardening.

Thing is, we used to have way more of a backyard, but even then it was kind of odd, with a big slope. So we didn’t have a great spot to put a large garden. When I blogged about my desire to grow a garden years ago, many of you were so helpful and I learned a ton.

So a few years ago I started a small garden – I used the square foot gardening technique – loosely. I say loosely because I didn’t segment the garden out like a true square foot garden. I just kind of planted stuff in there and hoped it would do well.

And it did. :) That’s when I learned that you don’t have to have a large, perfect spot to make food grow. It needs water and light and the space doesn’t matter as much, in my opinion.

Since then we had the patio put in so a couple years ago I moved the garden to the only good spot we had left – right next to our air conditioner:

square foot garden

It wasn’t ideal and I didn’t know how everything would do. Before this everything had been in full sun. This area gets morning and some afternoon sun, but not the super hot late afternoon sun and it’s actually done really well.

I could have DIY'd the garden set up, but it comes in a kit at most hardware stores and it was super easy to put together:

square foot gardening

I have taken it apart and put it away for the winter and I’ve left it out – it’s cedar so it holds up fine to the elements – at least for the next few years.

We back up to land with woods and a creek so we get a lot of wildlife. TONS of bunnies. Because of that I knew I wanted something to deter them from eating everything and I use that lattice stuff. I found it in the dumpster at hubby’s high school years ago. (I didn’t DIVE in the dumpster – just picked it up off the top.) ;) And I’m kind of surprised but it works great. They don’t nibble on anything. I actually think having it by the air conditioner may help too – the noise maybe?

So there’s some things I’ve learned over the past years that I thought I would share. I’m not an expert by any stretch but I’m learning more every season.

I planted a strawberry plant and blueberry bushes years ago – blueberry bushes need to be planted in multiples because they cross-pollinate. But the bushes didn’t do well – we needed to move them and never replanted them. Each one only produced a few blueberries total. Now I know I should have been more patient -- I think they just needed a few years to get established. I mean, we have a farm nearby that we pick blueberries at that has hundreds of big blueberry bushes, so I know they can do well.

And the strawberries are one of those I think I’ll just keep going to pick somewhere else:

strawberry plant in garden

By this time of year the plant is big and kind of sprouting out – I didn’t realize strawberry plants did that. It shoots off and plants itself in another spot, so I think in a warmer climate it would kind of take over. But for years now it’s only produced maybe a handful of strawberries each year. I know that would increase over time too, but I’d rather use the space for something else.

I like my garden foods like I like my flowering plants – producing all season instead of once. Strawberries produce for one month and then they’re done. I’d rather have more room for my beloved cukes:

growing cucumbers

Isn’t that funky? I don’t know what kind I got this year but they are long and skinny. I prefer a chunkier cucumber but these still taste great. A few folks warned me years ago about the cucumbers – they said they would take over the garden and they are right. :) But I love my cukes so I insisted on having them. Thing is, they are vine plant, so yes, they do go everywhere, but they don’t hurt anything. At least in my experience – they mix in with the tomatoes and stuff but not too bad.

I lean some of the lattice up against the house so they can work into that, but they prefer to stay low. It’s kind of cool to see how they grab on to stuff:

cucumber vine

They do pretty well in this spot but I think they prefer full sun. My first year growing them it was out. of. control. there were so many. It was awesome. :) Then the first year I planted them on this side of the house I didn’t get one cucumber – but it was a super hot summer and it turns out it had something to do with the bee population. Crazy, but they weren’t being pollinated by the bees so they never produced.

This year they are doing much better, just not producing a ton like that first year. I don’t know if it’s having less sun or just the version I got.

My other favorite garden plant is tomatoes. This year I did three versions – regular tomatoes, romas and cherry:

growing cherry tomatoes

The cherries always do well for me and this year they are mad crazy good. Like, I can’t even keep up. But I use them all the time – salads, in my eggs, for caprese salad…I love them.

The romas are doing incredible too – they just started maturing a couple weeks ago and they are coming so fast I can’t keep up:

growing roma tomatoes roma tomato plant

My only disappointment this year is my regular tomatoes – I got a container plant this year to try to fit more into the garden and I should have just done a regular plant. I got two little bitty tomatoes off of that all season. There aren’t even anymore coming – kind of a bust. Next year I’ll just go with a regular plant.

There are seasons to what you plant too – early summer crops and late summer. If you love lettuce you’ll want to grow that early. It does better in the less intense heat of the early summer months. I’ve done a few different lettuce varieties and they all do well – almost too well. When they start to mature they do so fast so it’s kind of hard to keep up.

I planted three arugula plants this year and with all of the rain we got in May and June they exploded – I didn’t even get that much off of them because they went to seed so fast. (That means they grew flowers, which often will change the taste and make them bitter. Same goes for many herbs like basil.)

Some of the late summer bloomers are melons – this year I couldn’t find any watermelon so I went with cantaloupe:

growing cantaloupe

I looked for weeks to see something and finally a few weeks ago this showed up. Man, these are sloooooow. It hasn’t grown much in the past week or so. But I’ll keep an eye on it – I’m not sure it’s going to get much bigger really. :)

In my little garden (I think it’s about four by four feet?) I’ve had ten plants growing this summer. As I mentioned, the arugula is now gone but everything else is still there. This year I planted my herbs in a smaller container by the back door so I’d have more room here. I do have my rosemary planted in the bigger garden though, and even with the cucumber vines all around, it does great.

A few years ago I picked up this book after many readers recommended it to me:

square foot gardening book

If you are new to gardening it is a wealth of information! Before I heard of this method I thought I needed a huge spot to grow my own food, but it’s so not the case. Many plants you can grow in containers too and they will do really well (tomatoes, strawberries, herbs), so space shouldn’t hold you back! My garden isn’t pretty, but it produces. That’s what matters!

As far as keeping them alive – just water them when they look hot and wilted. Other than watering I don’t do any upkeep with my garden at all. I don’t even mulch which I probably should. Pretty low key, just how I like it!

Do you garden? Do you use the square foot technique? What’s your favorite thing to grow?

Growing hydrangeas (not killing them)

Hey heyyyy! How was your weekend? Have I mentioned how wonderful our weather has been? One or 50 times? Yeah. It’s been awesome. 51.

I’ve been spending SO much more time outside this summer, I’ve truly enjoyed this season. I’ve been planting a bunch of new things, transplanting some, just enjoying our outdoor space and the flowers.

I wrote last summer about my pathetic hydrangeas and how I was the pretty much the worst hydrangea parent EVER. They hated me. I’ve learned a ton about them since and figured I’d share my new knowledge. (So many great tips in the comments of that post!)

Mine still have a long way to go, but I as long as we don’t have a scorching summer next year, I think they’ll do even better. It’s SO exciting to see them actually grow and bloom this summer! Seriously a thrill after I’ve worked so hard to help them along.

They were sad and pathetic last year, really. The biggest surprise I got a few weeks ago were the start of blooms on my limelight hydrangea. I’ve had it three years people – not one bloom till now. Here is was last summer and now:

how to grow hydrangea limelight hydrangea

It’s now FILLED with beautiful white blooms! They’re all only about half way done too, so in a week or two it will be full of puffy white flowers:
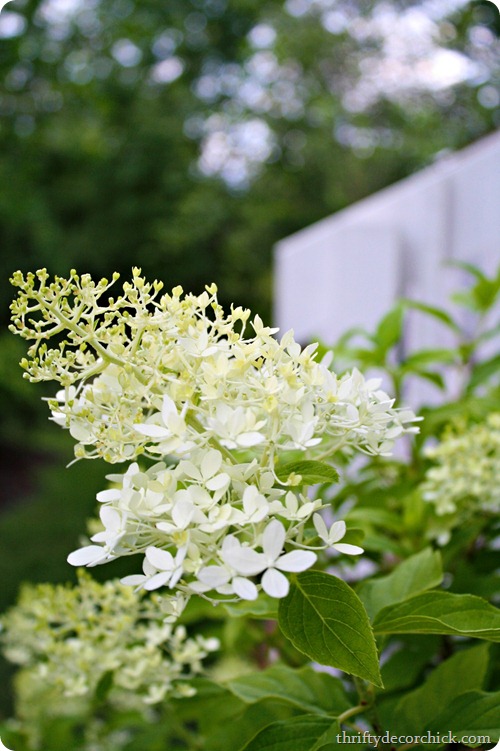
limelight hydrangea

So here’s the first piece of advice – the sleep, creep, leap saying is true. Most plants I have planted follow this – the first year they don’t do much, the second the come along a little bit and the third they leap! I got this guy on clearance at the end of the season two summers ago and last year you can see that it grew, but didn’t do much else.

The third year (this year), it has doubled in size and is full of blooms. I think with hydrangeas you just need to have patience. Which is hard when you buy one full of blooms and then it poops out on you.

Here’s another biggie – you will see hydrangeas everywhere in full sun all the time – I see them at restaurants, stores, churches, drive throughs – everywhere. But mine did horribly in full sun: 

full sun hydrangeafull sun hydrangeafull sun hydrangea 

I showed you these last summer – I’d had them for two or three years at that point? Not one had ever bloomed, they all barely grew, it was just sad. Sad sad SAD.

Now those three look like this:

how to grow hydrangeas

The one on the left has grown a TON from where it was (it was the smallest one) but it’s still not blooming. The other two have done great! They just don’t have a ton of blooms right now because I cut so many of them a few weeks ago. ;)

These are the mophead variety, and they have really strong, beautiful leaves too:

mophead hydrangeagrowing hydrangeas

The leaves on that pink plant are especially hardy, dark and pretty.

Tip two – they do best in morning sun and afternoon shade (or dappled shade). Mine in afternoon shade (these above) do even better than those in the back that get the dappled shade. If you are having problems getting yours to grow – try moving them to a spot where they’ll get some rest from the heat in the afternoon.

I found some PeeGee trees on clearance a couple years ago and was so excited – they are basically a hydrangea tree. The year I planted them they did great for the rest of that season, but last year they looked like butt, like the rest of mine:
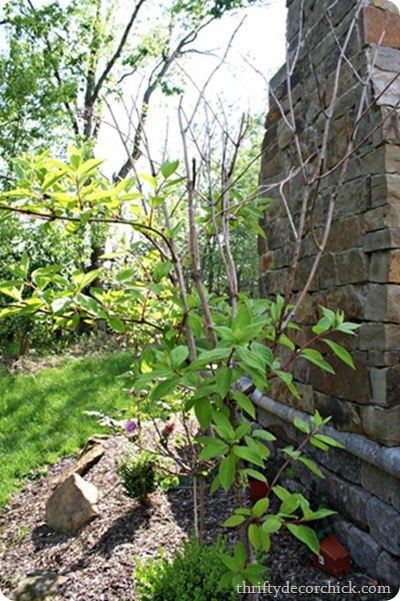
Pee Gee hydrangea

Now, they are amazing!!:

Pee Gee hydrangea blooming

They are both blooming and full and doing great.

Here’s the thing (tip three) – hydrangeas need MEGA water. I mean, it’s in their name. :) Last summer was the complete and total opposite of this one here in Indiana – super hot, drought conditions – it sucked. This year we had a really wet early summer and it’s helped tremendously.

I just watch my plants – if they start to wilt at all I know they need water. They need a lot of it, but watch how you water them too. I’ve got one mophead that has a fungus on the leaves (it hit one of my peonies too) because we’ve gotten so much rain. If you can, water them at the base of the plant (not with a sprinkler) so the water goes right to the roots and doesn’t sit on the leaves. (The fungus will not really hurt the plant so I’m cutting off those leaves and letting it be. If it had happened earlier in the season I would have used something on it.)

The Pee Gee tree is a paniculata hydrangea, like the limelight I first showed you. These two have the more cone shaped flowers:

pee gee hydrangea bloom

I much prefer the big round blooms, but these are beautiful too. They turn the most beautiful pink/green in the early fall – they are just gorgeous! I used them in this post a couple years ago: pee gee hydrangea fall

Aren’t they pretty?

I have about ten hydrangea plants out back now, and this one was my most recent addition:
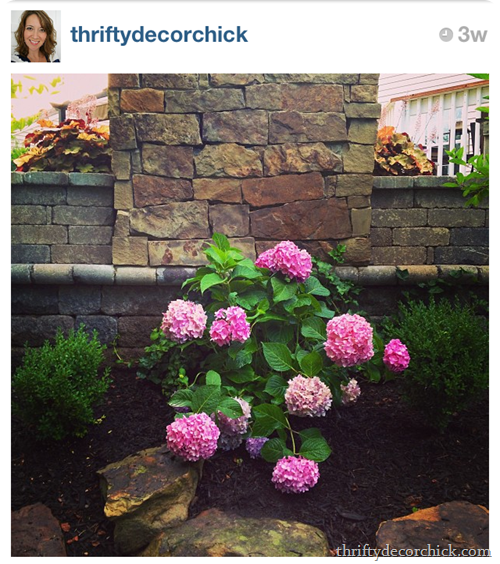
pink hydrangea mophead

I shared it on Instagram – it was in full bloom when I got it and looked amazing! This plant was HUGE (I got it at a local nursery) and was $30 something dollars – you can find them half that size for the same price, so make sure to go big!

Those flowers are now done and are turning brown but the plant is doing great:
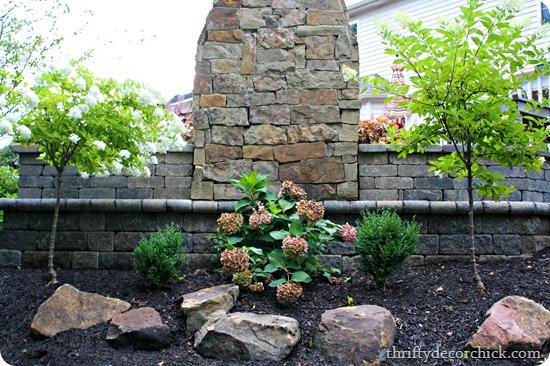
pee gee hydrangea

You can see my two PeeGee trees better here – they start to droop a bit as the blooms get bigger. (The one on the left is ahead of the other one by about a week.)

That brings me to another tip (number four?) – plant them in early summer or late fall if at all possible. It’s a lot of upkeep to keep them healthy and hydrated if you plant in the heat of mid-summer. I think the best time would be early summer so you can enjoy the blooms all season, but you can get some killer deals on them later in the fall, so it’s a hard call. I also think if you plant in the early summer you’ll have a better chance at a healthy, blooming plant the next year, since it has more time to get settled.

That huge mophead above was blooming pink when I bought it and the guy at the nursery said they will turn blue in our soil unless I changed the acidity. I have others that are blooming pink so I don’t know if it’s just this type? I was happy with that though because I have white, purple and pink and wanted blue:
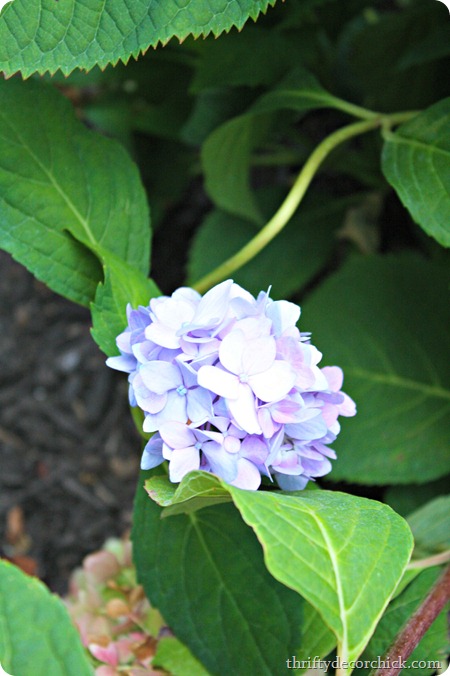
blue hydrangea

He was right! ;) The new blooms are blue.

Behind that one is a climbing hydrangea I planted last year:
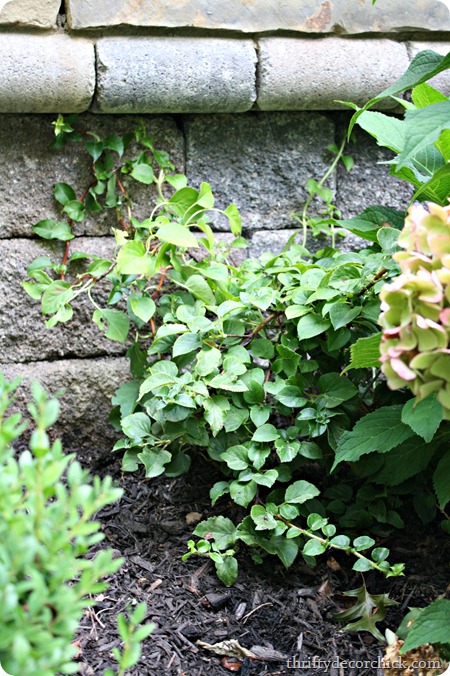
climbing hydrangea

Again, the plant is doing great, but not a bloom in sight. It’s not going to bloom this year at all, I can tell. I’m moving that one to a different spot soon so we’ll see how it does there.

Around the corner from those are a few more – mostly mopheads and one surprise lacecap:

lacecap hydrangealacecap hydrangea 

This is why you want them to be blooming when you buy. The lacecaps are more delicate – they have little bitty flowers that grow in the middle of the more traditional looking blooms. They are beautiful, but I just prefer the bigger fluffy ones. I am excited to see how these look when they are all blooming though!

Here’s my final big tip – I don’t prune my hydrangeas and they have done great this year. I mentioned earlier this year that I had pruned them and I misspoke a bit – I just (mostly) took all the dead wood off.

This can be tricky because sometimes it’s hard to tell between the normal and dead wood. Most hydrangeas bloom on dead wood – so you want to keep those ugly sticks like mine had last summer:

hydrangea grow on old wood

But I think it helped mine a ton to pull the dead wood out – they just shot up when I did that. I don’t know if it was just coincidence with the timing, but it seemed to help. I just pulled the dead stalks out of the plant – it will give easily if it’s dead. If it doesn’t, leave it.

I did trim down the Pee Gees just a bit though – just some of the tips that were total toast. And it seemed to work! I did this in May of this year – I’ve heard that’s a good time to do it if you’re going to. So I won’t cut them down this winter, and at best I’ll do a tiny bit of pruning next May, but that’s it. Otherwise I’ll leave them alone.

So that’s about it – I’ve learned a lot over the past year! I was determined because hydrangea are one of my all time favorites and I LOVE having them to cut and bring inside:

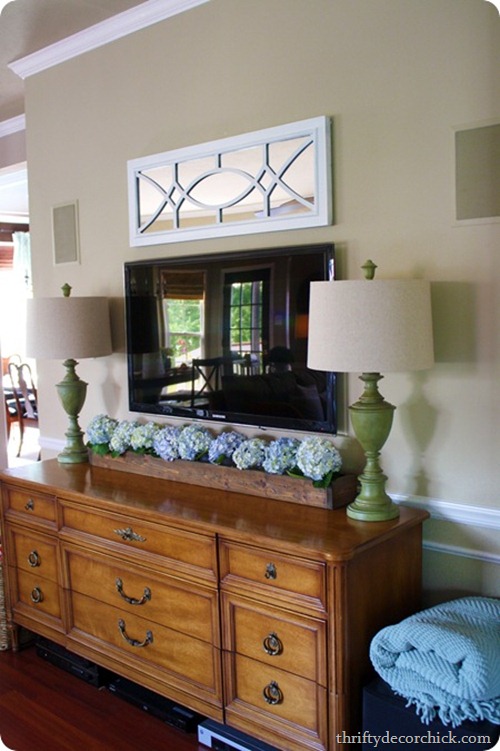
pink white hydrangea  mophead hydrangea pink white purple hydrangea in wood box dresser as entertainment center

Mine still have a long way to go – most are still tiny compared to a mature plant. But they are doing SO much better than the past. I think I’ve finally figured out how not kill them! Bonus!

Here’s a few other tips:

- If your climate is too warm for hydrangeas, consider the Pee Gee tree. It loves full sun so it should do better for you.

- You can change the color of your blooms with some stuff from the nursery or hardware store, or there are DIY methods too. (I’ve heard nails, pennies, etc.) The color of your blooms depends on the acidity of your soil. (Other than the white ones – those can’t be changed.)

- It seems like they are high maintenance, but once established hydrangeas are easy to take care of – they just need WATER.

- You know those planted hydrangeas you find in the spring/early summer at grocery stores? Yeah, they aren’t really meant to be planted. I had no idea! Go here to read more about that. I still think my one plant that isn’t blooming may be one I got from the grocery that I planted years ago. If it doesn’t bloom next year I’ll replace it.

I hope that helps any of you who have struggled with growing this beautiful plant! Again, I’m no expert but I’m getting there. ;) I think the change I made that made the biggest difference was where I planted them – the afternoon shade is key, at least at our house.

Are you a hydrangea lover? Any great tips I’ve missed? Have you tried and failed at these?


**For more on that DIY wood trough with the flowers in our family room go here!

Quick fix: The coat closet

Hello and happy Thursday! Sigh. I love Thursdays.

So you know when you have an issue in your house and you deal with it every. single. day. and then one day you figure out a reeeeally simple solution and it feels like you’re on top of the world and the most brilliant person ever?

Well, that happened to me the other day. The problem started back in August, on the first day of school.

Suddenly that day, a trail of little Bubby stuff started showing up every day right after school. We didn’t have the hat and gloves back then of course, but now we’re graced with their dumpage as soon as he walks in the door:

after school shedding

The shedding continues into the family room or kitchen:

after school shedding

And usually ends on the family room rug or sectional:

after school shedding

EVERY single day my call was the same – hang them in the laundry mud room!! (I’m still getting used to the fact that we have a REAL mud room now. GLEEE.)

But thing is, the mud room still looks like this:

yellow mud room

Bright yellow, which I think scares the boy (it’s starting to me), and the hooks (that you can’t really see) are hung too high. And those hooks are filled with bags and hats and stuff we don’t use day to day which I know makes TOTAL sense. But the real issue is that he’s too short to reach them.

Add to that, in the morning we don’t head out to the bus stop that way, we leave via the front door. So I started having him hang them on the outside door knob to the coat closet that I organized back in September:

coat closet organization

I am THRILLED to say it has stayed organized!

But having them on the outside of the door was annoying. Every time I went to get in there one of them fell off and it was just awkward. Here’s the thing -- I know I could hang his coat and backpack in the closet every day, but really? I don’t want to. I wanted an easy spot for it all that he could easily access.

So I was about to just sort through the stuff in the mud room and move the hooks down so he could reach but honestly, I don’t really want to mess with that space again until I start the built ins in there.

But then…then the perfect solution came to me while cleaning out the storage room a few weeks ago: 

drapery tie backs coat closet

It’s drapery tie back. I’ve mentioned before that I use them all over the house, and I mentioned in the coat closet post that I used them for our scarves. They are awesome because they are really deep and long and hold a lot of stuff. Way better/bigger than a normal hook.

I don’t use tie backs on our drapes anymore, so as soon as I found this one in the pile ‘o stuff in the basement I did a little happy jig cause I knew exactly where it was going:

drapery tie backs coat closet

I just installed it right in the middle of the door so it was at the perfect height for the kiddo.

We have solid wood doors so it’s easy to drill these right in. If you have hollow-core doors you will probably want to use anchors, at least if you’re going to hang something heavy like a coat or backpack. Something like scarves would be fine without an anchor I imagine.

So simple it’s just silly, but it WORKS! Now when the shedding starts I immediately point to the closet and he knows where it all goes:drapery tie backs coat closet

I should have made the vacuum cord pretty for you…but I didn’t. ;)

Funny how it’s easier for him to help when he can reach where he’s putting them. Huh. Who would have thought. :)

Until we get the mud room done this is a perfect solution for us. You’d think it would get in the way of the door shutting but it doesn’t – once in a while I have to move a scarf out of the way, but for the most part it’s no problem.

And here’s the reason it takes me 50 pictures to get one good one:

  Nutter

These two. And the cats. All little photobombers.

And the shirt…I die. I know. :)

Have you figured out a simple fix for something that was driving you crazy? Isn’t it the best feeling ever?? Well, at least pretty high up there. Organizing makes me HAPPY.