Tampilkan postingan dengan label Fall/Halloween. Tampilkan semua postingan

Quick and easy Halloween

Hello all and happy Halloween! We’re expecting heavy storms tonight so Halloween has been moved to tomorrow night throughout much of Indiana. Have you ever heard of such a thing – Halloween moved? I’m glad they’ll still get to trick or treat but it better rain like heck tonight. ;)

I don’t know what it was this year but I haven’t pulled out as much of the Halloween stuff. I had some fun crafts in mind but just plain ran out of time to do them. Next year I’m going to plan better and start earlier. (Says the girl who says that every. year.)

We’ve had the outside decked out for weeks and a few things inside, but last night the Bub was feeling better so I pulled the bins in and I let him put stuff wherever he wanted. He had a BLAST and could care less that it will only be up for a couple more days.

I thought I would share some of my projects from the past so you too can plan ahead of time for next year if you’d like to try them out. If you have time and all. ;)

I use a LOT of paper for Halloween decor. The BOO letters are just cheapy wood from the craft store covered with Halloween paper:

paper halloween bat cut outs

I used my vinyl cutting machine to cut out a ton of black bats (out of black paper) and I reuse them every year:

paper halloween bat cut outs

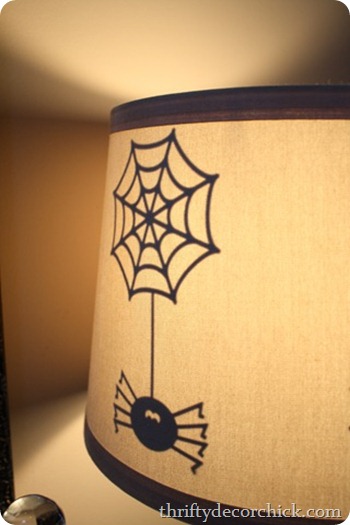
I also cut out spiders and webs and I put those on the inside of the lamp shades:

paper halloween cut outs

You can only see them when you turn on the light. So cute!

And yes…I put the mice on the stairs again this year, even after the mouse debacle:
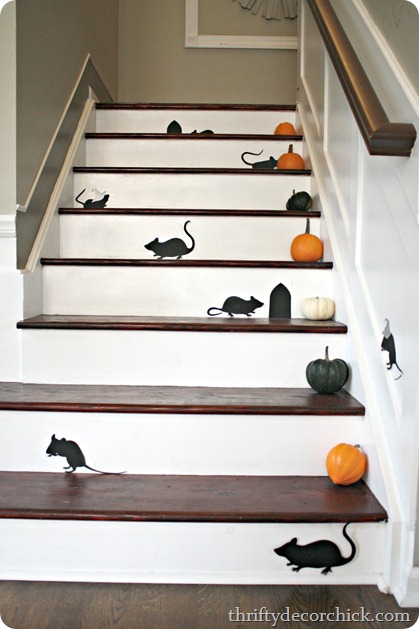
Halloween mice on stairs It’s part of my healing process. ;)

The bonus to all the paper is that it’s super easy to store year to year!

Last year I tried a new idea and it turned out well at first:

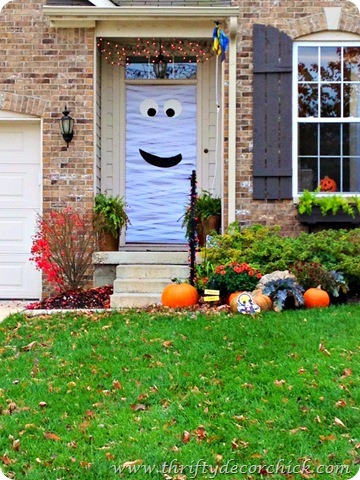
mummy door with tissue streamers

You’ll have to see the how-to to see how it turned out. It was SO cute though.

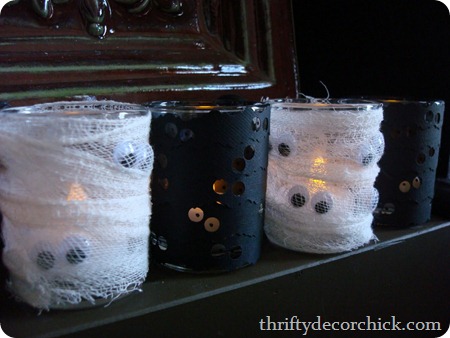
A few years back I made mummy votives:

mummy votives

Again, a super easy and cheap project!

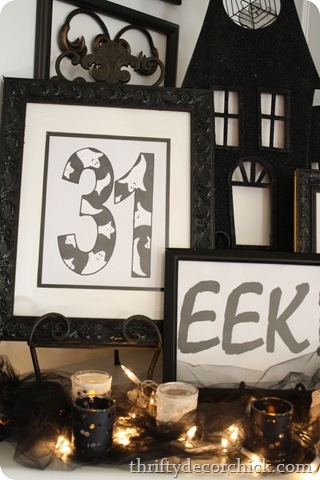
I used the computer and printer (and some spray paint for the frames) to make some Halloween art a few years back:

Halloween art

And I free-handed a ghost shape on contact paper and put it on a mirror:

Halloween ghost with contact paper

I still use him every year! :)

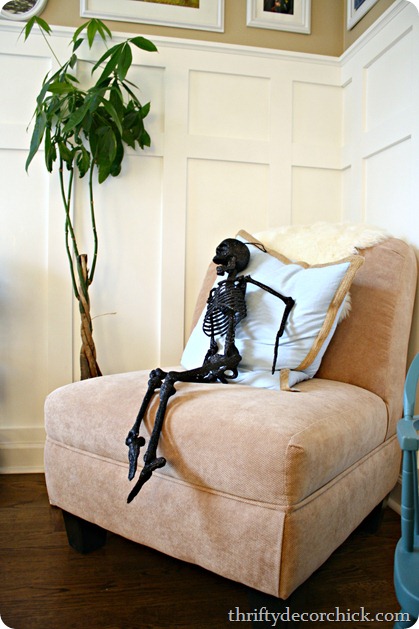
And here’s how the Bub decorated this year – I found Stan the Skeleton in my office:

Sparkly black skeleton

Stan scared me to death when I walked in here this morning, not even kidding.

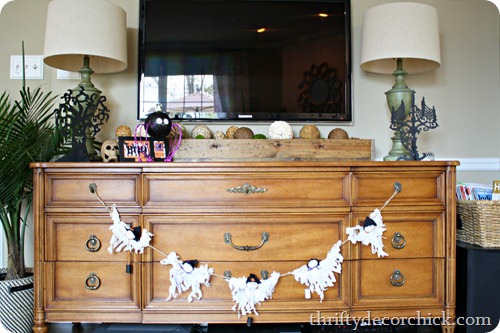
He decorated the TV dresser quite well, I must say:

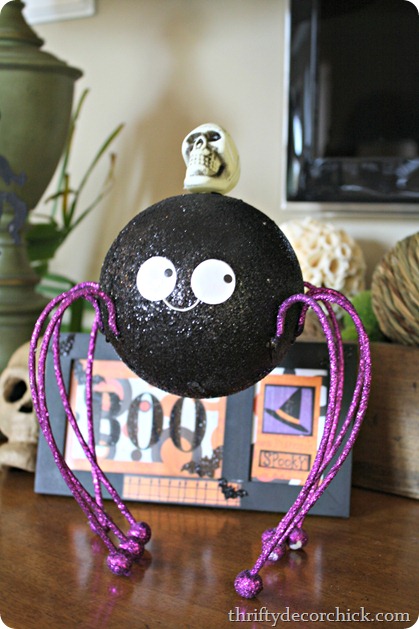
I especially loved the little touches like a skeleton head perched on top of the spider:

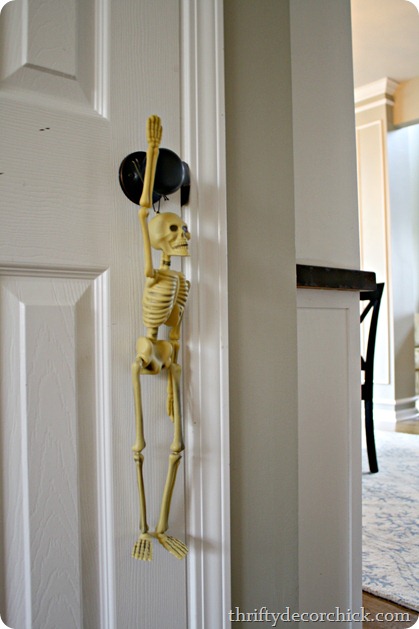
We have a lot of stuff hanging on door knobs:

He made sure to position this guy with his hand up:

Still not sure why but he’s wavin’ it around like he just don’t care.

He ran out of door knobs so moved on to other areas to hang stuff:

And the mantel is positively spooky:

He did good, right? Sometimes I lose sight of the fact that he could care less how it all looks – it doesn’t need to be in a perfect vignette to make him happy. He had SO much fun running around decorating last night. I think we’ll do this every year. :)

Hope you have a wonderful, SAFE Halloween! We’ll be carving our pumpkins tonight since we won’t be trick or treating till tomorrow. Happy Halloween!

Candy corn crafting

Hey everybody! Sorry for the late post today – it’s fall break for my kiddo and we slept in. It was glorious. Expect more of the same tomorrow.

So the other day I came up with a cute fall/Halloween craft and of course when I searched it realized I was like the eleventy billionth person to think of it, but I forged on. So this is not a new idea (are there new ideas anymore?) but I think it’s pretty darn cute.

I started out by grabbing a scrap piece of fabric, which is actually an IKEA curtain from a project gone wrong. So I use it for random stuff now and this is one of the random projects:

I did iron it first but you can’t tell. Score one for me.

I searched online for bunting or pennant template and this awesome one came up from Sweetly Scrapped Art:

Bunting pennant template

Most I found were a triangle shape – I wanted one like this with the area at the top you fold over. If it was a plain triangle shape you’d be doing some trimming after folding the top over your string. Make sense?

So I traced it on my fabric, trying to get as many out if it as I could:

Making a bunting

I didn’t even end up using half the fabric, score! More scraps for later!

So all along I planning on just doing straight lines with painters tape, but then I remembered I had the Frogtape shape tape (say that three times fast):

Scallop shape tape

Did you say it three times? I did. Can’t do it.

Anyway, I’ve been dying to try the scallop design so I thought this would be a great way to use it.

I didn’t cut out the shapes just yet – I just laid the tape down over one line of them:

Frogtape scallop tape

I thought this would save me some time, but I had to end up doing the same for the other direction so cut them out or don’t – it didn’t make much of a difference. One nice thing about leaving them and painting (without cutting out first) is that the line was similar across each “corn” – the orange, yellow and white were the same sizes.

And obviously…I used orange, yellow and white:

craft paint

The paint was the only cost in the project for me – so about $4?

I keep plastic bowls in the craft table for paint but ran out, so I improvised with the Frogtape lid:


Yeah, it worked perfectly. ;)

So I don’t have pics of the process because a.) I only have two hands and it was hard to take a pic and b.) because it was dark and the photos would have sucked butt. But you get the idea. I taped off the orange section first, let the paint dry (I used a hair dryer to speed it up), then taped off the yellow and white and did those.

I used the end of a foam roller to “pounce” the paint onto the fabric. (I rinsed it between colors.) This way it doesn’t go under the tape. I was pretty impressed that I didn’t get any bleeding, even on fabric.

When they were dry I used my craft glue to glue the top part of the pennants over onto some twine:

craft glue

And I gotta say, I think it turned out pretty darn cute!:

Candy corn bunting

The orange paint wasn’t super opaque – I could have done a few more coats but didn’t want this project to take forever. So that color isn’t very consistent throughout but when I was done I quite liked the look. The yellow and white covered much better.

Originally I planned to do this project on a paper like poster board, but I was afraid the paint would make it wrinkle. The fabric is nice and stiff once the paint dries so it worked great!

I think it is a super cute addition to the fall(ish) mantel:

candy corn bunting

I want to leave them up past Halloween they’re so cute. Candy corns are fall too, not just Halloween right? Whatever, I’m leaving them. I’ve been horrible about getting the Halloween stuff out this year! The outside of the house has been decked out for a week or so, but I haven’t wanted to bring in all the Halloween stuff just yet. This weekend we’ll take care of that.

You can see my other candy corn projects from a couple years back here:

candy corn crafts candy corn crafts

That wreath has survived two years, can you believe it??

Do you love candy corns? I don’t like to eat them but I love to decorate with them! Makes perfect sense.

Fall porch decor

outdoor fall decor

Hey hey! It’s Thursday and I’m happy! I’ve always loved Thursdays. It’s the almost-weekend. LIKE.

Today we’re closing up our fall linky parties over at Rhoda’s outdoor fall decor shindig – whoot! It’s supposed to be warm again today and tomorrow but I’m sitting in my office with a blanket on so I don’t quite believe it. Or I just refuse to believe it. :) So bring on the fall outdoor ideas!

Last year I shared our patio dressed up for the season:

IMG_2919_thumb[5]

So this year I’m heading back out front. If you’ve been around a while you’ve seen my plan before – when I find something that works I do it again and and again and basically run it into the ground. :)

This year is no exception. I like sharing this though because I know I’m not the only one with a teeny tiny porch. And even a teeny tiny porch can look big and mighty this time of year.

I start with a couple corn stalks – and apparently we’ve grown them big in Indiana this year:

corn stalks for fall

These were each over 12 feet tall so I cut them down with my saw. I secure them next to the door with some cup hooks and hidden twine:

corn stalks on porch

I changed out my yellow mums for these orange ones – I think these look better with the pumpkin wreath and door. The yellow mums will go back to the patio.

I got that big wide sisal rug from Target this spring and LOVE it. It’s hard to find one that wide:

fall front porch

See? Itty bitty porch and still festive. Yes I dream about a big wide porch with a swing, but it ain’t happening. So I embrace mine and make it work. :)

We have a big rock in our landscaping out front and I like to decorate around it for the fall. I pile pumpkins, kale, mums, whatever I can find around it:

pumpkins and kale

I just leave them in their containers and hide the plastic with the pumpkins. Love how it looks!

This year I also planted some sub-zero pansies – I don’t usually plant anything out front but these have a guarantee that they’ll make it through the winter and will then bloom again in the spring:

outdoor fall decorating

I think I’m going back to get more to go all the way around the landscaping out front. (I only got enough to go around the rock.) I LOVE the colors – lots of different purples, reds and yellows. So pretty. :) Anyone ever planted these?

This is not my thriftiest decorating – the kale and pumpkins aren’t cheap but I just love them. And they always last well past Thanksgiving. Last year my kale was absolutely beautiful in the snow. It wasn’t until about February that they finally dried up.

I took down our window boxes (they were falling apart) earlier this year and still hope to get some new ones up before the holidays:fall front porch decor

Weird timing maybe but I do love filling them with greenery at Christmas.

Now that the fall decor is up we’ll be pulling out the big spider, orange lights and blow up pumpkin for out front this weekend. :) Can’t wait to see your door and outdoor decor over at Rhoda’s today. Have a great almost-weekend!

Simple autumn tablescape

Hey all! How are ya? The cat pulled the cord out of my phone last night so we had a fun morning of running around trying to get to the bus on time. We did. ;)

Today I’m sharing my fall tablescape as we continue our fall link ups! If you’ve been following along over the years you know I got a wild hair a couple years ago and decided to get rid of our dining room and turn it into a library. It’s still in process but we LOVE it so far.

For a while this meant I really didn’t have a table to dress for the seasons (we had our round kitchen table). Not a big deal but I’m a decorating fiend and a blogger so I did miss that part a bit. But since I made our new, bigger table earlier this year, I’m able to join in on the festivities again. Whoot!

I started with a blank slate of the DIY tabletop:

DIY farmhouse table

I tried to use what I already had for the most part – I love our round IKEA chargers so those and my basic white plates were first:

white plates

I got the napkins at Pier 1 – LOVE them but they only had three and I needed four. So I ended up with two of the prints and two solids that matched. I like how it turned out.

The plates felt nekked when I was done so I added some gourds I picked up last weekend on each plate:

Like a smarty I only got three of the green and three of the orange – so I had to mix those up too. I was on a roll.

I created the whole table setting based around the pink flowers you see here:

I LOVE them – I can never remember what they’re called but I always see them in the fall. Any idea what they are? The bring pink is a wavy/felty feeling one and the longer ones are fuzzy and fun. They played perfectly with more hydrangeas from my pee gee trees. (You can see how I used those on the mantel here.)

I wanted to carry the flowers down the table a bit so I filled a Goodwill set with little bits of the flowers as well:

There’s a lot of Goodwill on this table – the little white creamer set, the copper sprayed candlesticks, the water goblets and glass hobnail votive holders are all from Goodwill over the years:

I love the glass aisle at Goodwill – it always draws me in. I can’t quit it.

At first I planned on putting a runner down the table, but I really wanted to see the table I worked so hard on. :)

My goal (like with the mantel) was to use more natural items and some items I already had. I didn’t want it to scream FALL – I wanted it to whisper. *Fallll.* 

I think it whispers:

Last night after I took pics the Bub asked why we were going to eat pumpkins. Love him.

This morning it was dark and rainy and I took the opportunity to light the candles again and take a few more shots:

It’s no fancy dining room but I love it. ;)

I think we’ll eat by candlelight tonight!:

This kind of thing is so fun for me – just puttering around and adding things, taking them away, arranging them just so. Hope it inspires you just a bit! :)

Do you have a dining room or just a kitchen table? I thought I would miss the dining room table more than I do – but I really don’t! It was a good choice for us for sure but wouldn’t be for everyone.

Weekend in the woods

Hello and welcome to a new week! Hope you had a lovely weekend! I didn’t get anything done and it. was. awesome. No projects, no cleaning, no decluttering, no organizing – just being lazy and hanging with my family and it was a welcome change.

I’ve mentioned a few times that I have a large family – both extended and immediate. I have six sisters and brothers (a mix of full, half and step) and with the addition of some grandkids now, the our group is BIG. It gets harder every year to get together for holidays because there are so many of us now. :)

Family means everything to all of us I’m sure, but my Dad is one of those people who is truly bursting with joy when his family is around. So every year now he and my stepmom rent a cabin so we can all get together and have a fun fall weekend with just family.

This year we had an amazing view:

Lake Monroe Indiana

It’s a little early for the leaves to change but you can see little explosions of color starting to happen. :) We were near Lake Monroe in Bloomington, Indiana and if you are nearby it is an amazing time of year to visit.

I didn’t get many pics inside our cabin because I was usually either eating or laying around and I was just too lazy, honestly. (It was fantastic.) It was a big place with plenty of room for all of us – not overly cabin-like, but rustic.

Saturday we rented a double decker pontoon boat and took off for the afternoon. This was especially fun for me because every weekend growing up was spent on this lake with my Mom and Dad. Most of my memories as a child (up till about seven years old or so) were camping and then hanging on that lake in our teeny tiny metal boat. There was room for the three of us and that’s about it. ;)

I’ve only been back to this lake as an adult a few times so it was special to be there again, especially with Dad. As a child I remember thinking the rocky shores were so beautiful and I was still taken with them as an adult:

Lake Monroe shore

Some people aren’t lake swimmers – are you? My husband is not – I think it freaks him out. :) Even I was a little hesitant at first, but then Dad and the siblings started jumping in and I finally did the same…and then you couldn’t get me out:

I’m in the middle with my boy. :) My son is so like me when it comes to things like this. We watch and take it in for awhile…then we do it and love it and you’ll have to drag us away. I was SO proud of him for getting in to swim (he’d never swam in a lake). The boy is a FISH.

When you sit on the life jacket just right you can just hang out there forever…it’s bliss. ;) The water was chilly at first but within minutes we’d get used to it and it was perfect.

I don’t share many pics of my son on the blog but I am so in love with this one:

:)

He drove the boat with Grandpa pretty much the entire time. Like a boss. ;)

On Sunday it was raining and chilly (a perfect fall day in my opinion) and we took the long way home through Nashville, Indiana and Brown County:

Brown County IN

Downtown Nashville is a treasure. A quaint little area with shops, wonderful food and fun stuff to do:

Nashville IN

And of course this is the BEST time of year to visit!

It was SO lovely – the rain made everything smell amazing and the mums were popping:

Nashville Indiana fall

Every single shop and restaurant is decked out for fall and it’s just gorgeous:

Nashville Indiana

We also stopped at a roadside pumpkin patch on the way out of town:

pumpkin patch

We saved the regular pumpkins for when we go to pick them at the local patch but got a bunch of really unique ones here. I’ve never seen a selection of gourds and pumpkins like they had!:

nashville pumpkin patch

I was giddy, I must say. It was just a lovely weekend all around.

I am so blessed for so many reasons, but one of the biggest is that I am a part of my big beautiful family. Thanks to Dad for forcing us to hang out together at least once a year. ;)

Have you been to southern Indiana in the fall? Do you have a favorite spot near you that you like to visit this time of year?

Hope your weekend was wonderful too – this week I’ll be sharing more fall-inspired posts as we continue our parties again tomorrow! See you then!