Tampilkan postingan dengan label before and after. Tampilkan semua postingan

January before and after!

Hey there!! Are you stuck inside like us today? I know so much of the country has had this horrible weather – we got about 12 inches of snow yesterday, which isn’t really that bad, but the temps are currently –12 and dropping. I don’t remember weather this cold in Indiana!
Anyway, the kiddo is home from school still and probably will be tomorrow too I’m guessing. I prepared for being snowed in by stocking up on supplies last week – I got SO much done in the mud room yesterday and I can’t wait to show you!
But today we kick off January with the first before and after link up of the year! Are you ready? Got any organizing before and afters? I’m all over that right now!
Here’s a few of my favorites from last month! Tasha shows how to paint linoleum floors (yes, I said paint):
painting linoleum floors
Isn’t that fun? I would never have thought that would work but they look awesome. Have you ever tried pulling up linoleum? I have. (Not fun.) So this a great option if you want a different look!
Vel completed her son’s room and I love how it turned out! But that little reading nook is my favorite part, of course:
boys room blue stripe
Ahh, nooks. I love them. That blue stripe around the room is awesome too, don’t you think?
Jennifer found some GORGEOUS chairs at TJ Maxx and gave them a little redo to make them work better for her space:
round back dining chairs Seriously, why don’t I find things like this at TJ Maxx?? Those are stunning. And she went to another location to find two more – that never happens!
Beth had a spot that was gathering shoes near the door and I think her solution looks so good! You would never know this little Target cabinet is really a mud room, right?:
cabinet to hold shoesShe’s able to keep the shoes and backpacks hidden away inside the cabinets. Brilliant.
Kristin’s stone fireplace underwent a big redo, and my favorite part is the added marble tiles around the firebox: 
 marble surround fireplace
They just tiled right over the stone that was there – I would never even think you could do that.
I totally LOVED Pam’s stenciled walls in her bedroom redo:
gold stencil on walls
And she did them in gold – love it! That bench is amazing too, seriously.
Anu took some lights from Target (I love that they are carrying these now!) and a simple bracket from Ikea to make an industrial wall sconce:
diy cage light sconce
This would be a great way to make just about any hanging light into a sconce on the wall.
Now it’s time to see what you’ve got for this month! If you’d like to be considered for a feature next time, please link back to TDC in your post or use this button by copying and pasting the link into your post:
<div align="center"><a href="http://www.thriftydecorchick.blogspot.com/" title="TDC Before and After" target="_blank"><img src="http://www.homestoriesatoz.com/wp-content/uploads/2012/03/beforeAndAfterButton_thumb1.gif" alt="TDC Before and After" style="border:none;" /></a></div>


Here you go! I’ll be back tomorrow with progress in the mud room!

December before and after!

Hi there! Welcome back! :)

I hope you had a wonderful Thanksgiving holiday week! We had a blast – we took off for a quick trip to Disney early last week. I fell in love with it hard earlier this year and wanted to go back to see it decked out for the holidays. It was incredible! The only bad part was getting food poisoning from a waffle on Monday and the Bub and I being out of commission all day Tuesday. Being sick at Disney pretty much sucks.

The kiddo didn’t eat nearly as much of it as I did so he was over it pretty fast. It took me till Saturday to feel 100 percent again. Even so, we had a GREAT week and I am so thankful.

OK, it’s the start of the month and that means another before and after party – are you ready? I picked out just a few of the incredible projects you all linked up last month to share today.

I adore Jennifer’s pick of wallpaper for her basement bathroom:

black and white star wallpaper

Heck, I love all of it! But I love that she was daring with the wallpaper – it paid off.

Anita is a brave soul -- she spray painted her countertops:

painting countertops

They turned out SO good! They look like a solid surface material now, so crazy.

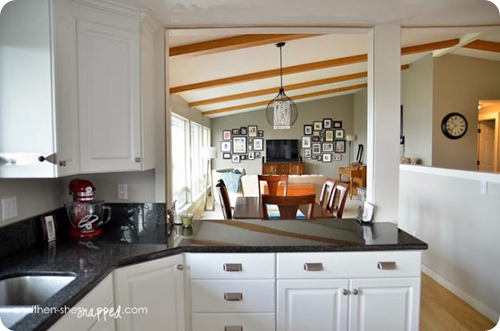
There were so many great kitchen posts! I couldn’t believe the difference taking down some cabinets made in Rachel’s kitchen:

taking down cabinets in kitchen

It was pretty before anyway, but this change made it so open and airy.

Liz’s before and after is so dramatic, you have to go see how it looked to fully grasp the change:

white kitchen blue island

Paint my peeps – it will rock your world. :)

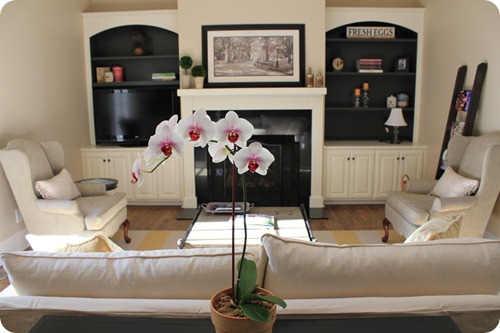
This beautiful space at Domestic Charm was transformed with paint too:

painting built ins

I especially love how you don’t even notice the TV – she painted the backs of the built ins a dark color and now it disappears! Brilliant.

Kristen is renting and did a lovely job decorating her daughter's room without doing anything permanent: 

decorating rental

I love how that wood wall looks behind the bed!

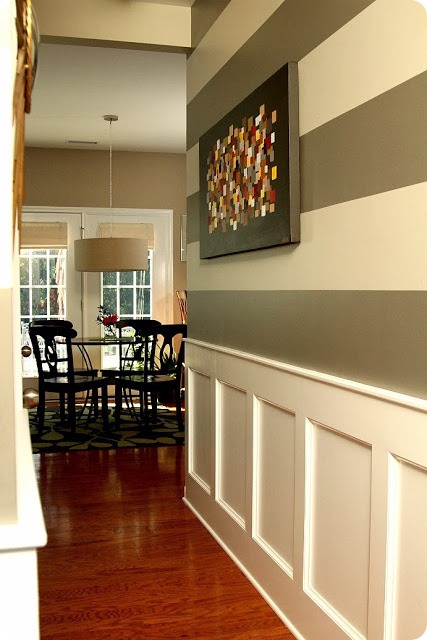
And finally Amy painted some stripes in her entryway and I love the contrast:

how to paint stripes

Stripes are a classic and these are so well done!

Well you wowed me again everybody! I wish I could share them all. If you missed any of the projects you can check them out here.

It’s time to link up your latest before and afters! I can’t wait to see what Christmas decor you’ve been up to! (Hint hint.) ;) If you’d like to be considered for the recap next month I would love a link back or you can use my button in your post:

<div align="center"><a href="http://www.thriftydecorchick.blogspot.com/" title="TDC Before and After" target="_blank"><img src="http://www.homestoriesatoz.com/wp-content/uploads/2012/03/beforeAndAfterButton_thumb1.gif" alt="TDC Before and After" style="border:none;" /></a></div>


Now link it up!:


November before and after!

Hello all! Have I got some pretty spaces for you today! It’s time to link up your before and afters, but first I have to share these beautiful spaces.

Oh by the way, the overwhelming majority of you wanted to keep this party as a monthly thing, so I will keep it as such, at least for now. I just know there’s SO many of these going any more and I didn’t know if they were still something you wanted to see every month here at TDC. You said yes so it will stay. :)

As I was looking through the links this month I was taken with how much COLOR is being used again and it makes me so happy. I love a beautiful neutral space, believe me, but I’m a color girl at heart for sure. Love these rooms!

First up, Beth used touches of coral in her guest room and it turned out so pretty and fresh:

Gray and coral room

I loved it paired with the light gray walls. I also love that she carved an office space out of this room too – and you’ll have to check out the bed! It makes me want to go stay for a week or so. :)

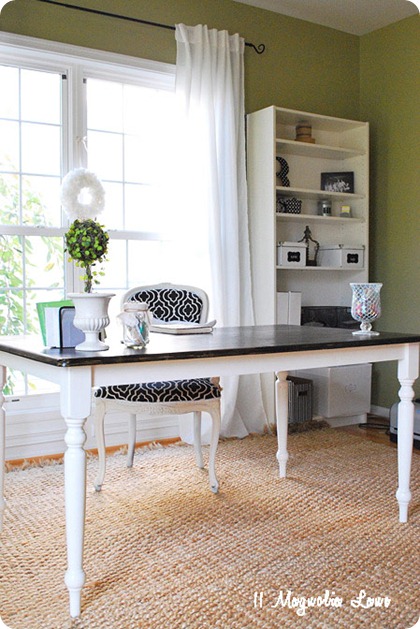
Amy used a pretty green color on the walls and then decorated with neutrals in her office:

Green walls black accessories

LOVE the kitchen table as a desk!

OK, Vel’s kitchen isn’t super colorful, but I had to include it because I’m drooling over it:

Black island white cabinets You MUST to go see the before to truly appreciate it! Love it all.

We’ve talked about the power of a neutral wall before – I loved the color Sarah was able to add to this room with just pillows: Navy headboardA neutral wall sure does make it so easy to change up a room down the line. I’m trying to do this more and more in our house.

I thought Karianne’s kitchen redo was SO fun!:

Fun gray and red kitchen

AND it was done on a budget. Such a fun space!

Linda’s living room is painted in a deep navy blue and white, but still looks bright and pretty with tons of color:

Navy and white room

I think blue is the new neutral – there’s very few colors that don’t look good with it, don’t you think?

And finally, at first glance Chelsea’s cute pantry may look like just another organizing project:

organized pantry with barn door

But you HAVE to go see the beautiful door they made for the pantry too. It is awesome!

Now it’s time for you to link up again! If you’d like to be considered for the recap next month I would love a link back or you can use my cute button:

<div align="center"><a href="http://www.thriftydecorchick.blogspot.com/" title="TDC Before and After" target="_blank"><img src="http://www.homestoriesatoz.com/wp-content/uploads/2012/03/beforeAndAfterButton_thumb1.gif" alt="TDC Before and After" style="border:none;" /></a></div>


Have fun – I can’t wait to see what you’ve been up to!


October Before and After

Well hello! I’m just gonna start this out right – it’s my birthday week. Yep. ALLLLL week. That’s how I roll.

Also, I’ve been thinking for a while and I’m considering changing this party to once every two or three months instead of once a month. Thoughts? The linky parties just aren’t as popular as they used to be. My favorite part is that some of you get to share and find each other, and I love the highlighting blogs during this recap every month – so I would continue to do that in one way or another. I’m just thinking the linky is dying a slow death. ;) Let me know your thoughts.

OK, before we link up this month it’s time to share a few of the projects from last month! I picked some big ones and some simpler ones – all awesome! First up is Delia’s kitchen redo:

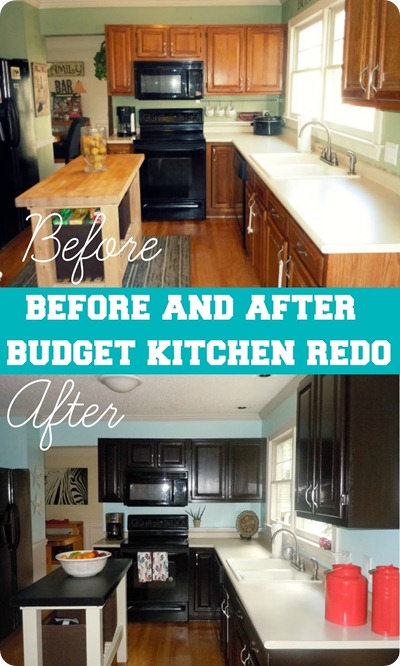
gel stain on cabinets

And when she says budget she means it – this was done with $65! She used gel stain to transform her cabinets and I am in awe! It’s a modern look with more contrast and I think she did a great job. It looks like a different room, for less than $100!

I have mud rooms on the brain (I’m starting ours, finally!!) so I was salivating over Brit’s beautiful built ins:

entry-storage-bench-hooks-basket-bins1

Seriously – this gets me so excited!

By the way, love Brit’s amazing moldings around the window, right? Right. Cristina showed us how to do just this:

easy way to install window trim

There are days I hold myself back from trying to rip out a window sill on a whim to do just this – trying to be patient. There’s a long list ahead of it. :)

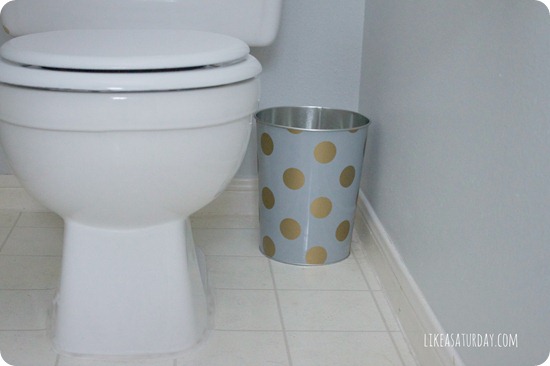
Here’s an easier project for you – Rachel did a super cute redo on a dollar spot trash can:

polka dot trash can

Why didn’t I think of that? That’s what blogs are for. So stinking cute.

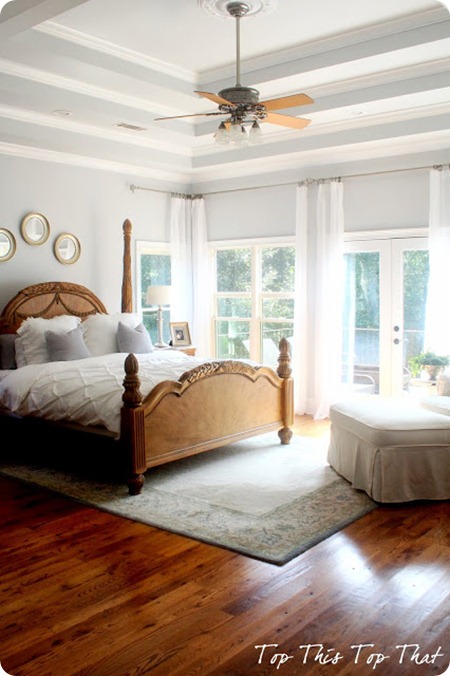
Laura’s beautiful, light bedroom redo (mostly just with paint) had me swooning:

light bedroom Just lovely!

My friend Beckie made over her son’s room and made it a SUPER fun place to be:

hanging beds

Aren’t those beds the coolest? Seriously, so fun!!

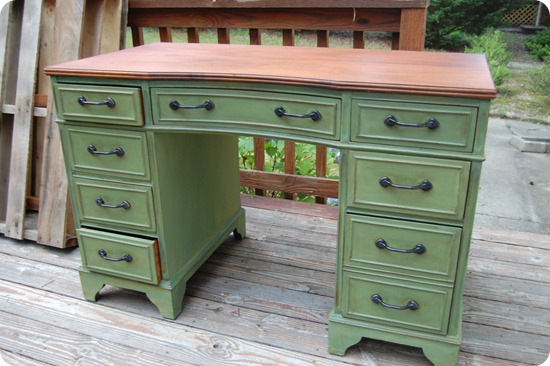
Tracy took a $10 desk and transformed it with milk paint:

milk paint desk

I am so digging that green lately – all greens actually. The top on that dresser turned out beautifully too, make sure to check that out.

And finally, another easy project – I love this one. Lisa made a plastic trophy look like an old vintage one: 

trophy redo

I couldn’t believe the difference! You can find these shiny trophies everywhere too – I see them all over thrift stores. Go here to see her tutorial!

OK, now it’s time to link up again! I can’t even believe it’s October people! If you’d like to be considered for the recap next month I would love a link back or you can use my cute button:

<div align="center"><a href="http://www.thriftydecorchick.blogspot.com/" title="TDC Before and After" target="_blank"><img src="http://www.homestoriesatoz.com/wp-content/uploads/2012/03/beforeAndAfterButton_thumb1.gif" alt="TDC Before and After" style="border:none;" /></a></div>


OK, have fun and link it up!


September before and after!

Happy Labor Day to ya! What do you have planned today? Hubby surprised us with a baseball game and I’m stoked! Just hope the weather holds up.

It’s the first Monday of the month so it’s time for the before and after link up once again…I am amazed that we are done with summer, aren’t you? I think it was one of our best summers yet – it was wonderful and I’m a little sad to see it go.

Anyway, before you link up I’m sharing just a few of the awesome projects from last month – I went a little crazy with them because I just couldn’t stop. ;)

Megan’s before and after is spectacular – what a difference paint and tile makes!:

hexagon wall tile kitchen

I LOVE that wall of tile. Love. And I love the two tone cabinets too.

Jaime has the greatest craft/homework area, especially with the addition of these Ballard Designs lookalike wall shelves:

DIY wall hutch ballard designs

Going UP is the key to getting the most storage out of a space – this is fantastic!

I loved Laura’s living room redo with the board and batten treatment:

board and batten living room

And I’m crushing on that media cabinet!

Heather did what I was thinking and it’s SO stinking cute: 

kitchen towels turned art

She took some fun Target towels and framed them – brilliant right? SO fun.

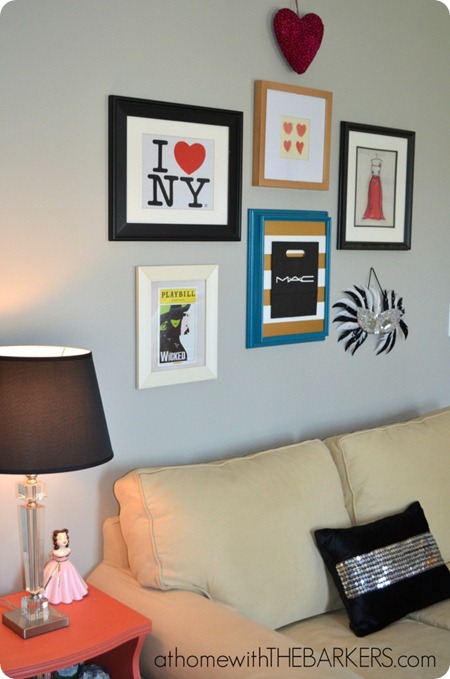
Sonya created a cool NYC-inspired bedroom for her daughter:

NYC-inspired bedroom

You KNOW I’m all over that. ;) She even used fabric from Mood in the room – perfect! :) (And who wouldn’t have loved a sofa in your bedroom at that age? Perfect for a bunch of teenagers.)

There were so many great furniture projects linked up it was hard for me to stop! Pam gives a great tutorial on this Pottery Barn-inspired table:

Pottery Barn DIY picnic table

Someday I’m going to make something similar for our deck – the metal tables don’t hold up well for us.

I LOVED Lauren’s redo on this IKEA wardrobe

ikea wardrobe hack

Just beautiful!

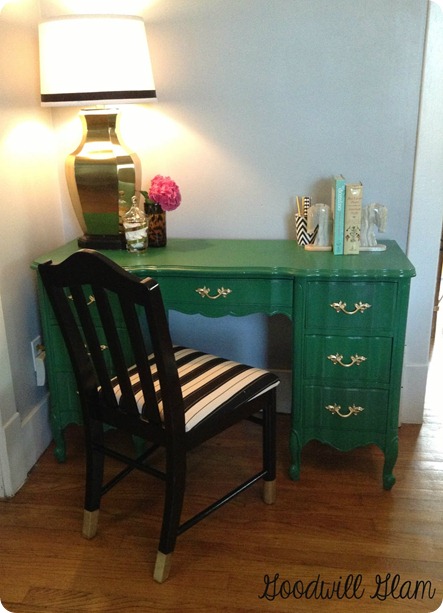
I love when people aren’t afraid to use color – Krista made this old desk totally hip with some kelly green:

kelly green furniture

The chair got a redo too – love those gold legs. ;)

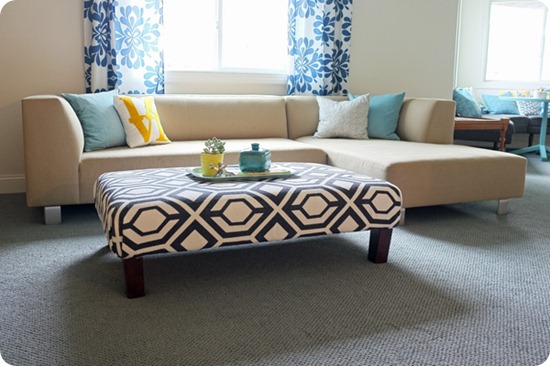
Jackie shared how she covered her ottoman, but it’s not regular fabric: 

recovering ottoman

She used a rug! (I bought a rug a few months ago do something similar with – glad to see it worked!)

And finally, but certainly not least (I had to wrap this up at some point!), Jess shared how she spray painted her bathroom countertops:

spray painting countertops

Yes, spray paint! I can’t even believe how good that looks!

Awesome right? I’m always so inspired by your projects! If you’d like to be considered for a highlight next month please add this button or a link to TDC in your post:

<div align="center"><a href="http://www.thriftydecorchick.blogspot.com/" title="TDC Before and After" target="_blank"><img src="http://www.homestoriesatoz.com/wp-content/uploads/2012/03/beforeAndAfterButton_thumb1.gif" alt="TDC Before and After" style="border:none;" /></a></div>


Now it’s time to link up this month! Any fall-inspired projects out there? I’m ready! Have fun all!


August Before and After!

Hello everybody! Welcome to a new week! I totally failed to mention that with all the hub bub from earlier this month, the before and after link up would be today. Hope you can all still join in and of course check out all of the amazing inspiration!

As always, I like to share a few of those inspirational projects before we kick things off – enjoy!

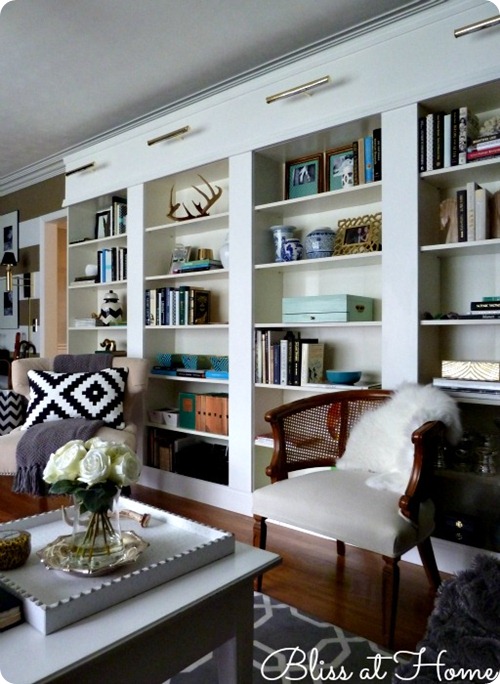
I stopped in my tracks when I saw Kristin’s built in bookcase wall, especially since it came from IKEA:

ikea bookcase built ins

They changed it up to look more custom and it certainly worked. I love the chunky trim on the front and of course those fantastic lights!

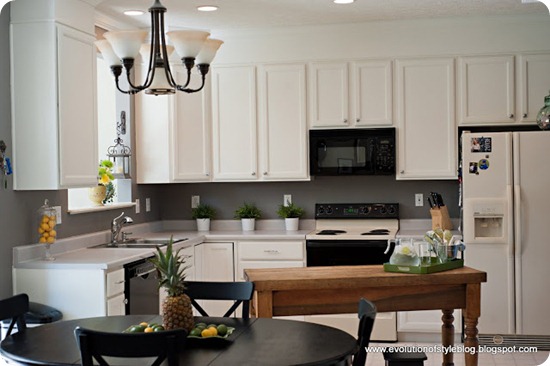
Jenny helped a friend redo her kitchen (Jenny, want to come to my house??) and took it from builder basic to bright:

painting kitchen cabinets

I especially love the dark walls against the white cabinets. AND that wood table as an island.

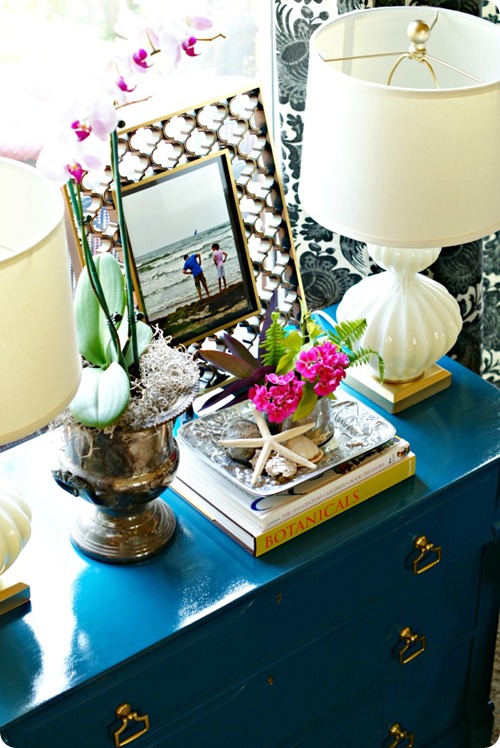
I always say if you want to try out bold colors, start with a piece of furniture. Jennifer redid a dresser with a beautiful peacock blue and I love it!: 

peacock blue dresser

She did a lovely job decorating it as well.

Courtenay shared a do-it-yourself, natural weed killer that I am going to try out:

DIY natural weed killer

Seriously…killing weeds may be one of the best before and afters ever, yes? Who knew this would be so easy?

So I’ve been using a picture hanging tip for a while and haven’t blogged about it yet, but Darnetha did for me:

hanging pictures with wire

It’s for those pictures with a string or wire hanger in the back – which are usually the easiest to hang unless you want them in an exact spot. Check out the simple solution on her blog here.

Oh Legos…how I love/hate thee. I’m always looking for fun solutions to corralling the little buggers, and I loved Cheryl’s idea:

hanging lego storage

My boy is sitting next to me as I type and has declared that he wants this. :)

Finally, but certainly not least, I love the look of “wood tile” and Angie shares how to make a frame for a mirror here:

wood tiled mirror frame

It looks so expensive, but you could do this with scrap wood easy!

If you’d like to be considered for next month’s round up, be sure to include a link to TDC in your post, or you can use this button and code:

<div align="center"><a href="http://www.thriftydecorchick.blogspot.com/" title="TDC Before and After" target="_blank"><img src="http://www.homestoriesatoz.com/wp-content/uploads/2012/03/beforeAndAfterButton_thumb1.gif" alt="TDC Before and After" style="border:none;" /></a></div>


Now it’s time to link up again! As always, you can do so for the next week – have fun and enjoy!