Tampilkan postingan dengan label check her out. Tampilkan semua postingan

Showing off Amy

Hello all! It’s a good day cause it’s Friday! We have trick or treating tonight because we got so much rain last night so that will be fun. The Bub will be a Ghostbuster. He has requested that I play the theme song on my phone as we walk around. :)

I’ve been thinking lately that I want to start up my “show off” posts that I was doing for awhile. I don’t know why I stopped…but it’s time to get them going again! So to do just that today I’m highlighting a blog called Amy’s Casablanca.

She has a beautiful home and I know you’ll find something you’ll love. Her blog is one of those that you find and just. keep. reading. So settle down and enjoy!

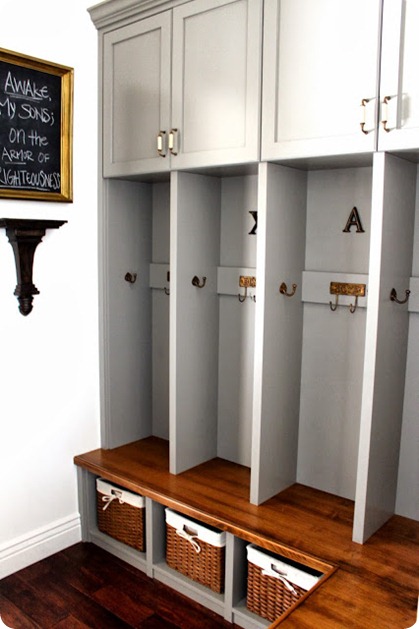
She just posted her new mudroom last week and all the storage has me drooling:

Gray mudroom built ins

Love the brass hooks (that say “boys” – she has four of them!) and the warm wood bench.

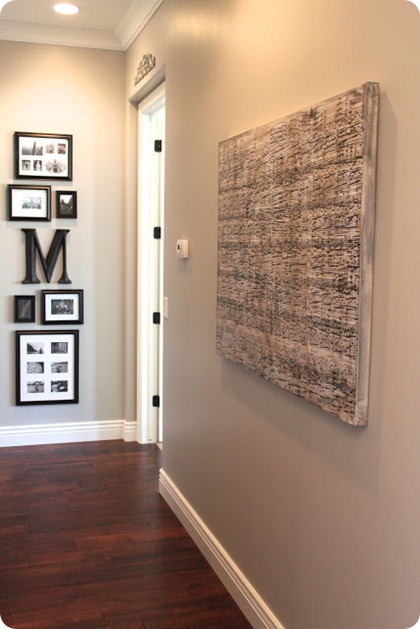
She found sheet music artwork that she loved (for $2000, gah!) and decided to DIY it instead:

DIY sheet music artwork

It turned out beautifully and was so inexpensive! My husband would love this! Go here to see the how-to.

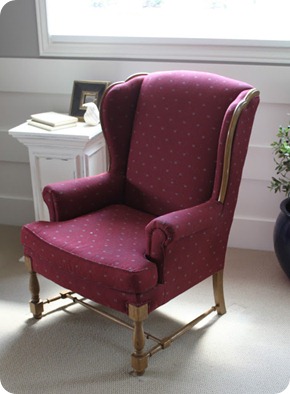
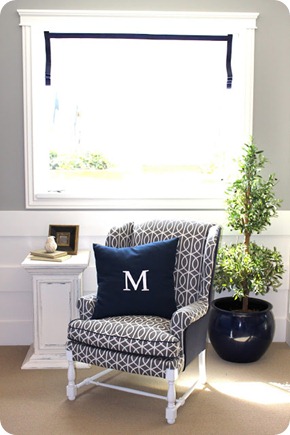
Amy found a chair for a great price and recovered it…but didn’t sew a new cover. She just stapled the new fabric right over the old:

Recovering a chair, no sew

Whuuut! Yes. It looks awesome and NO ripping all the old fabric off!

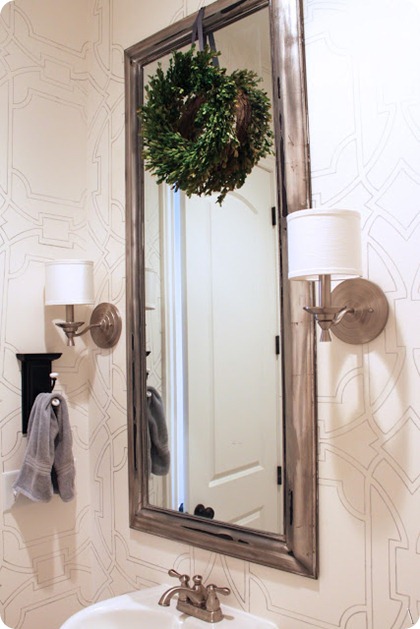
I love her powder room – instead of painting in a stencil she used a few paint pens that ended up costing less than $20:

Stencil with paint pen

And you know how much I love the two sconces on the sides of the mirror. :)

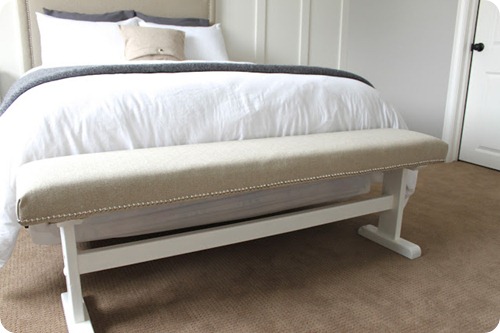
She also made over this Goodwill bench for her guest room:

DIY upholstered bench

It was just a wood bench before, but she upholstered it to add some cush. Love the nailheads too!

Amy’s kitchen is absolutely gorgeous and I LOVE what she did to her bar stools: Gray and white kitchen
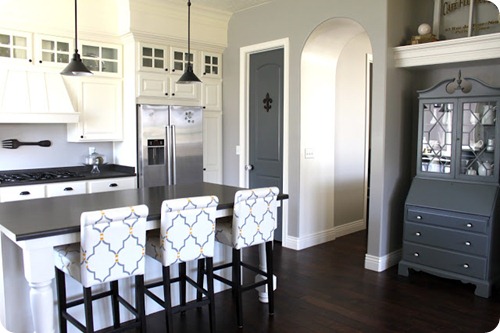
Hint – it’s not fabric. :)

You’ll notice that she is a lover of beautiful white trim and that’s what first drew me to her site, but there’s plenty of other eye candy as well! Check her out and say hello!

Hope you have a great weekend and don’t eat too much candy! I’ll be sure to not do the same.
October Before and After

Well hello! I’m just gonna start this out right – it’s my birthday week. Yep. ALLLLL week. That’s how I roll.

Also, I’ve been thinking for a while and I’m considering changing this party to once every two or three months instead of once a month. Thoughts? The linky parties just aren’t as popular as they used to be. My favorite part is that some of you get to share and find each other, and I love the highlighting blogs during this recap every month – so I would continue to do that in one way or another. I’m just thinking the linky is dying a slow death. ;) Let me know your thoughts.

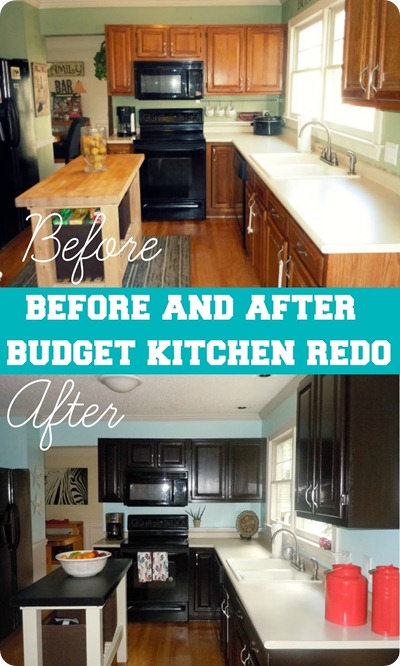
OK, before we link up this month it’s time to share a few of the projects from last month! I picked some big ones and some simpler ones – all awesome! First up is Delia’s kitchen redo:

gel stain on cabinets

And when she says budget she means it – this was done with $65! She used gel stain to transform her cabinets and I am in awe! It’s a modern look with more contrast and I think she did a great job. It looks like a different room, for less than $100!

I have mud rooms on the brain (I’m starting ours, finally!!) so I was salivating over Brit’s beautiful built ins:

entry-storage-bench-hooks-basket-bins1

Seriously – this gets me so excited!

By the way, love Brit’s amazing moldings around the window, right? Right. Cristina showed us how to do just this:

easy way to install window trim

There are days I hold myself back from trying to rip out a window sill on a whim to do just this – trying to be patient. There’s a long list ahead of it. :)

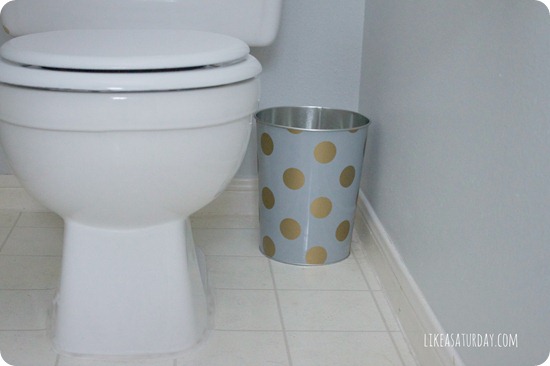
Here’s an easier project for you – Rachel did a super cute redo on a dollar spot trash can:

polka dot trash can

Why didn’t I think of that? That’s what blogs are for. So stinking cute.

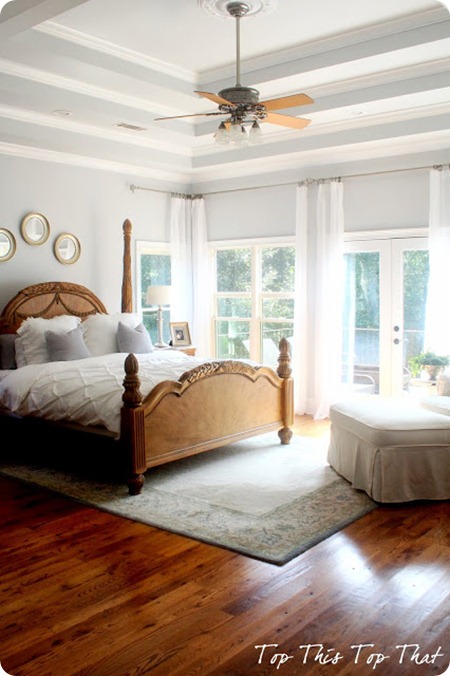
Laura’s beautiful, light bedroom redo (mostly just with paint) had me swooning:

light bedroom Just lovely!

My friend Beckie made over her son’s room and made it a SUPER fun place to be:

hanging beds

Aren’t those beds the coolest? Seriously, so fun!!

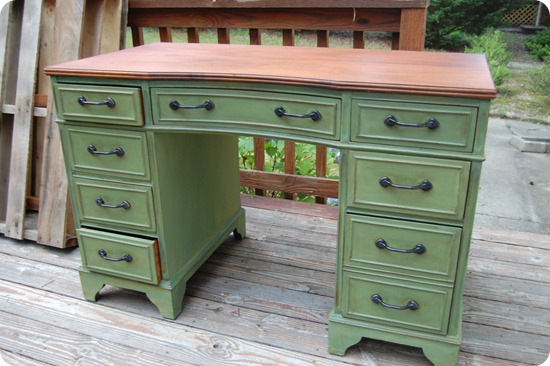
Tracy took a $10 desk and transformed it with milk paint:

milk paint desk

I am so digging that green lately – all greens actually. The top on that dresser turned out beautifully too, make sure to check that out.

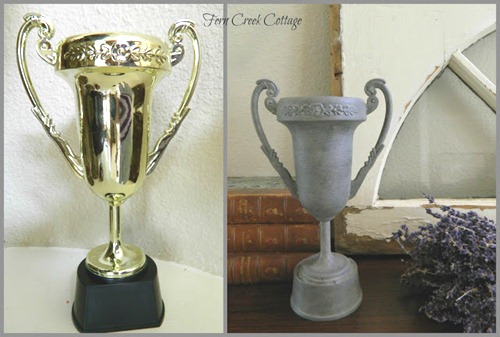
And finally, another easy project – I love this one. Lisa made a plastic trophy look like an old vintage one: 

trophy redo

I couldn’t believe the difference! You can find these shiny trophies everywhere too – I see them all over thrift stores. Go here to see her tutorial!

OK, now it’s time to link up again! I can’t even believe it’s October people! If you’d like to be considered for the recap next month I would love a link back or you can use my cute button:

<div align="center"><a href="http://www.thriftydecorchick.blogspot.com/" title="TDC Before and After" target="_blank"><img src="http://www.homestoriesatoz.com/wp-content/uploads/2012/03/beforeAndAfterButton_thumb1.gif" alt="TDC Before and After" style="border:none;" /></a></div>


OK, have fun and link it up!


(Your) little things make a big difference

Hey there all! I’m enjoying this lovely Thursday and relaxing a bit today – it’s been a crazy busy week as I prepared for a big video shoot with the folks from Home Depot yesterday. We shot it outside on the patio and it was really fun and went great. I will tell you more about it SOON!

For now I want to show off a few of those who linked up to the “Little Things” party I threw at the last minute a few weeks ago. I LOVED this link up – I may do that again. It was so fun to read through the posts!

I found a few (it was hard to stop) to highlight, so check them out!

Carmel at Our Fifth House added some pretty hardware to the back of her chairs for some bling:

hardware on back of chairs

I’ve always wanted to do the same – I just think it’s a cool unexpected touch.

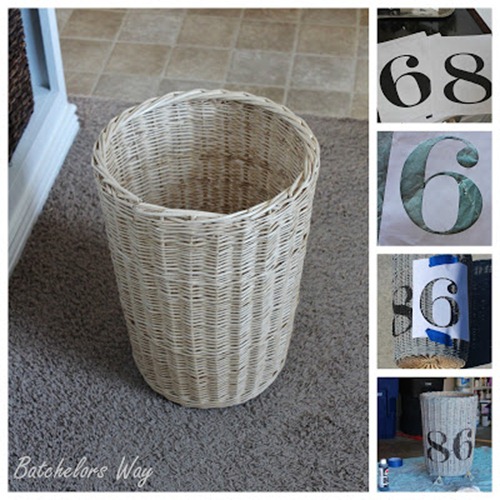
I loved this simple trash can redo at Batchelor’s Way:

trash can with painted numbers

Inspiration for Moms shows how to spray paint lamp shades:

swing arm lamps above bed

I LOVE how that room has come together – so classic!

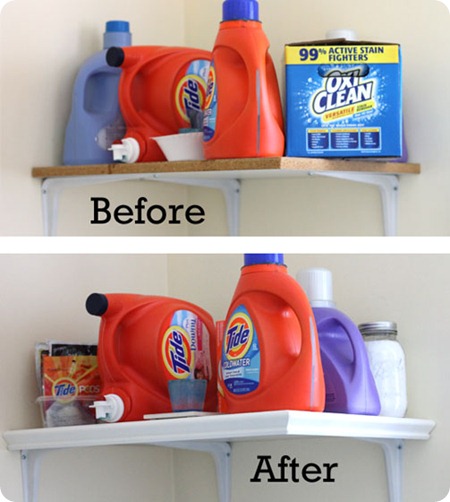
Lori at Family Love Home finished off a basic shelf with some trim:

laundry organization

It’s such a little thing but makes such a big difference, right?

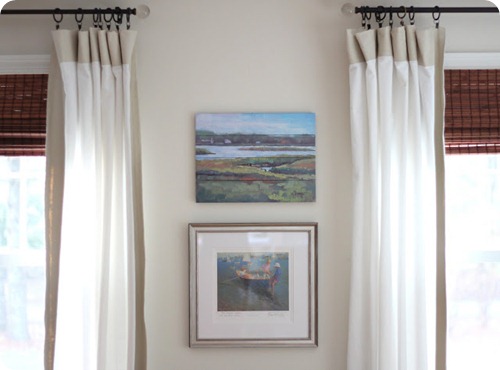
I loved all the pretty vignettes over at Shine Your Light:

art between windows Lisa talks about finding contentment with the little spots in your home, it’s a great read!

Danielle at Storypiece shared how she put together some simple organizational tags:

chalkboard labels

I’ve been trying to decide on simple tags in my craft room and I think this is it!

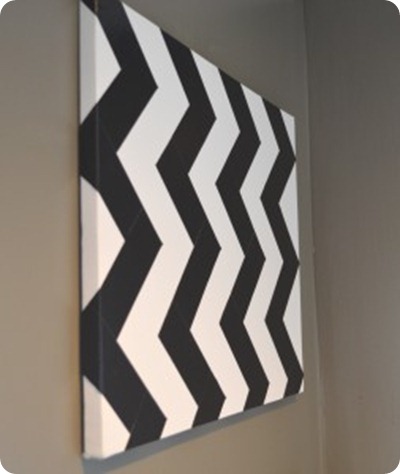
I loved the duct tape art at Complete Package Mama:

duct tape art

Such an easy, inexpensive way to make art!

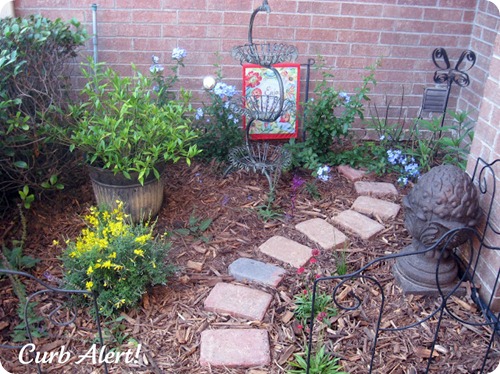
I thought Tami’s little butterfly garden at Curb Alert was so sweet!:

butterfly garden

I love that she used a little corner and created a fun spot for her kids – I so want to do this!

No. 29 Design used some cute IKEA hanging baskets to clean off her kitchen counters:

ikea hanging storage

I have a couple of these and have never found the perfect spot for them – I love this idea!

Proof of the power of spray paint – I love the blue chandy at Three Dogs at Home:

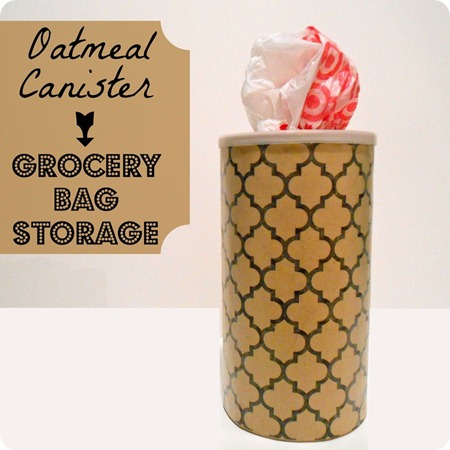
blue spray paint chandelierAnd finally, but certainly not least, I loved this simple organization idea at Heroth Home:food canister organization

Brilliant! Cheap! And cute! What more could you ask for? :)

Ack! I love it all! You guys linked up some great stuff! If you missed this one, go here to check it out!

Thanks for linking up! As always, if you’d like to Pin any of these posts, please do so from their respective sites.

I still say some of the smallest things we do to a space is what makes it. It’s all about the details!

Indy girls

Hello all! First of all, I am sending out love and prayers to those in Boston this week. I am at a loss for words regarding what happened – I just don’t understand the evil.

I’m glued to the TV as I prepare for my presentation at the SNAP! Conference in Utah this week – I’m looking forward to meeting some of my west coast blogging friends while I’m there! (I’m only there for a day so I can get home to an event Friday morning – flying all night long Thursday night!)

The conference got me thinking – there are SO many talented bloggers in Utah, it’s crazy. Up till a few years ago I felt like there’s only a handful of bloggers here in Indiana, but now you are coming out of the woodwork and I LOVE it!

Today I decided I would show off a few of the Indiana bloggers I know of – I’m sure I’m missing some. Give props to my fellow Hoosiers, yo.

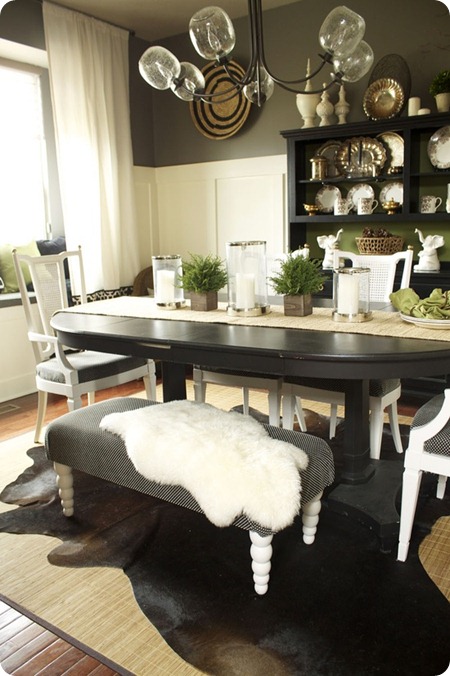
First up is Laurie at Laurie Jones Home. Her house is just beautiful, I especially loved her recent dining room update

board and batten with dark walls

Isn’t that gorgeous? Looks like a magazine! I love that deep color on the walls.

Chelsea at Two Twenty One is an IU girl (I’m a fan by osmosis – I’m a Ball State grad but my sis, bff and hubby are IU alums) and her recent home office makeover is one of my favorites:

bright ikea office

So darn pretty and bright! Love it!

Of course, I have to include my girl Beckie – we met years ago and have been friends since. She’s a crafty goddess and her new craft room is fantastic:

built ins craft room

All that storage is glorious! Did I mention she built it herself?

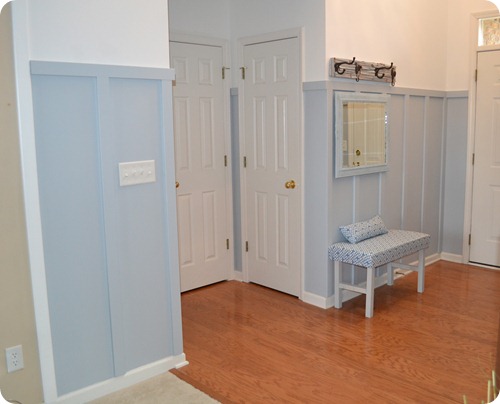
Jessie at Imperfectly Polished shares some great projects but I think her foyer is my favorite:

blue board and batten

It’s unusual that you see color on the trim and white walls – it’s exactly what I’m planning for the mud room and I love it!

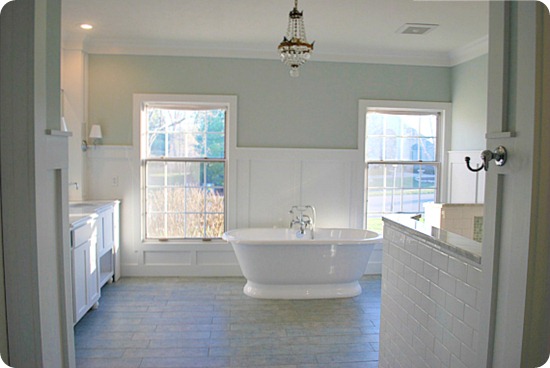
Prepare yourself for the gorgeous master bath over at Sweet Chaos:

luxury master bathroom

I met Carolyn and her friend Valerie years ago at Home Goods – she tells the story well here. ;) Turns out we go way back and didn’t realize it, and the weirdness keeps happening cause one of her friends is now the Bub’s teacher. We were MEANT to connect, obviously.

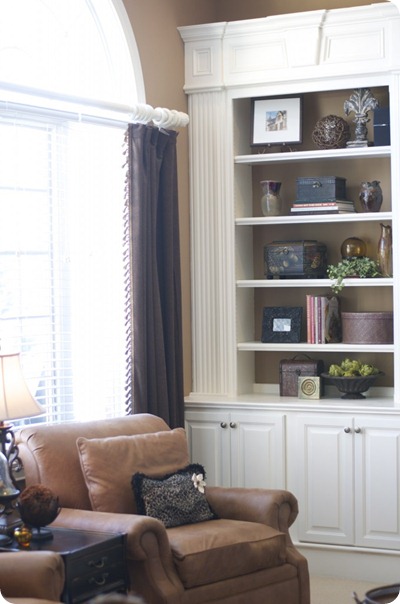
I met Kerry at Home Crush Blog a few weeks ago at the vintage mart meet up – it’s SO nice to meet local bloggers and readers! She does an amazing job at accessorizing – check out her beautiful built ins:

decorating a bookcase

She also shares some really yummy recipes here.

Liz from Hoosier Homemade is the queen of beautiful cupcakes:

flowerpot cupcakes

She makes me want to bake, seriously. Look at how adorable they are!

I met Julia at Sunbeam Yellow at the vintage mart too – she’s taking a break from blogging right now but I loved her video makeup reviews. She shares some DIY and crafty goodness too!

I’m sure I’m forgetting a bunch of Hoosier bloggers, so if you are one, feel free to share a link in the comments! I apologize if I missed you! I’m off to try to finish up a DIY project before I start packing (at midnight tonight – procrastinate is my middle name.)

Showing off Sarah

Howdy all! It’s slowly but surely warming up here…just a tad. And it’s been sunny. I’ll take it!!

A few weeks ago I was honored to be asked to join in on the Creating with the Stars challenge over at East Coast Creative. I was partnered up with a blogger who would be completing the projects and I was there (virtually anyway) to offer support and ideas.

Well, my blogger was a rock star – probably because her name is Sarah. ;) She blogs over at While They Snooze…love that title.

Allow me to brag on her and her projects a bit, won’t you? The first week she knocked it out of the park with a project that started with a tire. Yep, a big, heavy tire:

She found it on the side of the road and found a use for it – I love the way her mind works!

Her and her hubby made a base out of plywood, then cut out some legs with a jigsaw as well: 

DIY tire table

They created a top with the plywood so it could actually be used as a table:

DIY tire table

After that was done it was time to hide the tire. You didn’t think she was keeping it, right? ;)

It involved lots and lots of rope:

DIY tire table

Who would ever think that was a tire under there? And it’s the perfect height and size for next to a chair. Totally funky and fun and pretty much free! (The whole tutorial is up at ECC here.)

I think her next project was my favorite one for the challenge – she was inspired by plate art from Anthropologie that was…get ready for this -- $7,500. Choke.

She made her own with 30 dollar store plates and a few other supplies:

plate art

I know, brilliant, right?

She hung each plate, making sure each line was level:

plate art

Then she used a projector to get an image up on the wall and large enough to trace with a Sharpie:

Amazing! It really came out beautifully: 

What I love is that you could do this with any image – the possibilities are endless! You can see more details on how she did this art here.
 
For the last project Sarah did a beautiful water color looking map table, and I LOVE it:
map table
I’m sure she’ll be doing a post on that one too, be sure to check out her blog for the details.
 
Told you she is crazy talented – and did I mention she’s got a full time job and kids? And came up with these ideas and completed them each in less than a week?? I was a little in awe, seriously.
 
Here are a couple other projects from her blog I thought you would like as well – a totally free stencil wall:
DIY wall stencilDIY_Wall_Stencil_ 
Who needs a stencil when you have cardboard? For real.
 
And I think this has to be one of my favorite projects of hers – the DIY metallic art:
 DIY_metallic_art
Just gorgeous! I’ve been trying to figure out where I do the same project since I first saw this post.
 
The talent out in blogland continues to astound me! So much inspiration, so little time to copy it all. ;)
 
Be sure to check out Sarah’s blog here, and you can cheer on the remaining contestants over at East Coast Creative here!
 
I’ll be back tomorrow with some organization in the basement, whooee!

Mudroom and entry eye candy

Hey heyyyy! How are you? I’m great and looking forward to the weekend after a crazy week here. I’m so excited to show you progress in the house, but I still have so much to do get any of the projects actually DONE.

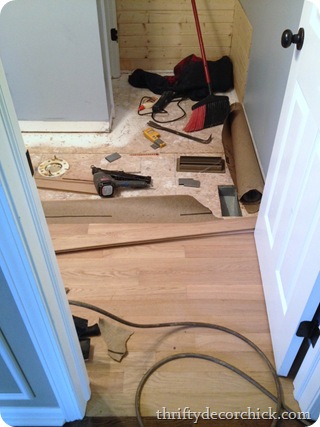
Remember that powder room that has sat undone for about two years now? Well, there’s been many hold ups, but this one was the biggest, at least for the past six months or so:

hardwood flooring

We’re finally getting new floors put in there! So excited, but it’s just the tip of the iceberg – how can such a little room take so much work??

Anyhoo, today I’m recapping your beautiful foyers and mudrooms from our last Show Us Your House linky in November. Weren’t those fun? I’m not doing them this year, but maybe we’ll pick it up again in 2014. I think I forgot one that was supposed to happen in December, I need to look back on that.

So I had the great joy of checking out your links and picking out just a few to brag on today. You all are SO talented, I LOVE IT!

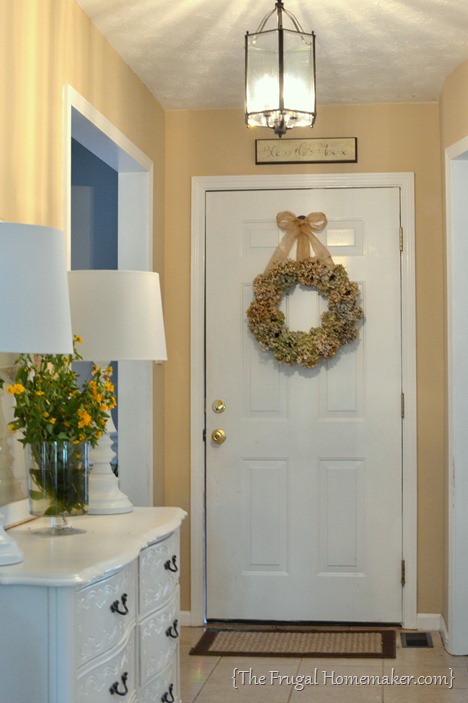
Christina shared how she made this lovely dried hydrangea wreath:

diy hydrangea wreath

It was so simple and I love how full it is – it looks so pretty on the back of her door with the burlap ribbon! (Love that dresser, the lamps and the light fixture too.)

I was impressed with Crystal’s idea to make a bench for her foyer:

DIY bench

And I am crushing hard on that blue door!

OK, I know many of us love bright white cabinetry and built ins, but I can appreciate a beautiful dark piece too, and I think I said “Wow” out loud when I saw Julie’s gorgeous mud room:

dark wood mud room cubby

Isn’t that fabulous?? LOVE that wall color and the houndstooth bench cushion is the perfect finishing touch.

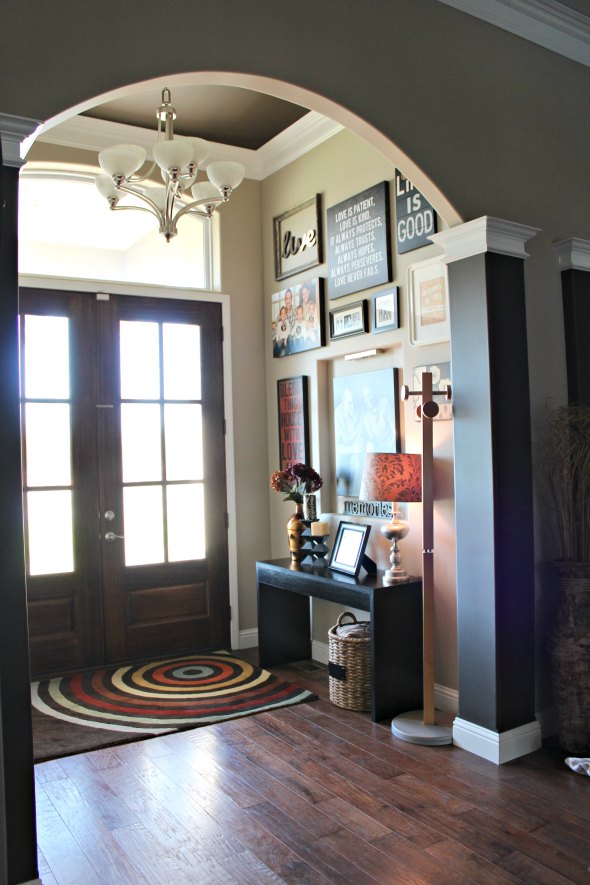
I loved all the color Mandy used in her foyer, and the well done gallery wall:

front entryway decorating ideas

And those front doors? My dream doors. Double glass-paned doors. Dreamy.

Cristina used some reworked some kitchen cabinets and put them in her mud/laundry room for added storage:

mud room butlers pantry

She also made it another useful space – it serves as a bar/butler’s pantry kind of space too. She’s brilliant. And handy.

Board and batten is HUGE – especially in foyers and mud rooms. It  must have something to do with how cute the hooks look with it. ;) I know many of you wonder how it would work with textured walls and Aimee shows you how they addressed that issue here:

board and batten textured walls

It’s a little bit more work, but the finished result looks fantastic!

I loved every bit of Pam’s foyer – it’s just so pretty and well put together:

decorating the foyer

Love the pair of chairs sitting there.

Anna made a smaller foyer work for them, with hooks and awesome shoe storage from IKEA (I love that thing!):

shoe storage

Love the frames hung up high over the tall board and batten.

Hannah stenciled her long entry hallway and it made a big impact:

stenciled foyer

That and the trim on the walls makes it so crisp and pretty!

And finally, but certainly not least, I loved Kelly’s whole mudroom space and it’s coastal theme:

coastal mud room

Those oars are awesome, right? She got them from Etsy and finished them herself! I thought for sure they were vintage. And I love what she used to make those pillows too, click over to find out. ;)

Again, you guys wow me! So impressed and honored that you link up at TDC.

I’m off to start a weekend of painting, staining and DIY! Or maybe I’ll just take a nap. That’s sounding mighty good right now. Either way, have a GREAT one and I’ll see ya on the flip side!

**As always, please visit the respective sites if you’d like to pin these images.