Tampilkan postingan dengan label I am cooking?. Tampilkan semua postingan

Easiest, yummiest biscuits…ever

So Thanksgiving is only two weeks away! What in the world? And that means less than six weeks till Christmas. Ahhhhh! Are you freaking out yet?

Don’t freak out. Making these will make you feel better, I PROMISE.

I blogged about these little puffs of goodness years ago but didn’t really show them to you, so I’m dedicating a whole post to them because they are just. that. good. They would be a perfect addition to your Thanksgiving feast, and are so easy to make.

Most of us have a crutch when it comes to certain foods, right? Like sweets or chips or whatever. Mine is bread. Anything bread. Buttered, toasted…any shape, any color, flavor, I’m there. And dear Lord…the rolls at Texas Roadhouse? Forget about it.

These little biscuits are SO heavenly. They taste similar to the cheddar biscuits at Red Lobster. Is your mouth watering yet?

The best part is they are soooo simple. Three ingredients:

Easy biscuit recipe

One cup self-rising flour
1/2 cup butter (softened)
1 package (8 oz) softened cream cheese

That’s it! Now I added a couple extras this time to amp them up even more (they don’t need anything but I like to play around with tried and true recipes).

You just mix the three ingredients together. It will be very thick:

Easy biscuit recipe

One little addition I made this time was a bit of shredded cheddar cheese. Just a sprinkle, maybe a few tablespoons?

I scooped them out on the (greased) pan using my ice cream scoop:

Ice cream scooper for baking

I use this more for baking than I do for ice cream. ;)

When I had just a bit left to scoop out, I added some dill to the mixture:

Dill in biscuits

I LOVE dill and my sis suggested it – brilliant. I only added it to the last few cause I didn’t think hubby would like them with it.

This recipe makes over a dozen biscuits because I make them smaller. When you put them on the baking sheet you can place them pretty close together because they don’t spread much while baking.

Bake them in a preheated oven at 400 degrees for 15-17 minutes and then ENJOY their buttery, crumbly goodness:

Easy biscuit recipe with cheddar

Go ahead and eat one or three right off the baking sheet. I wouldn’t know anything about that.

They are seriously amazing. I make them when we entertain and they’re always a hit. LOVE.

If you’re planning your Thanksgiving meal they would be a great addition – let me know if you try them out! :)

What are you making for your Thanksgiving feast?

EASY crockpot applesauce

What is up? Happy Friday to ya! So fall officially starts Sunday! It’s been “official” for me since the temps hit the 70’s around here, but whatev. Details.

Last weekend we went apple picking, it’s a long-standing tradition for us. Most of the apple varieties weren’t ready (I thought it was pretty early to go picking!), but that just means we’ll have to go back. Darn. We just picked mostly Jonathan’s that day and ended up with 15 pounds of apples. I always go a little overboard. :)

This year I wanted to try something I’ve always wanted to make. Of course I thought it would be a long laborious process involving smashing 25 apples by hand or something like that, but I was OH so wrong.

When I mentioned that I was going to make applesauce earlier this week, my friend Cristina mentioned she was making some. I asked for her recipe and she was all, oh I just throw the apples in a pot with some cinnamon and it’s totally easy and MIND BLOWN.

I had no idea! So I did a little research and found she was totally right. (Not that I didn’t believe her of course.) Here’s the recipe I used and of course I used my crockpot – I threw it all in and came home to applesauce. You can’t beat that.

You only need three ingredients – ten to 12 apples (I grabbed 12 because some of mine were small, but ended up using 11), sugar and cinnamon:

crockpot applesauce

The first step is the only one that takes time – you need to peel, core and cut up the apples. Thankfully I’ve had an apple peeler/corer/slicer for years:

apple peeler slicer corer

I honestly think I’ve had this for about 12 years and I rarely use it. (It’s called Peelota. Har.) But it’s one of those things you don’t get rid of because when you need it, you really need it. This is one of those times.

This doodad ROCKS:

apple slicer corer

It made quick work of getting them all ready to go. They looked like this when I was done:

easy crockpot applesauce

I just cut the apples in half from the top. If you don’t have one of these you’ll want to slice them up or just cut them into chunks.

I dumped them all in the crockpot and then added 1/2 cup of sugar and didn’t even measure the cinnamon, I just sprinkled (a lot):

simple crockpot applesauce

I added a dash of nutmeg too – because I’m wild and crazy like that.

I didn’t even stir – just left it as it was, put the lid on and set it to cook on high for four hours. We left the house for the evening, came home and could smell it…wow!

I stirred it up a bit and was freaking (in a good way), because it looked SO GOOD:

easy applesauce recipe

Here’s the thing – I’ve never heated up applesauce at home. Have you? Uhh…it’s amazing!

It was incredibly yummy. Like a dessert really – I like it chunky (name that movie) so I left it as is. Hubby and I both stood over our bowls in the kitchen and stuffed our faces with it. And then did it again later, and I’m doing it again right. now.

SO GOOD, so stupid easy:

Simple crockpot applesauce @ thriftydecorchick.com

And not too horrible for you either!

This batch is almost gone already but I’ll be making more for sure and want to can it when I do. What a lovely little gift for the holidays, right?

Next time I’m going to try it with just a 1/4 cup of sugar though – I really don’t think it needs half a cup. I’ll let you know how it turns out.

Here’s the recipe for you again:

10-12 apples -- peeled, sliced, cored
1/2 cup sugar (less would be fine)
sprinkle cinnamon on top – at least a teaspoon
dash of nutmeg (not needed)

There you go – have I blown your mind? Or all you all, duh Sarah…it’s totally easy. I really had no idea. Now go get some apples and cook it up! You will thank me. :) Have a GREAT weekend!

Best sangria ever

Welcome to Friday, whoot! Hope your week was great and you have an even better weekend planned!

First up, I’m over at SAS Interiors today sharing how I strive to create a meaningful home:

CreatingaMeaningfulHome_BlogButton

It’s a great series with some fabulous bloggers contributing – check it out! Thanks for having me Jenna!

So today I’m sharing one of my very favorite recipes…of the liquid kind. :) I figured I’d post it today so maybe you can make it yourselves and toast to the weekend, yes?

Aw yeah.

So a lovely reader shared this sangria with me years ago – I needed a good one for an event coming up and sent out the call on Twitter. I’ve tried a lot of sangria in my day (well not a LOT, but a few…you know. Whatever.) and it’s hard to find one that has the right amount of sweet and fruitiness.

Here’s the thing – the initial cost of the ingredients is a little expensive. The liquor needed is about 20 bucks and then you’ll need to buy a few things to make it each time (most of which we already have). But the expensive stuff will last you a really really long time – so over time it’s not too crazy bad.

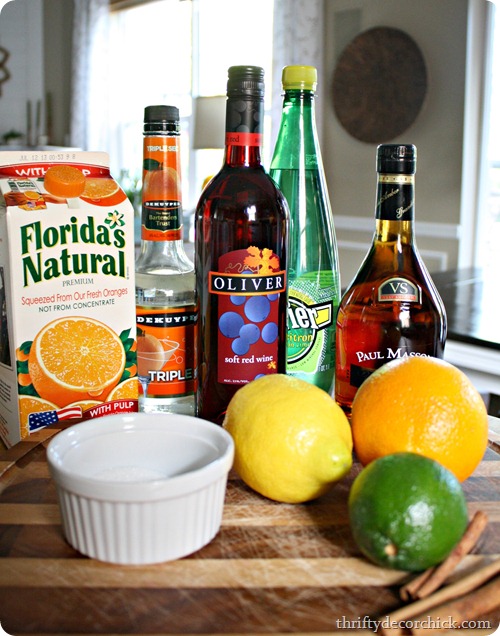
Here’s what you’ll need:

classic sangria recipe

1 1/2 cup orange juice
2 tbsp triple sec
1/2 cup brandy
1 bottle (750 ml) fruity red wine (the cheaper, the sweeter, the better) :)
3 tbsp sugar
2-3 cinnamon sticks
lemon/orange/lime or even strawberry, pineapple, whatever!
1 1/2 cup chilled lemon/lime sparkling water

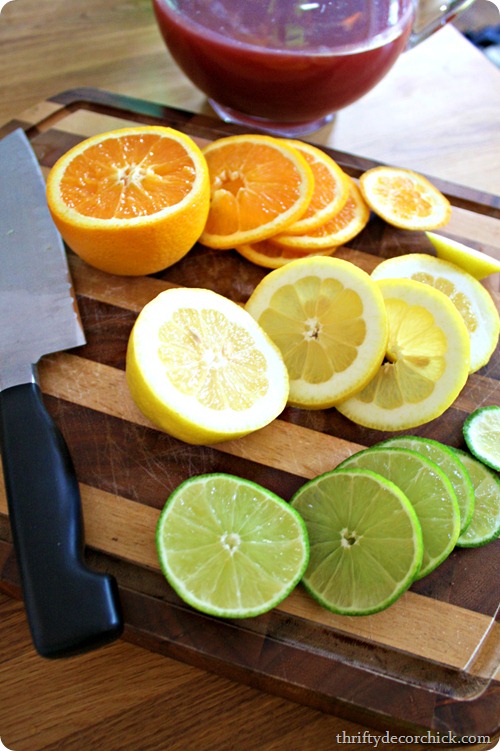
You’ll want to mix the first six ingredients (hold off on the lemon/lime water) and stir. Next up, cut the fruit into slices:

classic sangria recipe

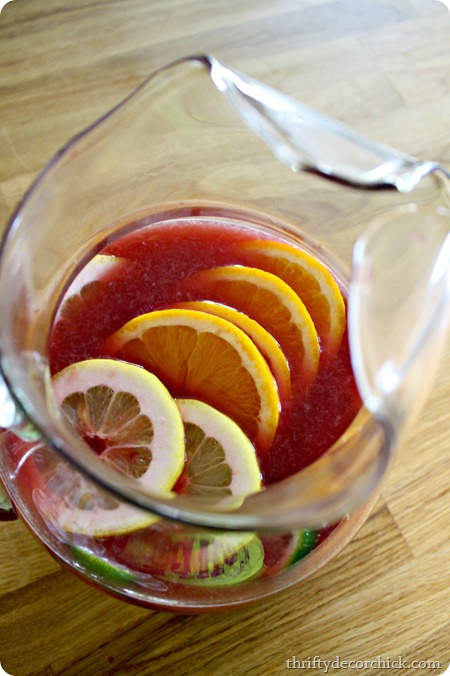
One of the reasons I love this drink is because it’s such a pretty one to serve. :)

Just make sure to clean the fruit well before slicing since you will be adding it to the drink:

classic sangria recipe

Side note – we like our orange juice with pulp. Usually I make this with OJ without it (it’s clearer) but I was using what we had this time.

This is where I like to let it steep in the fridge for a while – preferably over night. But it is still super delicious right away too. My sister-in-law had some right after I mixed it last night and it was yummy, but letting it sit really deepens the flavor.

Right before you serve it (after letting it steep for awhile or right after mixing everything), add the lemon lime sparkling water – this is what gives it a slight fizz. So good!

I make this for every party or girl’s night and it’s always a hit. My SIL and I were reminiscing tonight how my father-in-law loved sangria and would always order it when we went out to new restaurants. Thing is he would always turn up his nose after trying it and it made us laugh every time – he could never find one that was just right.

But I’m proud to say he LOVED my sangria. ;)

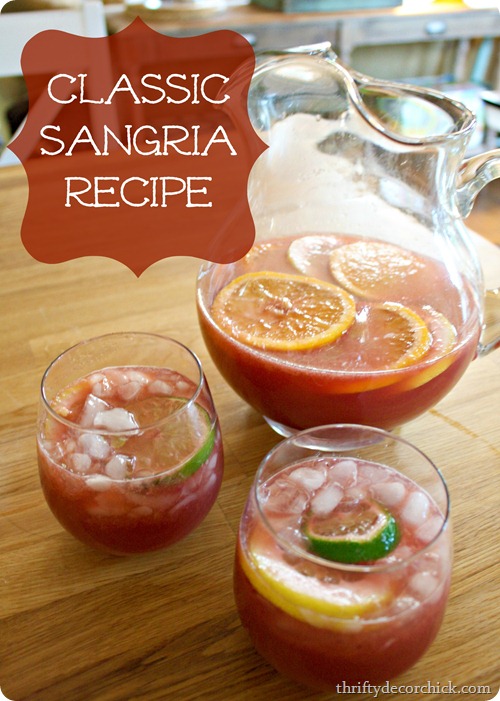
Hope you’ll try it and love it too!: best sangria recipe

Have a great weekend, cheers!   

Easiest dessert ever!

OK peeps, I don’t share recipes around here often but when I do you know it’s going to be either really easy or really good or really easy and good. This is both, score!!

I don’t have a source for this, (a friend reposted it on Facebook) so if you’ve seen it somewhere let me know. I don’t even know what to call it? Pineapple angel food cake? Pineangel food cake? Pineapple fluffy goodness?

I don’t know. It’s yummy though, and stupid easy. You just take a box of angel food cake and a 20 ounce can of pineapple:

easy pineapple dessert @ thriftydecorchick.com

I’m sure you could use fresh pineapple (just keep the juices!) but wow…this is supposed to be easy remember? ;)

You just dump the pineapple in with the cake mix:

pineapple angel food cake dessert

And that’s the only ingredients! When I first saw this I thought, wow, that’s crazy easy! And then I remembered you only need water with the angel food cake mix anyway, but I digress…it’s still easy.

The pineapple juice will react with the mix and make it super frothy and fluffy – it was fun to watch:

easy pineapple cake dessert

The more you mix it the bigger it will get!

Then you just pour it into a pan and bake for 30 minutes at 350 degrees. That’s it! (I ended up using a 9 by 13 pan.)

I starting mauwing on it right out of the pan when it was done and it was SO GOOD warm. Wow. YUMMO.

But I soon realized I could make a little parfait:

angel food cake and pineapple easy dessert

I just layered the pineapple goodness and whipped topping and it was SO. good. The cake was just fine at room temp but like I said, I loved it heated up a little.

So there you go – a super easy, really yummy dessert. Perfect for this time of year with the pineapple and great for when you have people coming by and need something fast:

angel food cake and pineapple, easy dessert @ thriftydecorchick.com

Or when you’re home alone in the middle of the day. Whatever.

;)

I’m off to get more ingredients today so I can make it again this weekend. Have you tried this easy dessert? Any other simple sweet recipes you’ve tried? (Some readers on Facebook said they have tried it with cherry filling too – doing that next!)

Avocado banana ice cream

OK, bear with me here. When I first heard about this dessert I was pretty cynical. I like bananas. I LOVE avocados. But together? Frozen? Um, not exactly appetizing.

But because I have been known to eat an entire vat of guacamole all by myself, and I have been known to do this often, I just had to try it.

A friend told me about it earlier this week and was raving. She said she couldn’t believe how good it was. I was so curious I didn’t waste much time making it myself.

My friend found it on Pinterest, then I got home and searched and found it immediately as well. We both used the recipe found here at Averie Cooks

I had everything but the avocado, so I picked up a ripe one today. It took minutes to make. And did I mention the best part? You do not need an ice cream machine!

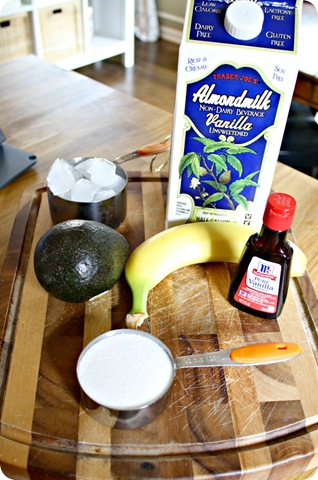
There are only six ingredients:

Avocado Banana Ice Cream:

1 ripe avocado
1 medium banana
1/2 cup milk
1 cup ice (optional but I think it helps give it a frozen consistency)
1/2 cup sugar (I think you could do a little less. I may try 1/4 next time.)
tsp vanilla

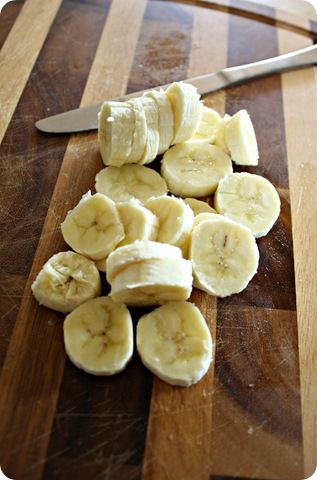
The only time in this recipe is the freezing – cut up the banana and freeze it beforehand:

Mine was mostly frozen when I made it, but not completely. I was a little anxious to try it. :)

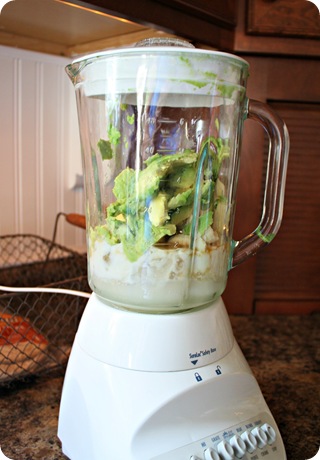
You just dump everything in the blender:

blender ice cream

Looks SO appetizing, I know. ;) Just WAIT.

Blend till smooth.

This is when I noticed a tiny bit of avocado on the sides of the blender and while pushing them in to the mixture I gave it at quick taste. Even drawing the spoon up to my mouth, I didn’t believe it was going to be good.

But let. me. tell. you. IT IS GOOD. I quite literally said out loud, “NO way.” And then I tasted it again to make sure.

Um, I’m not kidding you, this is amazing. I tried it again. And again.

Mine wasn’t quite frozen enough, (frosty, but not frozen) so I poured it into a container, tasted it some more. Put it in the freezer, couldn’t stop thinking about it, went back 20 minutes later to check on it (duh, not frozen), tried it again.

Still GOOD.

About 90 minutes later I gave up and got it out:

No I didn’t eat the whole bowl. I wanted to.

OK seriously, it’s scrumptious. Smooth and creamy and sweet. It would have been just as good as a smoothie too (just don’t freeze afterwards). I’ve also heard that it does not get brown with time.

I am going to play with adding a little less sugar next time and maybe just a tad less vanilla. I think it would be just as flavorful with a little less.

It’s been smokin’ hot today and will be this weekend, so I’m going to try and make it last. ;)

I mentioned it on Facebook earlier this week and some were talking about avocado and chocolate? A pudding I think? I’ll believe anything after trying this. Have you tried this ice cream? Tried a weird food combo that was surprisingly good? Two of mine – ranch dressing on pizza and Wendy’s fries dipped in a chocolate frosty. ;) YUM.

Hope you have a LOVELY Memorial Day weekend!

Easy peasy banana bread

easy banana bread

Helloooo there! I’m back today with a very quick, YUMMY, very easy recipe – and I just had to share it because for years I thought it was way harder than this.

I love when I think something is difficult for so long and then do a quick search on the net and realize it’s not hard at all. Or maybe I hate when that happens, because I’ve denied myself of awesome all that time.

Whatever. This one is scrumptious and easy.

I had some bananas that were overripe, so before I threw them out I grabbed my phone and searched “easy banana bread recipe.” This one on Simply Recipes popped right up and I just had to share!

Can you believe I’ve never made banana bread? Ever??

It seriously took five minutes to mix everything:

banana bread ingredients

(I took this after I had already mashed the bananas, these are not quite ripe yet.)

You’ll need:

  • 3 or 4 ripe bananas, smashed (I used four)
    1/3 cup melted butter
    1 cup sugar (they say you can easily use 3/4 cup, I went with a cup)
    1 egg, beaten
    1 teaspoon vanilla
    1 teaspoon baking soda
    Pinch of salt
    1 1/2 cups of all-purpose flour

I love that the ingredients are so basic – I had everything I needed on hand. How often does that happen when you want something specific?

First mash up the bananas (I used a potato masher), and then add the melted butter:

YUM, banana goo!

Then mix in the sugar, egg, and vanilla:

On a side note, I’m a put-away-as I-go kind of cook. Do you put ingredients right away or wait till the whole shebang is done at the end? Leaving them out kind of gives me hives. :)

Add the baking soda and salt and mix:

Add the flour last, bake at 350 in a preheated oven for one hour and you’re done!

I added a bit of cinnamon at the end too, just because cinnamon is good in just about any baked item. In my opinion.

I don’t care for nuts in banana bread, so this recipe was perfect for me. If you like them in your nanner bread, I’m guessing about half a cup would be perfect.

The recipe specifies an 8” by 4” loaf pan, but all we have is a 9 by 5. Because of that I baked it for about 50 minutes instead of an hour.

It came out perfect:

easy banana bread recipe

I may or may not have eaten about five a couple pieces by the time I took this picture. :)

It is SO good. Especially yummy warm from the oven, with a little butter…  Ohhhh…um, what was I saying? I may add a few raisins in my next loaf – I think that would be amahzing.

I thought banana bread was much more complicated than this, and when I realized it wasn’t (and it was GOOD), I just had to share! Have you discovered an easy recipe you thought would be more difficult?

Now go forth and bake!!

Thank you Pinterest!

OK peeps…I had a whole other post planned for this evening. But then fate stepped in, in the form of our old buddy Pinterest.

pinterest quote

A few days ago I pinned a simple little recipe for easy apple dumplings:


Tonight I made them. And my life has been changed forever.

OK, I may be going a little overboard here. But for the love of all that is good -- how can something so simple and easy taste so good?

SO. GOOD.

It takes about five minutes to prepare, 30 to cook. Bake? Cook. Whatever.

I’ll share the recipe as I found it first, and then let you know how I changed it up.

You’ll need:

2 Granny Smith apples
1 tsp vanilla
cinnamon
2 packages crescent rolls
1 1/2 cups sugar (see below for more on this)
2 sticks butter (just do it)
12 ounces Mountain Dew

To start, peel and slice your apple(s). I have one like this that makes the slicing super easy:

image

I halved this recipe, so I used exactly half of everything. (Duh.) One apple, one stick butter, 6 oz of the Dew, 3/4 cup sugar, on package of crescent rolls and a dash of vanilla.

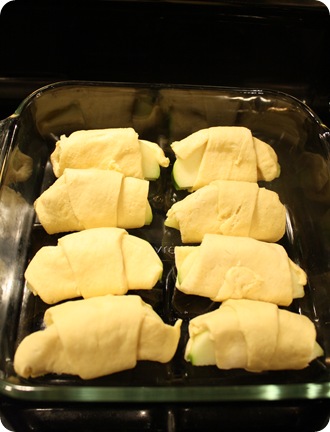
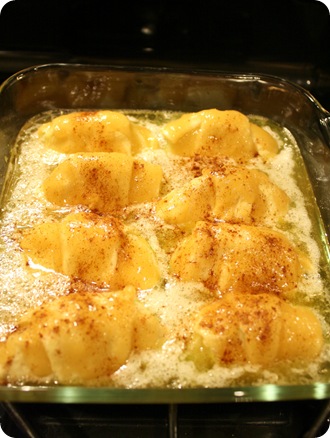
Just wrap your apple slices with the crescent rolls and place them in a baking dish:

Again, nighttime pics so they stink. :)

Then you mix up the sugar, (melted) butter and vanilla in a separate bowl. This part is where I think I made these even more spectacular, on accident. ;) I went to get my sugar and realized we only had a bit left – about half of the 3/4 that I needed. I figured brown sugar might work, so I actually used half brown sugar/half sugar to make up the 3/4 cup.

I think that made these extra AMAZING. ;)

Anyway, you mix all that up and then pour that mixture all over the “dumplings,” then take the Mountain Dew and pour that over everything too:

apple dumplings mountain dew

It will look kinda grody, but oh JUST YOU WAIT.

Sprinkle some cinnamon over the top and put them in a 350 degree oven for 30 to 40 minutes. I took ours out at 36 minutes in.

I doubted them when I first saw them – they looked like they would be total mush all the way through. But I persevered people. I pushed on.

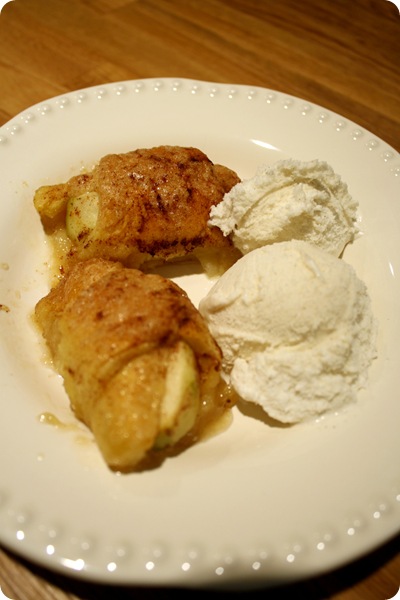
And I added some ice cream:

easy apple dumplings

They were SO GOOD. I cannot express how good. Like, how did I make something so good, GOOD.

The bottom is mushy, the apple is tender, the top is crispy and flaky and scrumptious!

Yes. That good. I’m sorry, do I need to say it again?

Go get some apples and brown sugar and make them immediately. You can thank me by making some more and sending them to me. Cause ours may be (almost) gone already.

:)

Have I mentioned how much I love Pinterest?

Have you tried these easy apple dumplings yet? Any other easy peasy recipes I can’t live one more day without?

Comfort Foods

Can someone check my temperature? For real – I have been a cooking fool over the past week. Like, using my crock pot more than I have in the past year.

In a week.

And this, the week we have no kitchen. Well, we have one, but it’s kinda half of one – I have to walk across the house to get to the fridge in the garage. Which makes cooking way more exercise than usual.

Maybe I’m burning off the calories of this good stuff?? Maybe not.

And really, is crock pot cooking really cooking? When I do next to nothing and it does it all, I feel like I’m cheating when I say I’ve been cooking.

All I know is I’ve been making yummy meals and I’m loving it. Imagine how much I’ll love it when I have my island and garbage can and refrigerator back? It’s going to get spectacular!! ;)

I’m sharing some of our favorites from the past week or so and some changes, if any, that I made to them. (I’m just sharing the original poster’s pics and I’ll recap each recipes here.)

First up – a truly scrumptious recipe I found on Pinterest from Bubble Crumb:

Crock Pot Chick and Dumplings

IMG_1890

It is SOOOOO good! Whooeee, I’m so thrilled to find this. I am a chicken and dumplings NUT. Have you had them at Cracker Barrel? (I almost wrote Crate and Barrel. You can how much I think about cooking – never.)

Anyway – yummo! This does not disappoint.

Here’s the deets:

4-6 boneless skinless chicken breasts
2 tablespoons butter
2 cans cream of chicken soup
1 can chicken broth
1 onion diced (I used half of one)
1 tablespoon dried parsley
4 grands flaky refrigerator biscuits (I used five)

Put the chicken, butter, cream of chicken, chicken broth, parsley and onions in the crock pot and cook on high for four to six hours. Mine only needed five, and probably didn’t even need that much.

As the chicken cooks and gets tender, break it up with a spoon or fork, whatever.

Get your biscuits and cut them into nine pieces. I kind of rolled them into balls to ensure they stayed whole but it’s not necessary. Stir into chicken mixture and cook for another hour.

(The recipe says to cook for 30 minutes and my biscuits were not done at that point. One hour did the trick.)

I noticed as it cooked that it was a tiny bit thick, and the recipe said to add chicken broth if necessary. I was out of that, so I used chicken soup and it worked great. ;) I just put a bit in to make it a little creamier.

It was AWESOME. (!!!)

Next up, one of the many great recipes from Tracie’s place that I shared last weekend. This one is crock pot mac and cheese:

Crock Pot Easy Mac and Cheese

DSC_0149

The goodies:

1/2 pound elbow macaroni
4 cups shredded Cheddar cheese, divided
1 (12 fluid ounce) can evaporated milk
1 1/2 cups milk
1 egg
1 teaspoon salt
1/2 teaspoon ground black pepper
Dash of Worcestershire sauce

Very important before you do anything – spray the crock pot well with cooking spray. This cheesy goodness will stick otherwise. I sprayed but not well enough. :)

Mix the egg, fresh milk, evaporated milk, and Worcestershire together in a large bowl. Mix in the uncooked macaroni and three cups of shredded cheese. Pour into the crock pot and sprinkle the remaining cheese on top.

Cook on low for five to six hours. Do not stir or remove lid while cooking.

That whole not stirring thing was so hard for me. Not sure why. I always feel the need to stir.

I cooked ours on high for five hours and it only needed four, if that. It was a bit overdone. I also used a bit too much cheese (I know, is there such a thing?) – I used thicker shredded cheese, and I think the finely shredded would have worked better. It was just major CHEESE and combined with being cooked a bit too long, it wasn’t as good as I know it could be.

But, it was still GOOD. :) I know it would be GREAT with those little changes. I plan on giving it another go this weekend. ;)

And I saved the best for last…hold on peeps. This is fan-freaking-tastic. I also found this on on Pinterest and it’s from Chef Mommy:

Crock Pot Creamy Chicken and Wild Rice Soup
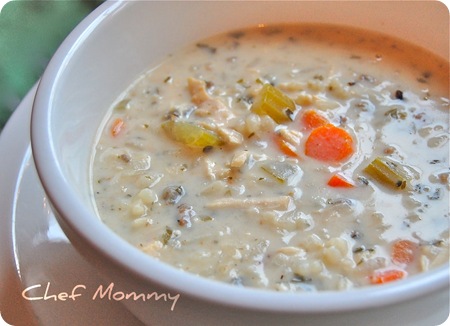
Ohhh…I’m drooling just thinking about it. SO. GOOD.

This one takes a teeny bit more work, but it’s so worth it.

4 cups chicken broth
2 cups water
2 boneless, skinless chicken breasts
1 package of Rice-a-Roni long grain and wild rice
1/2 tsp salt (plus more to taste)
1/2 tsp pepper
3/4 cup all purpose flour
1/2 cup butter
2 cups half and half
1 cup grated carrots
1 cup diced celery (we’re not bit celery people so I used one small can of mushrooms – SO GOOD)

Mix the broth, water, carrots, mushrooms, chicken and rice (and the seasoning packet) in the slow cooker.

Cook on low for six to eight hours or on high for four hours. I did the high version and it turned out great.

Once chicken gets tender (couple hours in), break it up into pieces while cooking.

At the end of the cooking time, get a small bowl and mix the salt, pepper and flour. In medium saucepan over medium heat, melt butter. Stir in flour mixture by tablespoon to form a roux.

I had no idea what a roux was, but found out it’s a mixture used as thickener for stews, soups and gravy:

roux 
(source)

Then, while still on the heat (I’m guessing here – that’s what I did), whisk in the half and half, a little at a time, into the roux until mixed completely and smooth.

Stir this yummy mixture into the soup in the crock pot then let it cook on low for 15 more minutes.

Then die and go to heaven cause it tastes that good.

Oh my goodness. I think I need to go eat some leftovers.

Mine was a bit thick – almost like gravy, not soupy like the photo. But that’s how we like it. :) You could add a bit more broth if you like it thinner. (Wait to see how it cooks up first.)

So there you go – my very favorite comfort foods from the past week! I really don’t know what is wrong with me – we’ve had cool weather the past couple of days, but the chicken and dumplings I made on a 95 degree day.

I guess I’m just craving comfort. ;) If you are too, you can’t go wrong with any of these!

Any yummy, easy fall recipes you make all season? I’d love to hear about them -- I need to plan out the dinners for the rest of the week. Stop laughing, I’m FOR REAL.

Yes, taking my temperature. And then reheating some leftovers. Hollllla…

For the love of basil

Hello hello! I hope you had a fantastic weekend!

Some of you (my family) may know that I’m not the biggest cook. I know how to cook, I just choose not to.

Or something like that. :)

Actually, I do cook, just not as much as I should. I enjoy it when I do it. It’s the whole planning thing I have a problem with – I kind of fly by the seat of my pants with most meals, using what we have on hand. If we don’t have it on hand, I don’t cook. :)

But when I find something that’s easy, I make it a lot. And when I find easy, quick, tasty food, I like to share it with you, my Squeezies. Cause I’m nice like that.

I showed you our basil plants last week and how they are absolutely busting with yummy leaves. I LOVE basil so it makes me giddy.

I figured I would show you some of my favorite (new and old) basil recipes. They are all SCRUMPTIOUS!!

First – one that works for a quick snack or a great dip for parties. It’s simple, it’s basic, and I didn’t realize how easy it was to make till a few years ago.

All you need to make pesto are four ingredients:

Pesto:

Grated Parmesan cheese
Extra-virgin olive oil
Garlic
Basil leaves

You’ll notice I didn’t mention measurements, and that’s because I kind of wing it when it comes pesto. Usually pine nuts are included in the recipe too, but I don’t LOVE nuts, so I don’t include them.

You just throw everything in a processor or chopper:

Mix to to the consistency and taste you desire. I like a lot of basil, so I do a lot of basil, a lot of cheese, a little olive oil, and an even smaller amount of garlic.

Taste and mix, taste and mix, till it’s where you want it. And then eat it with crackers:

pesto

It’s SO yummy!! Most pesto recipes will be more liquid – but I like a thicker consistency.

Oh em gee, I love this stuff.

Now that we have an appetizer, let’s move on to the main course. :)

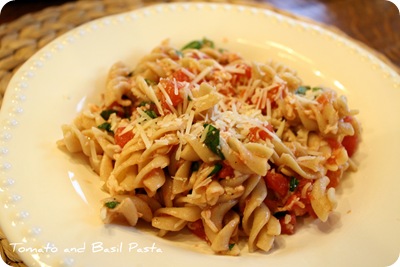
This Tomato and Basil Pasta is SO simple and good, you won’t believe it:

Fresh Tomato and Basil Pasta:

3 medium tomatoes, chopped (or one canned, like me)
1/3 cup chopped basil leaves
1 Tbsp. olive oil
1 clove garlic, minced (or one tsp, but I used one Tbsp.)
1/2 tsp. salt
1/4 tsp. pepper
8 oz. rotini pasta, uncooked (I used about one and a half cups)
3/4 cups grated Parmesan cheese (I used about a cup)

This dish really couldn’t get any easier. You just mix everything together while cooking your pasta:

I had two cans of tomatoes in the pic, but you only need one. It’s more than enough.

Then mix with the cooked pasta, and top with some more Parmesan:

fresh tomato and basil pasta

SO GOOD!!! Oh my, this is so perfect for summer – it’s light, fresh, and pretty darn healthy. I use whole wheat pasta, so that helps even more.

You can also make it as a pasta salad as well, by just rinsing the pasta after cooking then refrigerating it. That one screams summer! :)

Finally, I tried out a new basil cocktail and it may be a new favorite. Yes, I said basil cocktail. (Did I mention you’ll need to LIKE basil for these recipes?)

This one is a Bacardi Dragon Berry Strawberry Basil Lemonade:

I’m just calling it Strawberry Basil Lemonade for short. :)

Strawberry Basil Lemonade:

2 parts Bacardi Dragonberry Rum
1 part lemon juice
1 part simple syrup (I used sweet lime juice instead)
3 basil leaves
3 strawberries (hulled and chopped)
2 parts Sprite (the recipe didn’t say how much to use but I did two parts)

To make this yumminess, muddle (crush) two basil leaves and two strawberries, then add those to the fresh lemon juice, simple syrup and Bacardi rum in a shaker with a bunch of ice. Add the Sprite and you’re done:strawberry basil lemomade

This is SO good, yummo!! It may be my new favorite summer cocktail. It’s going to be perfect for evenings out on the deck.

Again, if you don’t like basil and strawberries you probably won’t like it. But if you do I’m betting you’ll love it like me. The basil gives it just a tiny kick that is so different and fresh.

Did I mention yummy? ;)

(Check out my simple Summer Beer recipe here, it’s another warm weather favorite. And I hate beer!)

So there you go – a plethora of basil recipes, all easy and sooooo good. All perfect if you grow your own basil – it’s such a kick to go outside to pick my own food. Love it!

I’m linking up to my friend Rhoda’s recipe party, in our Home May’d linky series:

You can start linking up your summer recipes Tuesday morning!

So are you a basil lovah like me? Can you believe I first tried it only a few years ago? Now I can’t get enough. :) Excuse me, I’m off to snack on some pesto!