Tampilkan postingan dengan label dining room. Tampilkan semua postingan

Dining room (pretty) organization

Hey hey! How the heck are ya? There are some beautiful projects linked up at the before and after shindig – check it out here to see them or link up yours!

Today I’m back in the dining room – or is it the library? This room is a little confused right now. :) Last year we decided to do away with our dining room (that we used twice in seven years?) and make it into a more functional space for us. I shared the progress on this DIY built in project early last year and the final result here. The “book” part of the library is done…but we still need a cozy place to sit.

I love the built ins for so many different reasons, but one of the BIGGIES is all of the glorious storage they provide:

DIY built ins cabinets as bases

I chose to use upper kitchen cabinets as the bases, which I’ve done a couple times elsewhere in the house. They aren’t nearly as deep as a regular cabinet base (12 inches instead of 24), but I knew they would still provide plenty of storage.

I use this area for most of our serving stuff – the items we don’t use every day or even every week, but I like to have it all for special occasions/holidays/parties. You know – all that pretty stuff you hardly use but still need (want)?

When I finished the built ins I was so excited I just shoved everything back into the cabinets and called it done. For a long time now I’ve been wanting to clean them out, purge some of the stuff and pretty it up just a tad.

I started by pulling every single item out of the cabinets. You know, the whole it gets worse before it gets better thing? Yeah:

decrapifying

Well the dog wasn’t in the cabinets, of course. He just has to be in front of the camera every. single. time.

And this is another reason the room is still in limbo – the table and chairs from the kitchen were moved in here temporarily and have stayed. Hubby sits here to work most days lately instead of the basement so we’ve kept it for now. I’m itching to get those comfy chairs in here though. :)

So I cleaned them out and then cleaned them out – vacuumed all the leftover sawdust (nice) and wiped them down:

Side note – no I don’t paint the insides of the doors. SOMEONE (me) doesn’t have the patience for that.

I pulled out the top shelf in each one to cover them with some cute contact paper I had picked up for this project a year ago:

contact paper on shelves

But I ran out of it before I could do the bottom shelves. I was just going to leave them as is but it looked wonky. Sooooo I quickly taped them off and did one coat of the color I used on the backs of the built ins – Storm Cloud (I think it’s Sherwin Williams?):

label cabinet doors before painting

Do you see that little piece of Frogtape on the back of the door? That’s been there all this time – I used those to number the doors when I took them off to paint them. I highly recommend doing that because otherwise you’ll have to do a lot of adjusting to get the doors just right again.

Anyhoo, did I need to paint the inside the cabinets no one but me will ever see? (I mean, obviously I have no life.) No. But there’s something to be said for having an organized space look pretty too. It only took me five minutes for each one, so it wasn’t too bad.

storm cloud gray

I only had to do one coat each too – which totally surprised me. The paint is the SW Duration kind and it covered great.

After it was dry I did a super quick purge and then loaded everything back in. I have a cabinet for holiday stuff:

organizing holiday dining items

One for vases/pitchers/birthday party supplies (there’s no rhyme or reason to this as you can see):

organizing serving ware

One for random serving stuff, with room to spare:

organizing serving dishes

I have more in the kitchen that will fill that space, don’t you worry. ;)

And finally, one dedicated to dishes. My vintage glass plates (from Goodwill) for showers and small get togethers, our white dishes for big meals and some serving plates and linens as well:

organizing serving dishes

And, I gotta say, it doesn’t ever get any less weird that I share the insides of our drawers and cabinets with you, even after five years. ;)

It is SO GREAT to have a spot for all of this stuff! Most of it was in the basement before – now I like having it close by in a pretty spot:

DIY built ins using cabinets as basesI still LOVE how this all came together. So very much.

We’ve lived here for nine years and I feel like I am on the cusp of having a good spot for everything – it’s taken that long. If you’ve been around for awhile you know I have to live with things for some time before making them right for us – the same goes for how I (try to) organize the STUFF in our house.

How do you organize all the dining stuff you rarely use but want to keep? :) Or do you use them often? I think I need to throw a party.

How to accessorize bookcases

Well hello! I’m back today to share how the accessories on the bookcases came together. It was a long process (what about this project wasn’t??) and I gathered some of the items over months and months. Most of the accessories we already had, but it sure was fun to look for a few new pieces throughout this process!

Here are the bookcases again as a reminder:

DIY built in bookcases

First I’ll go through some of the pieces, and then I’ll explain how I pulled it all together!

Of course I wanted the items to have a “library” feel, so that was most important to me throughout the process. Almost all of the “new” (I’ve picked up items since January) accessories were found at local antique/thrift shops.

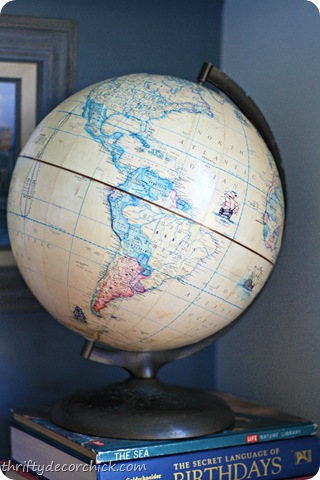
I loved the colors on this globe – they work with he room perfectly! The background color ties in with the walls in the room and the blue works with the backs of the built ins:

accessorizing bookcases

I had a globe from my childhood that I could have used, but my STINK sister took it. She swears it’s hers and I swear she’s WRONG. :)

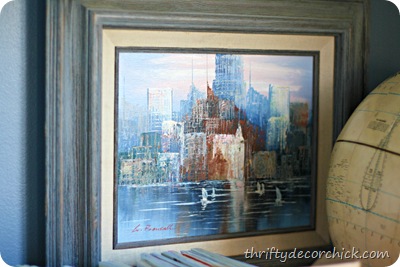
This art was a more recent find and I was so thrilled when I found it!:

accessorizing bookcases

It’s an actual oil painting of a skyline and it reminds me of NYC. It was only $20 (which I thought was incredible for a real painting), I think because there was a sticker stuck to part of it. I was able to get it off with tweezers and it looks brand new! The frame was like that too – perfect!

When I shop for ANY accessory, I love finding things that mean something to us as a family, and the NYC painting is certainly one of those.

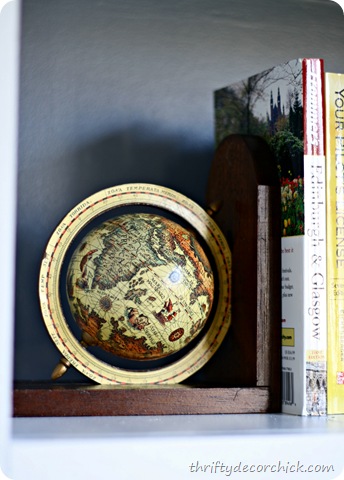
I brought in more globes with these bookends I found at a thrift shop:

globe bookends

They were going to get a paint job but I didn’t want to do it after all that work. Now they’ll stay as is. :)

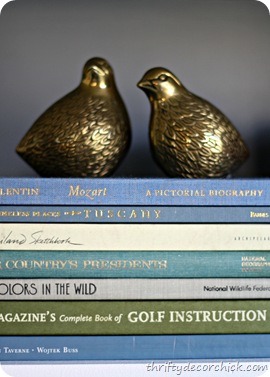
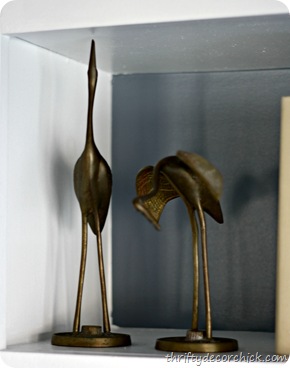
I added quite a few metal pieces, the fat quails (?) were from Goodwill, the pretty cranes were from a thrift shop:

 accessorizing bookcases accessorizing bookcases

There were a few small DIY projects, including the little set of drawers that I showed you here:

CeCe Caldwell paint

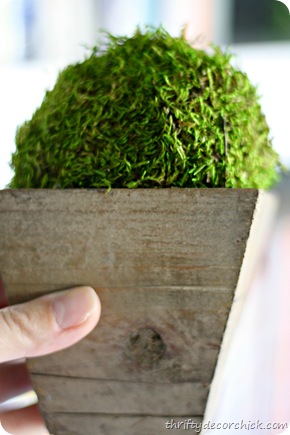
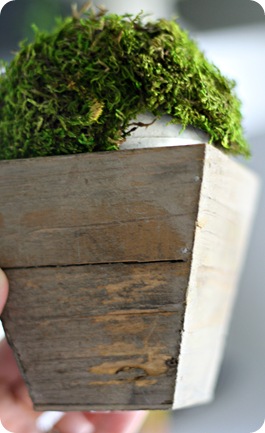
I filled my little wood pots by just covering Styrofoam balls with moss sheets:

DIY moss topairies

I just cut pieces of the moss off and hot glued it on. I didn’t worry about the backs:

 DIY moss topairies DIY moss topairies 

I don’t mess with the backs or the insides of things. :)

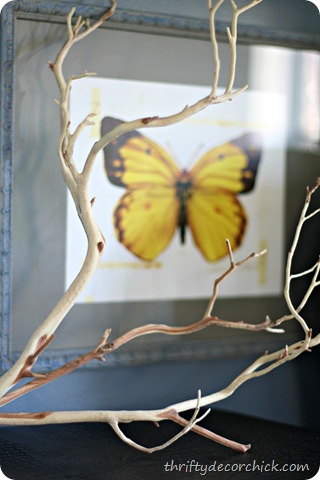
The butterfly art was a poster I cut up and framed years ago. I just painted the frame and mat with the chalk paint I used on the set of drawers above:

accessorizing bookcases

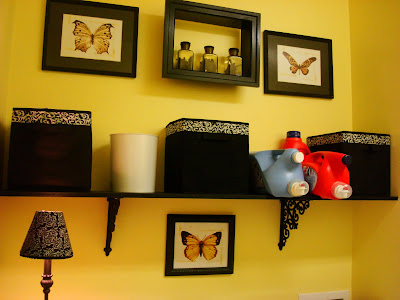
You may remember the butterflies from my old laundry room years ago:

black and yellow laundry room

I added a little tiny bit of sapphire Rub n Buff to the frame to bring out the texture – the sapphire is such a pretty color!

The faux leather box used to sit in the bedroom (I shopped the house!) and the fat topiary (that I adore!!) was one of my only new purchases, like from a real store. ;) I got it at one of my favorite local nurseries:

accessorizing bookcases

Most everything else was ours already. :) I was surprised we had so many books! I did pick up just a few more at Goodwill, but I made sure they were all books we would actually read. It was fun to pick out some new ones. (For a fraction of the price!)

I take the book cover off my books so the pretty covers can be seen. I bought my very first design book to celebrate finishing the bookcases – I’ve never had one! (The Design Sponge book):

oil rubbed bronze cabinet hardware

Oh la la!! ;)

I used our paper back books too – we have too many of them not to!

As I’ve said before, sometimes accessorizing falls right in to place, sometimes it’s agonizing! :) Most of this fell into place nicely, it was only those bottom shelves that gave me fits:

DIY built in bookcases butcher block

As I went through the process, there were things that I repeated to make it more cohesive – first up were the metal pieces:

how to decorate bookshelves

The fan, the cranes, the bookends and the little fat birds were placed throughout.

I tried to space out the green items too:

how to decorate bookshelves

I even thought about which way to go with the books. I tried to switch back and forth – starting on the right, then left, right, etc.:

how to decorate bookshelves

Otherwise parts of the bookcases started to look “heavier” than others.

And I also thought about what to center on the shelves and what not to:

how to decorate bookshelves

The top and bottom items are all centered, and two of the shorter shelves in the middle are as well, on each end.

You know how you see those beautiful photos in magazines? Yeahhh, I can’t even imagine how many people and how long it takes them to get those perfect shots!

I’m just glad I have pictures of these, because I’ll need to refer to these when I need to put everything back after I decorate them for the holidays! The books will stay of course, but I plan to exchange a few accessories out.

So there. you. go. Whew! I hope that helps as you try to conquer your shelves or accessorizing in general. I’m certainly no expert but I do love how they turned out! If there’s something or an item you’re wondering about, please let me know and I’ll answer you in the questions.

Thanks again for all the love on this project! Now, onto that never-ending powder room project. :)

Library bookcases done. Boom!

Remember that one time, back in January, when I had that idea to transform our dining room into a library? And then, back in March, when we started the process of building bookcases for the new library?

Yeah, it was eight months ago, so I don’t blame you if you can’t remember. ;) Well, they are finally done!!!! And I’m thrilled!!

I have worked  my butt off over the past few days to get them done. Seriously, my butt should be a third of it’s size.

There was so much to do to finish up, I didn’t realize how long it would take. There was a TON of painting – I had done one coat of primer on the bottom cabinets before, but then I dropped a can of blue paint that splattered all over them (fun times) and I got a recommendation to use an oil-based primer instead anyway (more on that later). So, I reprimed the cabinets and taped off the baseboards and cabinet trim with my Frogtape:

I did one more coat of primer and two coats of semi gloss white paint.

I primed the cabinet doors and then sprayed them with the semi gloss two times:

The finish is impeccable! I’ll show you more of that process soon too!

I used a TON caulk. It was insane. I used this trick I saw on a DIY show. Or maybe it was a blog? Pinterest? Who knows anymore!:

And found an awesome tool that helped this process immensely that I’ll show you soon too!

I installed the crown molding in the room and caulked the top and bottom of that:

I originally picked out hardware that was a nickel finish, but I realized after I got the lights in that I wanted the hardware to match it, so I went back to Home Depot and picked these out:

I love their clean lines – they say “library” to me:

oil rubbed bronze cabinet hardware

I installed some lattice wood on the side of the cabinets just to add a little detail:

trim on side of cabinet

And THEN I could really start decorating the shelves! I’ve had most of them (mostly) done for awhile now, it was those taller shelves on the bottom that were hard:

dark bronze cabinet hardware

Sometimes accessorizing is the easiest thing and everything just falls into places nicely. Sometimes it takes FOREVER to get it right. These took for.ev.er:

accessorizing bookcases

I’ll share more detail on all of the accessories soon, but for now, let’s just enjoy the final result shall we?:

DIY built in bookcases

The dog likes it too. I swear I don’t stage him like that – our animals are just obsessed with being in each photo. I had just shooed the cats out of the shot. ;)

I know I say this a lot, but they turned out EXACTLY how they looked in my head. I really don’t think I could be happier:

DIY built in bookcases with cabinet bases

I love how the shelf spacing turned out – we made the bottom one bigger because we had to deal with the light switch and thermostat. We have a ton of bigger books that I wanted to have room for on the bottom, but I ended up laying them all flat anyway. ;) At first I was a little nervous about the bigger bottom shelf but I really like how it came together.

By the way, we asked two heating and cooling guys about the thermostat – I thought we’d have to move it. They both said it’s fine as is, which was a nice surprise. I’m even more surprised that they don’t bother me much. I hardly notice them.

We have a column in the room that prevents a good straight shot of these, so here’s a couple that show more detail of the bookcases:

DIY built in bookcases DIY built in bookcases 

I didn’t want to lose much floor space in the room, so we used upper cabinets for the bases – they’re only 12 inches deep. It worked perfectly – I didn’t want the shelves to be any deeper than that:

DIY built in bookcases butcher block

The cabinets were just the unfinished kind you can find at most big box hardware stores. Even at 12 inches deep they hold a TON! I’ll show you that soon too! ;)

Obviously it took me waaaay longer than I thought it would to build these. I’ve never done something this large. Dad helped me a TON by coming by a day or two a month to help me create them -- but I otherwise it was (mostly) me. We had help on one part – adding the trim to the front of the shelves.

Now I can’t wait to get moving on the rest of the room! Most of it won’t be too bad – I’ve had a new light sitting in the garage for months (this one is too ornate for what I’m going for in here – it’s moving elsewhere). The drapes won’t be too hard (just have to find the perfect fabric!). I’ve already got a coffee table that will go in the middle of the room that will get a redo.

The chairs are going to be the biggie – finding four, super comfy, pretty, affordable chairs will be interesting. :) My plan is to put the coffee table and four chairs in the middle of the room for another comfy spot to sit:

DIY built in library bookcases

We never ever, I mean, never used the dining room. Ever. I do think a dining room table would look lovely in front of the built ins, but I just don’t want to go back to a space that we don’t use. For now, the chairs are the plan!

Since I’m obsessed with before and afters, let’s take a look at the room earlier this year:

chocolate brown dining room

This was a result of my dark and dramatic phase. ;) I really did love this room, but when I painted it chocolate brown the floor was light carpet. The addition of the hardwoods made it feel like a cave.

I’m so thrilled to have a much brighter, useful room now!:

DIY built in bookcases

And for all that is good, I am SO GLAD this part is done!!! :)

Can I get a WHOOOOO??

Thanks so much for coming along on this ride with me – and thanks for your patience. I hope you love them and are inspired!

For more on this project, check out these links:

We started out with adding toe kicks to the cabinets and fitting them in place here.
I pulled down all the trim in the room, had the lights and outlets wired (we had help on that too) here.
I installed and primed the cabs, painted the walls (twice, ugh!) here.
I showed you how we built the bookcases (frame and shelves) here.
The trim was added and shelves beefed up here.
And finally, the library light drama was covered here.

Whew!! MAJOR props to my Dad for all the help, and my hubby and son for being patient with me for the past few days so I could get ‘er done!

Now I’m off to create a new Halloween costume for a cute little boy. The ninja now wants to be the Headless Horseman and I’m determined to make it happen. And then…I’m taking a nap. For a few days. ;)

Library lights (finally!)

So I mentioned last week that I finally ended what was a four month long search for lighting for the dining room bookcases I am finishing up.

Actually four months is conservative. I think it’s probably been more like eight. :) When I last blogged about the bookcases, this is where we were:

DIY built ins with bases

I said I was going to be finished with them in September. I was wrong. :)

Now, I’m aiming for end of October. I think I’m gonna be able to do it.

Anyway, see those spots at the top? Those are where the lights were supposed to go. The lights I. could. not. find. ANYWHERE.

Until last week. ;)

Now that I’ve gotten over the HUGE hump that was the lights, I’m SO ready to get this done! When we first started this project (ohhh, back in March), I showed you the lights I had picked out for the tops of the bookcases:

plug in spotlight

They were little plug in spotlights that I was going to hardwire in. But they were dinky, and my whole goal with them was that they would be directional, so I could direct the light down over the built ins. These didn’t stick out enough to really be able to cast light over the shelves.

So, I moved on to my next idea. Hardwiring a picture light, like this:


plug in art light

This one is from Lamps Plus, for like $70. You can find the exact same thing at Lowe’s for about $30. (I showed you how I used one of them here.)

Anyhoo, Dad and I were standing at Lowe’s one day, about to put four in the cart, when he noticed something – the arch at the top of the light wasn’t going to work. We put in a header at the top of the built ins, but it was only eight inches tall. These wouldn’t work because they were too tall.

Bummer dude. Seriously.

So that was forever ago, and since then I’ve looked online everywhere. This was perfect:


SINGLE LIBRARY WALL LAMP(source)

Again, a plug in I believe, but they are easily hardwired.

But this one was more than $200. Each. I needed four. Not happening.

This one too…gorgeous:LIBRARY WALL LIGHT

(source)

About $250 I think? Choke.

I loved the long arms on this, and I knew I could pull it out away from the wall so it would work with my clearance issue:

swing arm library light

(source)

But again…more than $300.

It was getting frustrating. I looked at sign lights (too big and expensive), I looked at lamps I could hardwire (way too big).

I considered something like this from IKEA:

ikea wall light

Only $20! But it was too small, the wrong color and four hours of driving to get it. :)

I was starting to feel like Goldilocks. ;)

Lamps Plus had this:

(source)

But the light part didn’t move. So when it was installed it would just shine light down to the floor. Not the look I was going for. They had another version I found over labor day that was $95, and I was thisclose to ordering them, but I held off cause I still didn’t want to pay that much.

Of course a few weeks later when I was so frustrated I was considering it, those were gone. :)

So the other day I had had it. I tried one more place -- a local lighting store and they carried exactly what I wanted. For $170. And a six week wait.

I was totally defeated. But I was determined to find something that day. I had already looked everywhere fifteen times, but something took me to Home Depot (again). I had a feeling I’d find something. (I really did…I have a weird sense about these things.)

This time, I had a different idea. I’d look at the outdoor lights too.

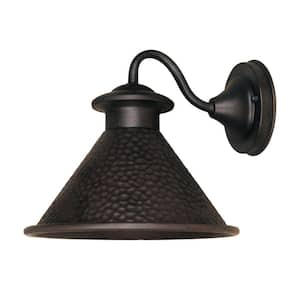
And wouldn’t you know it. I found the one:

home depot bronze outdoor light

They had two sizes, and I went with the bigger one. It’s a dark copper/bronze, which is what I wanted. The clearance was good for the ceiling, and it was the perfect size – not too big, not too little. The bracket was the perfect size for the header. The light didn’t tilt like I wanted, but that was an easy fix – I just bent them ever so slightly myself. :)

You can see this one online here, but the funny thing is that it’s listed for $90 online – they were only $35 in the store! So I got all four lights for $140 – basically $100 less than ONE of the fancy ones would have cost me.

I was thrilled but didn’t want to get too excited till I got one up to see how I liked it.

I LOVED IT:

outdoor light fixture inside

They don’t stick out as far as I had originally wanted, but I realize now that may have bugged me to have them eight to 12 inches out from the wall.

IMG_3352

Ignore the unfinished top. :) My plan is to add crown around the top and there is just enough room to get it up there.

They were a breeze to install – I just screwed the wall bracket into the wall and then wired it up. Light fixtures are usually my nemesis but these went up so easy and fast. That never happens to me when it comes to lights.

In the store they used the little round light bulbs instead of full-sized ones, and I loved that look. I don’t want to see the bulbs at all when you’re standing in the room:

bookcase light

With the little tilt that I added, they shine down onto the shelves beautifully:

outdoor lights turned bookcase lights

Love them!! I couldn’t BELIEVE after all this time I found them at that price, and in the outdoor section of all places!

Of course this is just a peek – the painting and some trim isn’t done. The accessorizing and arranging isn’t done either. But I am thrilled with the lights – they are just what I imagined in my head when I started dreaming this up almost a year ago!:

inexpensive library lightsI cannot tell you how great it is to have these up!! I added a dimmer, of course, so they are on all day long lately. And today was perfect for pictures because it’s a dark and stormy one. ;)

Of course my gauge on projects is always the Bub and the hubby – their reactions tell me a lot. My husband loves them and I got an actual “Ohhhh and ahhh” from the kiddo, so I always take that as a good sign.

Thanks for being patient with me on this bookcase project – they have been a labor of love but I had NO idea they would take this much time. I hope to have a full reveal for you soon!

Hooooolla!