Tampilkan postingan dengan label spray paint. Tampilkan semua postingan

Spray painting door knobs

Hey hey all! Well thank you for the kind words yesterday! :) We are very excited.

I’m back with a DIY project I’ve been wanting to tackle for a long time. I mentioned a while back that my house had been finally been debrassified, but I was wrong. I had forgotten about a couple knobs in the house. Drats.

But these were exterior door knobs that we use a key with – so replacing them meant two things: lots of $$ and since they are keyed don’t you have to make new keys when you install them? I always thought you did but maybe not. But still, lots of moola to replace two of them.

I didn’t feel like spending lots of moola so I figured I’d try out a DIY to change them up. I’ve always wondered how spray painted knobs hold up and it’s the age old question – some say they do great, some say they do horribly.

We’re about to find out. Well…in a few weeks/months anyway.

I did a couple doors with varying uses/elements so it will be interesting to see how they turn out. But first, the how to.

You take the offensive shiny thing off:

spray painting brass knobs

Ignore the horrible, dirty mud room door. And missing trim. And blinding brass.

Don’t be afraid to take the knob off – even I avoided this for years and it’s not a big deal. It's two pieces and the screws, that’s it. Just remember how they go back together and always remember the access to the screws side goes inside the room!

First up, and I think this is most important part – clean them. I just used my basic cleaning stuff but anything that will get any grime or grease off is what you want:

spray painting brass knobs

Thing is, if you don’t clean them well the primer and paint won’t hold well – you’ll get crackles (the dreaded crackle, shakes fist in air!!!!) or it will easily wear off those dirty areas.

I took them out in the garage and needed something that would allow them to stand up, so I stuck the one with the long part into a shop towel cardboard box and just laid the other one on top:

spray painting brass knobs

I later stuck the screws in there too – they stand up straight so you can spray all sides at once.

So…the primer part. Well. I have some really good (and expensive stuff) called BIN primer in a spray. But it’s a pain in the butt. I told you more about it here. I’ve tried everything to make it spray smoother but it just doesn’t work. This time my gloves and the can ended up covered in the primer:

spray primer spray primer

SO frustrating. The paint sprayed all clumpy and gross too, so I actually had to sand down the knobs a bit to help that. I’m throwing the primer out, which is annoying cause it’s not cheap.

Anyway…I ended up just using a basic black primer instead:

spray painting brass knobs

The BIN stuff is stronger, better primer, but I was tired of cussing so there you go.

Don’t they already look so much better though? SO. much. better.

I finished up with my BFF…good old ORB (that’s oil rubbed bronze for those not tight with it):

oil rubbed bronze spray paint

Hello my friend. Good to see you again.

When spray painting remember short, light coats – not long, heavy ones. There’s really not much to it if you remember that.

I took the knob off the back door too and you can see the wear on the keyed side from being outside:

spray painting brass knobs

So it will be interesting to see how these hold up – the mud room door is one we use a key on all the time, so that will get lots of wear and tear. The back door we don’t use a key on much, but the outside part gets hit with the elements. And we use both doors numerous times a day.

On the back door I took the knob off and did that first: spray painting door knobs

I didn’t want to take both off just in case something went wrong. You know I don’t have much luck with that door.

The deadbolt part was a little more tricky – we’ve been told we need to replace our whole back door (water issues) and every time I get inside there I see why. The insides of that one were rusted so it was hard to get the lock part off the outside part of the door. I just ended up spray painting the inside part.

I also took the strike plate off and sprayed that, but I know it will get scratched up – it already is. Most of it should stay the ORB color though, so we’ll see how that holds up:

spray painting door knobs

I decided to makeover that mud room door so I can’t show you the after on that one just yet. ;) But here’s how it looks on the back door:

spray painting door knobs

So here’s the thing about painting doors – this is why you really want to take the knob off before you paint. I didn’t and now the knob isn’t exactly where it used to be and you can tell. :)

I can’t wait to show you how it looks on the mud room door! LOVE how the room is coming together! There’s a long way to go but I think it’s going to be fun.

I’ll update you in a month or two and let you know how these are holding up! I’m really interested to see. Our coach lights that I spray painted still look fantastic: spray painting outdoor lights

They are exposed to the elements for sure, but no one handles them.

Have you ever tried spray painting door knobs? How did it turn out for you? I’d love to hear! I love a good experiment. :)

Metallic fall art

Hello all! Thanks so much for your wonderful comments on my fall mantel and to everyone who linked up theirs! As of right now there are about 270 mantels linked up – be sure to check them out!

Today we’re sharing crafts over at Layla’s and I’m excited about this one too. It was fun to get a little crafty again – it’s been too long! I spent an hour just wandering around the craft store the other day and it was BLISS. I forget how fun that is to do when I have the time.

I had one idea in mind but it was while walking around the store that I came up with another crafty idea instead. I really, really love how it turned out.

I’ve had this shadow box from Goodwill for years:

shadow box

It’s one of those things I keep hanging on to because I knew I’d really want it when I wanted it…you know what I mean? I knew I would eventually do something fun with it, and eventually is now. ;)

The front part of the frame was a little busted up so I took that off and spray painted it white. There’s a little damage to it but the new coat of paint kind of hides that.

Then it was time to create. I found this felt table runner (at Michael’s) and my mind started churning…

leaf tablerunner

I decided to use it as a stencil – I thought it would be so pretty with the cut outs in the leaves!

I dug some of my favorite metallic spray paints out of the garage:

metallic spray paint

And decided on these two – copper and gold.

gold copper spray paint

I cut the runner apart and situated the two pieces so they covered my paper, which was just poster board I cut to size. (First I sprayed the backs with adhesive so they would stay put):

leaf stencil

I tested this out a couple times, hence the spray paint already on there. :)
I sprayed the copper paint first, then did a light coat of the gold over it:

leaf stencil

Isn’t that so pretty? I almost left it just like that! The middle where the two parts of the runner met was a little blurry (my error), but otherwise it looked great. And I was covering that part anyway.

Last fall I found an autumn quote that I just fell in love with – “Autumn is a second spring when every leaf is a flower,” by Albert Camus. Beautiful eh? I dressed it up a little bit in Picmonkey and created a printable (just like I showed you how to do here).

You should be able to click this and save it if you’d like:

 fall quote printable

I printed it out in an 8 by 10 size card stock and the font was a little blurry, so just a warning about that. It’s not super crisp but it still looked fine to me.

I just used spray adhesive to stick it on top of the leaf stencil and then added a little more bling. I couldn’t resist this glitter tape and used it to frame out my quote:

    sparkly tape

And then found these cute acorns and pinecones for $1.50 on clearance and stuck a few in the corners:

fall scrapbook

I gotta say, I’m pretty smitten with it:

DIY fall printable

I just LOVE it. And I love that I can just take it out and reuse the shadow box for another season. Now I’m looking forward to making something for Christmas too. ;)

It’s not super crafty, but it involved scrapbook supplies and I’m all about that. I’m a scrapbook supply hoarder who doesn’t scrapbook.

I especially love the metallic tones this time of year, and really love all of them together in this “art”:

Autumn is a second spring quote

Now it’s time to lug the bins out and get the rest of the house fallified! :)
Can’t wait to see all the projects linked up at Layla’s!

Glossy navy blue LOVE

Hello my friends! How was you weekend? We picked about 15 pounds of apples and one day this week I’m going to try making applesauce for the first time. It should be interesting. Wish me luck.

I got one big DIY project and a small one done this weekend and I’m equally excited about both of them. We’ll start with the smaller one today since it’s prettier. ;)

As some of you know, our master bedroom is going through a (sloooooow) metamorphosis. It started with new bedding I picked up months ago and then a DIY headboard and some paint. I still haven’t finished painting because I’m still deciding on the color. It may change. We’ll see.

I’m not one to knock my old decor, because at each point I loved where I was. Does that make sense? Deep. Anyway, I’m changing up our bedroom because I was just wanting a different look. We had the same paint up for eight years and I was itchin’. I sold our bed on Craigslist and I’m trying to use the cash from that to makeover the whole room.

At first I was hoping to reuse the sconces we used for light before:

sconces above bed

I did love having the light right above my head for reading. But the only reason those worked was because the bed was so tall – regular lamps wouldn’t work for us (the light was too low). And now that the bed is back near the ground again those sconces looked too teeny. SO. I ended up bringing some brass lamps up from the basement:

painting a nightstand

To see that nightstand redo go here. Your 80’s nightstand will thank you. ;)

I know many of you dug the brass as it was and I totally get it. I think in a different setting I may almost kinda maybe leave it as is. I’m not quite there with the shiny brass yet (I love an antiqued version, still not sold on this coming back). And they weren’t in the best condition either – they both had some areas that were corroded/worn/not sure what to call it. And both had stickers on them (for YEARS?) that I just couldn’t get off all the way (I had to just spray over them). 

So they needed some paint. I just couldn’t decide on a color. I didn’t want to go with a silver because I thought that would be too cold feeling – I wanted to warm up the space a little. The bedding has a blue/grey color in it, and I actually have a color that matches that pretty well – but I wanted more contrast than that.

And then one of you (LilClementine) suggested navy blue and the heavens opened up – THAT was the one. I picked up some glossy navy blue paint the other day and gave it a go. I started with primer – on a shiny metal like this it’s never a bad idea. All I had was a black primer so I just used that:

spray painting a lamp

I knew immediately I was going to like them more painted. I think the pretty lines of the lamp were lost with the shiny metallic. When painted a deeper color you can really appreciate them. I think so anyway.

And then I pulled out the blue. I was so hoping it would turn out like it was looking in my head:

navy blue spray paint

It did. :) I absolutely, totally LOVED it. Brilliant!!
I had some navy blue ribbon in my stash so I just wrapped it around the bottom of the lamp shade to tie it in a bit:

ribbon on lamp shade

So here’s the thing – the navy blue isn’t in the bedding or anything else in the room really:

how to spray paint

But there will be more of it now. ;) The older I get the more I realize things don’t have to match exactly. I think if I had used a color that was a match it wouldn’t have made the same impact. I love how it brings a bit of contrast and drama to the room:

navy blue lamp

Right? I LOVE them. Now I want to pull some navy into some pillows maybe, or in the drapes? I don’t know, like I said, this room is slow going so I’ve got time to decide. ;)

Yet again…if you haven’t used spray paint to transform something, do it. Today. OK, fine -- maybe later this week if you’re busy. Short, small burst of paint, not long ones. Move it quickly across the surface, don’t concentrate on one spot too much. Numerous quick coats are better than one heavy one.

Next up I need to finish the painting. Figure out what to put above the bed (the mirror just went up there to fill the space for now). Drapes. Recover the bench at the end of the bed. New floors?? We’ll see.

It’s coming along though and I’m really pleased with it (and my navy blue lamps) so far:

tufted headboard

What’s the last thing you spray painted that you loved? The best part about it – if you don’t like it it takes just a few minutes to change it again. Seriously the easiest way to change up your decor that I know of.

A touch of fall

Hello all! Well the no-spend month is coming to a close and I’m so thrilled with what I was able to get done -- but also a little ready to buy something…anything…fun. ;)

I’ve focused SO much on our backyard this year (you can see the spring tour here) that I’ve completely ignored the front. Completely. I plopped some ferns in the planters on the porch back in April and haven’t even watered them much since (they just get rain water).

Since I fall is coming, like it or not (LIKE!), it was time to do some clean up and add some fall touches to the front. We have a teeny tiny porch but I think even small ones can make a big impact, especially this time of year.

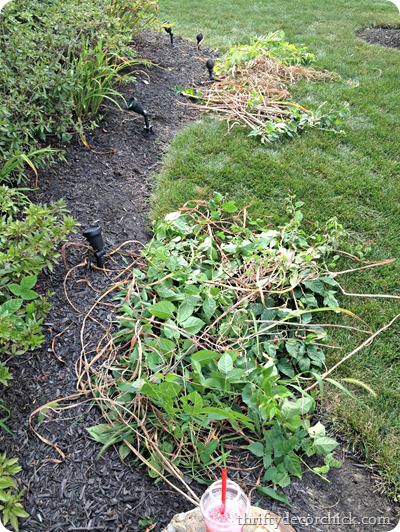
First thing I needed to do – get rid of the weeds that had grown three feet tall and the trees that were sprouting in the beds:

pulling weeds

Told you I hadn’t touched it in months. :) Pretty. We get a lot of random trees growing in our beds and if I don’t stay on top of it they are a pain to get rid of. Annnd these are going to be a pain – I’ll need to watch them because some were so thick I just cut them down, I couldn’t get them out of the ground.

I cleaned up those, the weeds and the dead leaves and stalks on the lillies:

fall clean up

Yes that is a cherry icee. A girl needs sustenance.

Next up was a trip for new plants for the porch. Yes, I cheated a little bit, but do flowers count? Probably not. Probably. *hangs head in shame*

I checked out my local True Value – the one I visit (in Pendleton, IN) has a great floral selection. I always ogle all the planters too:

outdoor planters

Seriously, they have a ton! (You can see their online options here.)

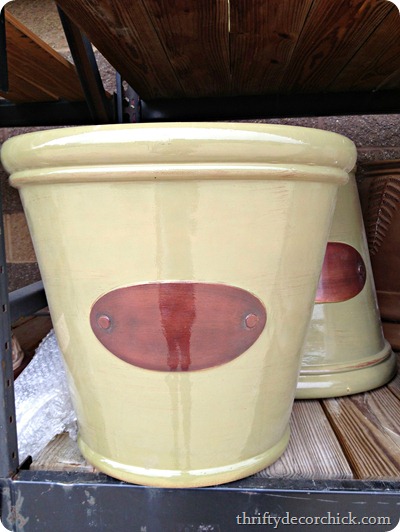
I fell in love with these:

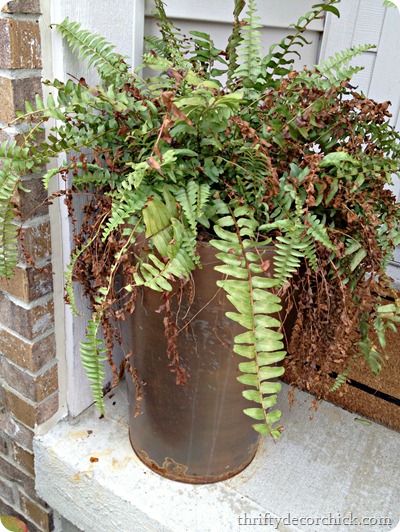
But they were a little too wide for our porch. We don’t have a lot of room to work with here. I found the perfect set years ago, but they’ve not done well in the elements:

copper planters

Yeeah. The ferns aren’t doing so hot lately either. Moving on.

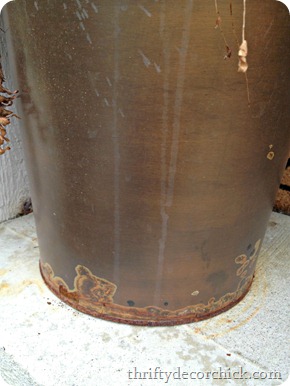
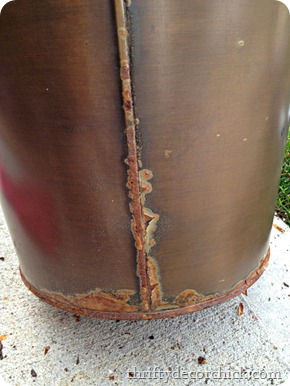
So here’s the thing – I love the copper tone of these, but they are not holding up well. At all:

prepping metal for spray paint

They are also leaving rust marks on the cement which is always super fun to clean up.

I love how tall and skinny they are and I only need them to work for a few more months. I’ll get/make something else next spring.

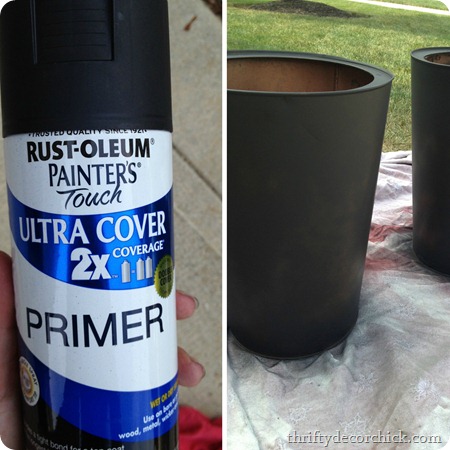
Soooo…spray paint to the rescue! I cleaned them off well:

prepping metal for spray paint

This is important! No need to sand metal, but you do need to clean it well. I used a brush and started knocking some of the metal flakes off, but that got to be a can of worms. It was just going and going so I just decided to paint right over them. If you are going to try to keep something for an extended time you’ll want to get all that off. Again, I’m just trying to make these presentable for the next few months.

I usually skip the primer but since these are outside I figured I should use it. I had black primer so I used that:

priming metal spray paint

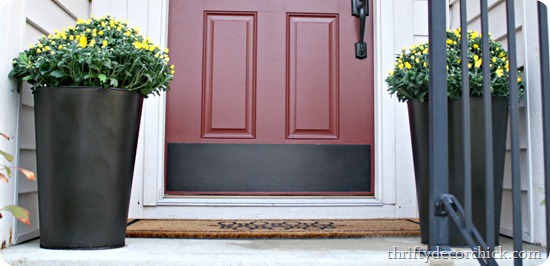
Then I gave them a coat of my oil-rubbed bronze spray paint. I don’t use this stuff nearly as much as I used to, but it matches the kick plate (that I spray painted!), the hardware on the door and the coach lights I sprayed a few years ago: 

spray painting light fixtures So I figured it would tie in well.

I picked out some bright yellow mums at True Value. They are just about to explode:

yellow mums fall

And then the joyous deadheading begins. ;)

See how it all ties together?

spray painting outdoor planters

Much better than this:

Because it’s in the 90’s this week and 90 degree temps makes me want fall, I dug out my DIY pumpkin wreath from last year and hung it:

pumpkin wreath

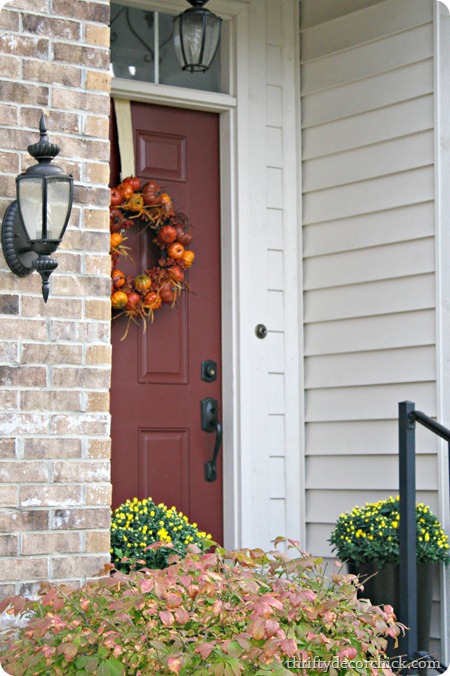
It’s almost September. It’s allowed. I love how it looks on the red door!

I painted those coach lights three years ago and they still look fantastic!:

fall front door

I’m a little shocked at how well they’ve held up, honestly. I don’t even think I primed them? They’ve withstood the elements better than the original finish did.

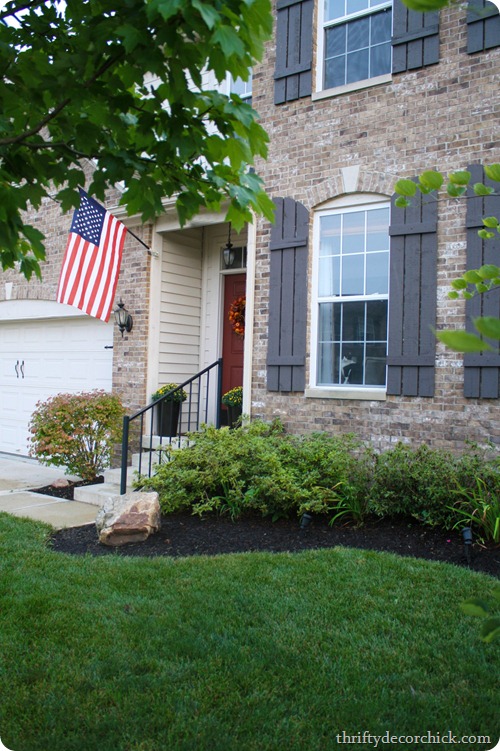
A few weeks ago I read that the flag should hang to the left of the door – I had no idea. It was always getting caught on the gutter anyway so I moved it over:

fall front porch

Technically they’re supposed to be lit up at night too, so the coach light takes care of that. ;)

I’ll add some more fall touches out here as we get into the season, but I’m loving the warm welcome we have going right now:

      red door brick house

This one likes it too:

:)

This just goes to show that even the outside items can be salvaged with a little cleaning and new paint. Those planters are completely washable and will hold up well even outside…at least till the end of the year. (If they weren’t rusting I have no doubt they’d last much longer.)

Have you started any fall decorating yet? Are you ready? Have you picked up any mums? Do YOU believe in the power of spray paint? 


I was one of the bloggers selected by True Value to work on the DIY Squad. I have been compensated for my time commitment to the program as well as writing about my experience. I have also been compensated for the materials needed for my DIY project. However, my opinions are entirely my own and I have not been paid to publish positive comments.

New kitchen nook, complete!

ranunculus flower

Hello there! I’m back! Last week was crazy – I flew across the country to Salt Lake City to speak at the SNAP! Conference and then hurried home after my session (I was there for about 36 hours) to get home in time for an event honoring my hubs Friday morning.

And then…it was cancelled. You gotta be kidding me.

We had SO much rain last week and the school had flooding so it was postponed. I was glad to be back home though, so all was OK in the end.

I’m back with the full picture of how the kitchen nook turned out. I first showed you how I transformed an IKEA table into a farmhouse table here. Thanks SO much for all the lovely comments by the way! They make my day!

Well, the next phase was new chairs. We have had the black chairs in there (from Garden Ridge) for about seven years now – they’ve held up OK. A few scratches but mostly OK. But the thing that bothers me about them is that the legs become loose ALL the dang time. I am tightening the bolts on them at least once a week.

I had fallen in love with a different chair too – and for months I was dreamin’ about it:

Willliams Sonoma chairarhaus x chair

(1/2 sources)

I ADORE these x-backed chairs. The pretty curves, the warm wood. LOVE. But these were way more than I wanted to spend. (One was $150, the other $200.)

So I watched for months and stalked Home Goods and never found anything. And then it hit me to check out World Market. Yes, again. I love that place:

x back chair, world market

I got them on sale so they were wayyyy cheaper than the other two versions and I only got two because I had a plan for the other side of the table.

Many of you guessed it – a bench. I mean, it’s practically begging for it, right? We’ve had one for years that I used to use at the round table we had in here. It’s been sitting in our mud room for a while now, so I pulled it out, primed it, then gave it a fun color:

spray painting a bench bench at table

That color is apple green by Valspar by the way –- I was trying to use a color I had on hand. It was brighter than I first wanted. When I asked hubby what he thought he mentioned how well it went with the boxwood wreath on the pantry door, the island chairs, the flowers on the table…the man is good:

ikea table turned farmhouse table

I love the pop of color – this nook has had no color for so long, I’m happy to bring some in. And the best part about spray paint – it will take me 15 minutes to change it up if I ever want to.

Someday when the budget allows (and they are on sale again) I’ll pick up a couple more of those chairs to have for when we need more seating. For now this set up works great for just us.

The last change to this space was a new light, also from World Market. I had been eyeing it for months but was afraid I wouldn’t like the leafy things on it:

gray antique chandelier

I went to see it in the store and it was GORGEOUS.

I’ve changed the light over this table at least five times now – the rest of the lights in our house have never been changed or replaced once. This spot…I don’t know what it is.

But I finally feel like this is the perfect combo – the size and look of the table and the pretty chandelier – it works now. I promise not to change it out again for at least a year. ;) I have a plan for our other light that was there – once I can find someone to climb 20 feet to install it. (Not it!)

Of course all of these changes happened over the course of a couple months – and I did my research on everything for six months to a year beforehand. (YES, I take forever.) Once I decided what I wanted I picked up different pieces as the budget allowed.

I’m SO thrilled to have a big table to use again. And yes, to decorate:

ikea table turned farmhouse table

I may have to do a spring tablescape just to celebrate. And can I just mention I am OBSESSED with ranunculus. I love these flowers!

Someday I’ll learn how to properly take pictures so the light streaming in the windows does not blind us:

farmhouse table with bench thriftydecorchick.com

But today is not that day. ;)

I ADORE these chairs – they are really sturdy and the wood that makes up the “X” is too – I tried out some that were really flimsy and way more expensive:

x-backed chairs world market

I especially love this spot with the light on a dimmer in the evening:

farmhouse table with bench thriftydecorchick.com

It’s just so much more open and bright now! I cannot even believe the difference, I really can’t.

We all love this table – the size and shape just works so much better for this space. It’s so much easier to spread out on the computer, for homework – all that stuff too:

farmhouse table with bench thriftydecorchick.com

The round table felt so cramped in comparison.

And now that this spot is transformed, the budget is frozen for a while. This was happening while I took pictures this morning:

water hates me

More water issues. The disposal stopped working and (gross) water was POURING out of the disposal. Didn’t know that could happen? Me either. Fantastic!

There are a few more changes coming to the little kitchen nook – and many more coming in the kitchen (someday). But for now I have a pretty table that I love. :)


**For more info on the chalkboard wall, go here.
**For more on the pantry (with the glass door), go here.
**And to find out how NOT to paint your glass atrium door, go here.